To guarantee your dish is truly baked and safe to eat, you need to hit the right internal temperature for each food type. Use a reliable thermometer to check, inserting it into the thickest part without touching bones or fat. For meats like chicken and turkey, aim for 165°F, while beef and lamb are done around 135-145°F depending on doneness. Fish should reach 145°F, and seafood varies by type. Learning the proper targets helps you perfect your baking every time.
Key Takeaways
- Use a reliable thermometer to check the internal temperature at the thickest part of the food.
- Follow specific temperature guidelines: poultry at 165°F, beef at 135-145°F, seafood at 125-145°F.
- Recalibrate your thermometer regularly to ensure accurate readings.
- Insert the probe properly, avoiding bones, fat, or gristle, and wait for the needle to stabilize.
- Confirm the food has reached the target temperature before removing it from heat to ensure safety and proper doneness.

Alpha Grillers Meat Thermometer Digital – Instant Read Food Thermometer for Cooking & Grilling – Professional Kitchen Gifts for Men, Dad & Mom
Instant Read Food Thermometer | Our instant read thermometer features a temperature probe and advanced, highly accurate technology…
As an affiliate, we earn on qualifying purchases.
As an affiliate, we earn on qualifying purchases.
Understand Why Internal Temperatures Matter in Cooking
Understanding internal temperatures is essential because they determine whether your food is safe to eat and cooked to your preferred doneness. In cooking science, knowing these temperatures helps you control how heat affects your ingredients, ensuring proper texture and safety. Proper internal temperatures also influence flavor development, as heat triggers chemical changes that enhance taste. When you cook meat or other dishes to the right temperature, you activate natural flavors and improve overall quality. Additionally, using precise temperature control techniques allows for more consistent results and reduces waste. Implementing innovative cooking technologies can further optimize temperature accuracy and safety. Recognizing the importance of artful cooking methods can help you achieve optimal results while preserving food quality. Moreover, being aware of common passive voice structures can improve clarity and engagement in your cooking instructions. Properly monitoring internal temperatures with reliable thermometers ensures food safety and ideal doneness. Conversely, undercooking can leave harmful bacteria alive, while overcooking can lead to dryness and loss of flavor. By mastering internal temperature targets, you can consistently achieve delicious, safe, and perfectly cooked meals, making your cooking both confident and enjoyable.
Alpha Grillers Meat Thermometer Digital – Instant Read Food Thermometer for Cooking & Grilling – Professional Kitchen Gifts for Men, Dad & Mom
Instant Read Food Thermometer | Our instant read thermometer features a temperature probe and advanced, highly accurate technology…
As an affiliate, we earn on qualifying purchases.
As an affiliate, we earn on qualifying purchases.
Follow Safe Temperature Guidelines for Different Meats
To assure your meat is safe to eat, it’s essential to follow recommended internal temperature guidelines for each type. Proper temperature ensures harmful bacteria are eliminated, making your meal safe and enjoyable. When preparing meats, consider how meat marination can influence cooking times and flavor pairing; marinated meats may cook faster or require adjustments to reach safe temperatures. Always check specific guidelines for different meats—chicken, beef, pork, or seafood—since each has unique safety standards. Using the right internal temperature helps you avoid undercooking or overcooking, preserving meat’s flavor and texture. Additionally, understanding the cooking process can help you better gauge when your meat has reached the ideal temperature. Incorporating food safety practices, such as using a reliable meat thermometer, can further ensure proper doneness. Recognizing proper handling of raw meats can prevent cross-contamination and ensure overall kitchen safety. Being aware of temperature control techniques can help you maintain consistent and safe results during cooking. For example, awareness of personality assessments can inform your confidence in cooking and decision-making in the kitchen. Remember, adhering to these guidelines not only guarantees safety but also enhances your confidence in cooking, allowing you to focus on creating delicious dishes that are both flavorful and safe to serve.
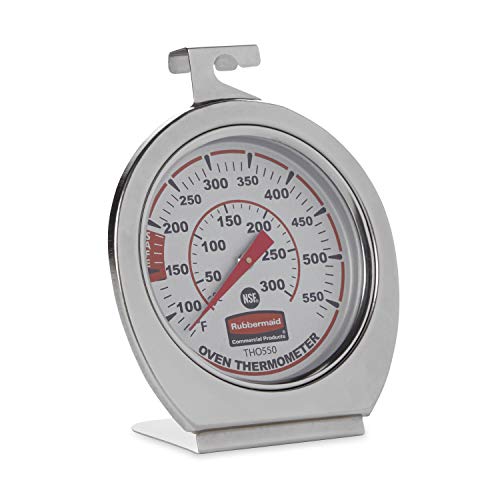
Rubbermaid Commercial Products Stainless Steel Monitoring Thermometer, Safe for Inside Oven/Grill/Smoker, 60-580°F Range, Easy to Read Food Thermometer For Food Resturant/Home Cooking
FOOD SAFETY: Thermometer displays true oven temperature instantly to ensure safe food preparation
As an affiliate, we earn on qualifying purchases.
As an affiliate, we earn on qualifying purchases.
Use a Meat Thermometer Effectively for Perfect Results
To get accurate readings, start by calibrating your thermometer regularly. Make sure you insert it properly into the thickest part of the meat for consistent results. Always read the temperature carefully to guarantee your meat reaches the perfect internal temperature. Proper document management can help keep track of your cooking times and thermometer calibrations. Additionally, maintaining a cooking thermometer and knowing how to interpret its readings are essential for achieving optimal results. Understanding the principles of Free Floating can also improve your overall cooking accuracy by reducing interference from external factors. Familiarizing yourself with Gold IRA Markets can help you understand investment strategies that emphasize transparency and reliability.
Calibrate Your Thermometer
Calibrating your meat thermometer guarantees you get accurate readings every time you cook. Proper thermometer calibration guarantees your temperature accuracy remains reliable, preventing undercooked or overcooked results. To check calibration, place your thermometer in ice water or boiling water, and compare its reading to the expected temperature. If it’s off, adjust accordingly. Use this quick reference:
| Method | Expected Temperature | Adjustment Needed |
|---|---|---|
| Ice Water | 32°F / 0°C | Calibrate downward |
| Boiling Water | 212°F / 100°C | Calibrate upward |
| Room Temperature | 68-72°F / 20-22°C | No adjustment needed |
Regular calibration keeps your thermometer accurate, ensuring perfect internal temperature readings every time. Maintaining proper accuracy is essential for consistent cooking results.
Proper Insertion Technique
Ensuring your meat thermometer is inserted correctly is essential for accurate temperature readings. Proper insertion means placing the probe into the thickest part of the meat, avoiding fat, bone, or gristle, which can distort readings. When doing thermometer placement, angle the probe so it’s fully embedded without poking through the other side. Push the probe in until the sensing area is fully submerged and seated securely. Keep the thermometer steady to prevent movement that could affect accuracy. Remember, inserting the thermometer too shallow or too deep can give false readings. Proper insertion technique involves quick, confident placement to minimize heat loss and ensure the most reliable temperature measurement. Additionally, understanding the internal temperature targets helps determine when your meat is truly cooked to safe and optimal levels. Mastering proper insertion technique is key to consistent results and avoiding under- or overcooking. Recognizing safe cooking temperatures is essential for food safety and optimal taste. Accurate thermometer placement guarantees your meat reaches the right internal temperature for perfect doneness. Using the correct technique also reduces the risk of puncturing the meat, which can lead to juices escaping and dry results. Proper meat preparation further ensures consistent and safe cooking outcomes.
Read Temperatures Accurately
Once your thermometer is properly inserted, the key to getting an accurate reading is to be patient and attentive. Wait a few seconds until the needle stabilizes, ensuring temperature accuracy. To avoid false readings, regularly check your thermometer’s calibration techniques—test it in boiling water or ice water to verify precision. Proper calibration helps maintain reliable results over time. When measuring, insert the probe into the thickest part of the meat, avoiding bones or fat, which can distort temperature readings. Remember, a thermometer that’s out of calibration can give misleading results, so recalibrate as needed. Additionally, calibration techniques ensure your thermometer provides consistent and trustworthy results. Accurate readings confirm your food has reached the correct internal temperature, ensuring safety and perfect doneness. Detecting passive voice can help improve the clarity and directness of your writing, making your instructions more effective. Regularly verifying your thermometer’s accuracy is an essential step for trustworthy results. Using proper technique minimizes errors and helps you achieve the best cooking outcomes. Consistent technique and calibration are your best tools for precise, reliable results.
Alpha Grillers Meat Thermometer Digital – Instant Read Food Thermometer for Cooking & Grilling – Professional Kitchen Gifts for Men, Dad & Mom
Instant Read Food Thermometer | Our instant read thermometer features a temperature probe and advanced, highly accurate technology…
As an affiliate, we earn on qualifying purchases.
As an affiliate, we earn on qualifying purchases.
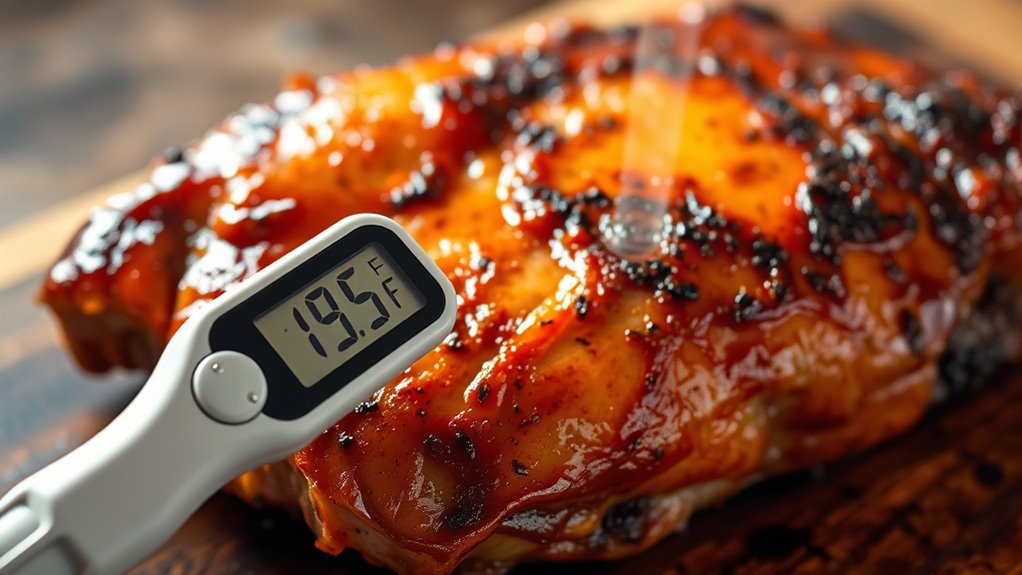
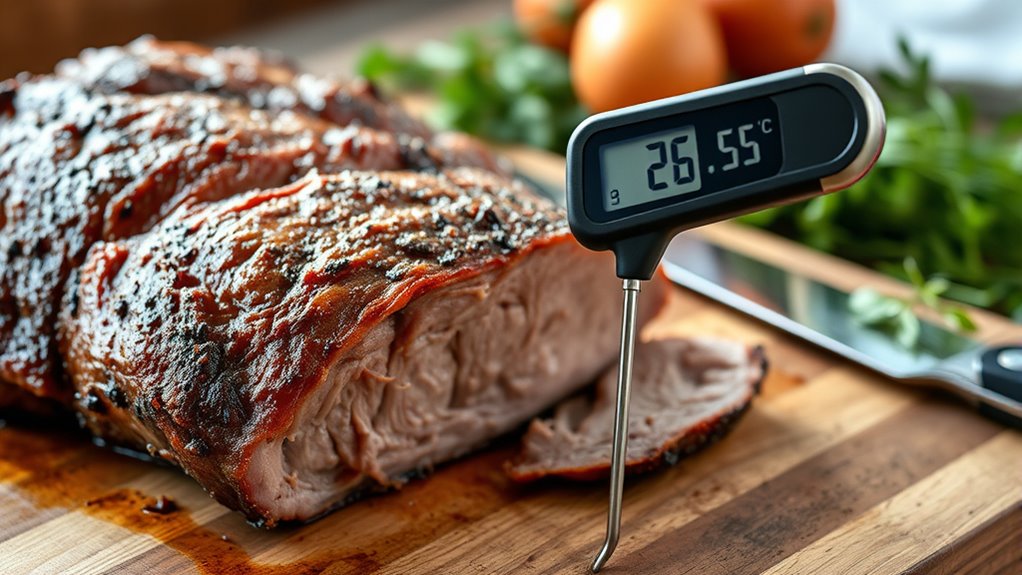
Check Internal Temperatures for Beef, Pork, and Lamb Cuts

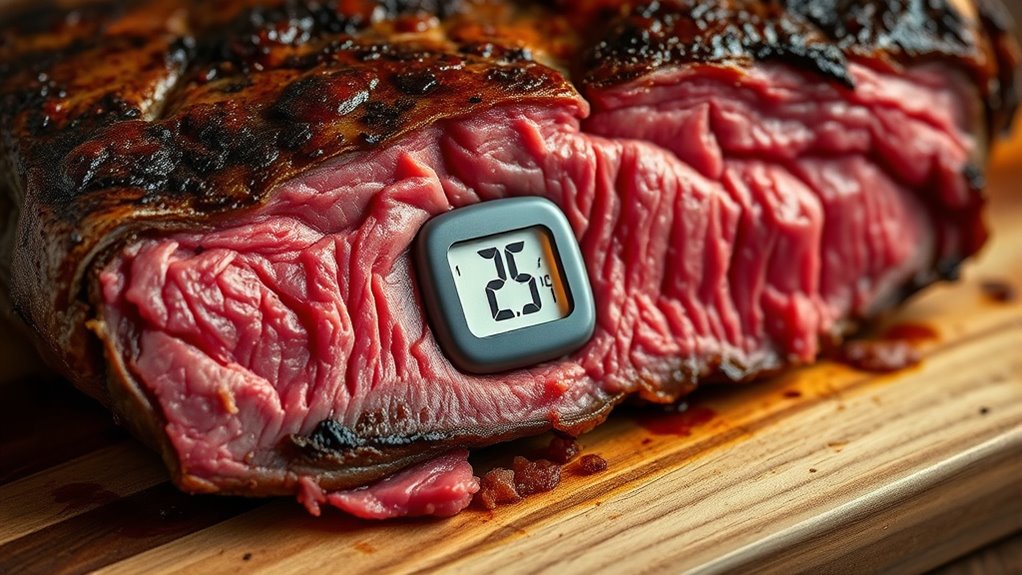
Checking the internal temperatures of beef, pork, and lamb cuts is essential to guarantee they’re cooked safely and to your desired level of doneness. Using a reliable thermometer assures you hit the right temperature, preserving meat tenderness and flavor retention. For beef, aim for medium-rare at 135°F, or cook to 145°F for medium. Pork should reach 145°F with a three-minute rest, while lamb is best at 135°F for medium. Monitoring internal temperatures prevents overcooking, which can toughen meat and diminish flavor. Remember to insert the thermometer into the thickest part of the cut, avoiding bones. This practice guarantees your meat is perfectly cooked, tender, and flavorful, making every bite satisfying and safe. Proper temperature checks are your key to delicious, well-cooked beef, pork, and lamb.
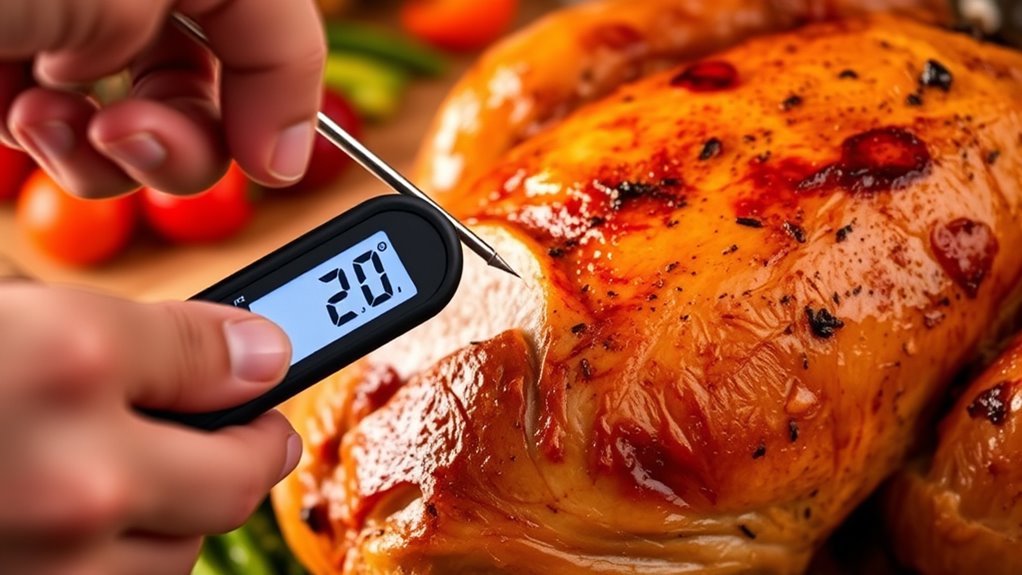
Measure Poultry Temperatures: Chicken, Turkey, and Duck
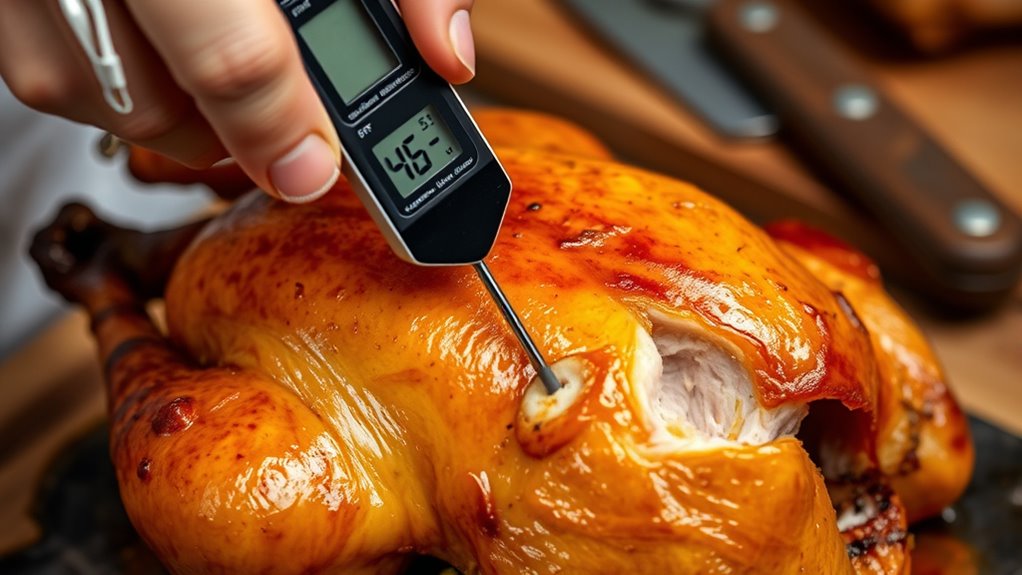
When measuring poultry temperatures, it’s vital to follow juice and texture guidelines to guarantee safety and quality. Use a reliable thermometer and insert it properly for accurate readings. Remember to let the poultry rest before carving to allow juices to redistribute, enhancing both flavor and safety.
Juice and Texture Guidelines
To guarantee your poultry reaches the right level of doneness, you should measure its internal temperature accurately. Proper cooking ensures ideal meat marbling, which contributes to tenderness and flavor, while also promoting juice retention. When poultry reaches the correct temperature, it should be moist but firm, avoiding dryness caused by overcooking. Achieving the ideal texture involves balancing doneness with moisture; undercooked poultry can be rubbery, while overcooked meat dries out quickly. Keep in mind that resting the poultry allows juices to redistribute, enhancing both texture and juiciness. Monitoring temperature precisely helps you hit that perfect point where meat is safely cooked but still succulent, ensuring your chicken, turkey, or duck is flavorful, tender, and satisfying.
Proper Thermometer Use
Using a reliable thermometer is the best way to guarantee your poultry reaches the proper internal temperature. Choosing the right thermometer type assures temperature accuracy, preventing undercooking or overcooking. Digital instant-read thermometers offer quick results, ideal for poultry, while dial thermometers can be more durable but slower. Use a probe thermometer for continuous monitoring during roasting. Always insert the thermometer into the thickest part of the meat, avoiding bones or fat, to get an accurate reading. Proper use boosts confidence and safety.
| Thermometer Type | Best For |
|---|---|
| Digital instant-read | Quick, precise checks |
| Dial (analog) | Durability, longer cooking processes |
| Probe thermometer | Continuous temperature monitoring during roasting |
| Infrared thermometer | Surface temperature (not for internal use) |
| Candy or meat thermometer | Accurate readings for poultry safety |
Resting Time Importance
Resting your poultry after cooking is vital to guarantee it reaches its final safe temperature and maintains ideal juiciness. During the resting period, carryover cooking continues, slightly raising the internal temperature. This process ensures the heat evenly redistributes, preventing undercooked or overcooked spots. Skipping the rest can result in a less tender, drier bird, as juices escape when sliced too soon. For poultry like chicken, turkey, or duck, resting for about 10 to 20 minutes allows the temperature to stabilize, ensuring safe consumption and superior texture. Keep in mind, the internal temperature can rise by 5°F or more during carryover cooking, so removing the bird from heat slightly before reaching the target temperature is essential. Proper resting maximizes flavor, safety, and juiciness.
Cook Fish and Seafood to the Right Temperature Every Time
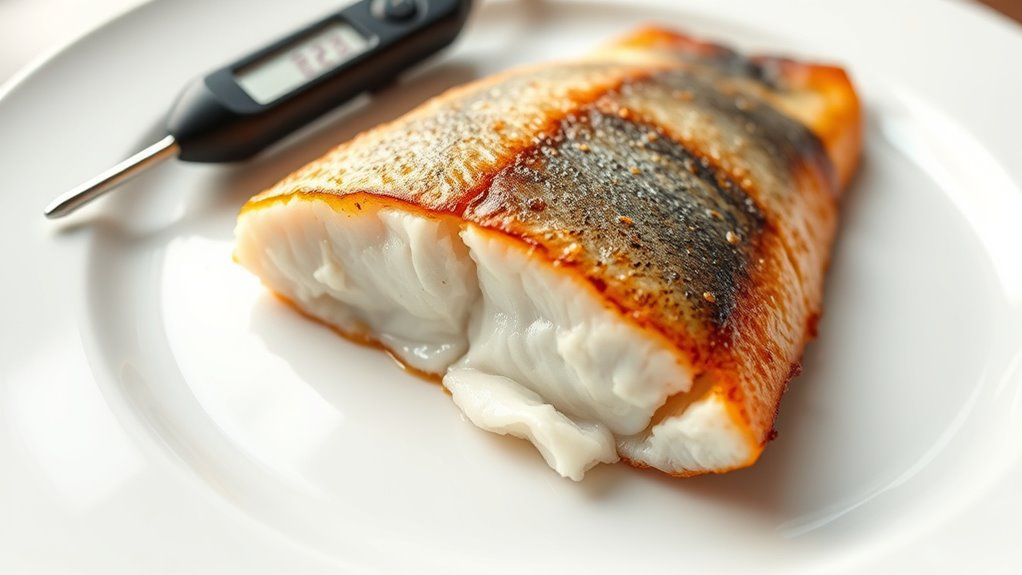
Ensuring fish and seafood reach the right internal temperature is essential for both safety and ideal texture. Freshness plays a key role, as high-quality seafood is easier to cook perfectly. Use precise cooking techniques like grilling, baking, or steaming, and monitor internal temperatures with a reliable thermometer. For most fish, aim for an internal temperature of 145°F (63°C), which ensures safety and a flaky texture. Shellfish like shrimp and scallops are done when they turn opaque and reach 125°F to 130°F (52°C to 54°C). Properly cooking seafood not only prevents foodborne illnesses but also preserves its delicate flavors and textures. Remember, checking the temperature is your best assurance for seafood cooked to perfection every time.
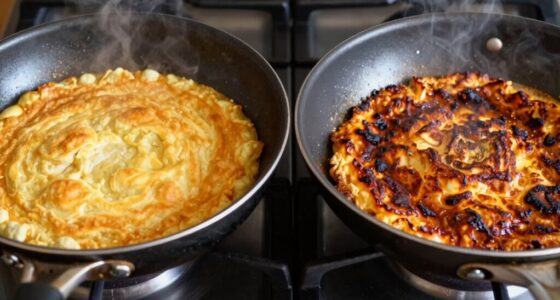
Avoid Overcooking: Tips for Achieving Perfect Doneness
Monitoring the internal temperature carefully helps prevent overcooking seafood, which can lead to a loss of texture and flavor. To achieve perfect doneness, stick to recommended cooking times and use a reliable thermometer. Overcooking can diminish delicate flavors and result in dry, tough fish or seafood. Keep a close eye on the temperature as it rises, removing your seafood just before it reaches the target. Resting the cooked seafood briefly allows residual heat to finish the process without overshooting. This approach preserves moisture and enhances flavor development. Remember, each type of seafood has a specific ideal temperature; knowing these helps you fine-tune your timing and avoid unnecessary overcooking. Precision in temperature management ensures your seafood remains tender, flavorful, and perfectly cooked every time.
Recognize and Prevent Common Meat Cooking Mistakes

Recognizing and preventing common meat cooking mistakes is essential for achieving perfect results every time. Seasoning mistakes can ruin flavor, so taste as you go and avoid over-salting. Plating errors, like uneven slices or crowded presentation, detract from the dish’s appeal. To help you stay on track, consider this table:
| Mistake | Prevention Tip |
|---|---|
| Over-seasoning | Use moderate seasoning and taste first |
| Undercooking | Use a reliable thermometer |
| Overcooking | Remove from heat at target temperature |
| Poor presentation | Plan plating before serving |
| Seasoning mistakes | Apply seasoning evenly and gradually |
Avoid these pitfalls for perfectly cooked, flavorful meat that looks as good as it tastes.
Frequently Asked Questions
How Do Altitude and Oven Differences Affect Internal Temperature Targets?
Altitude effects and oven calibration can modify how you reach internal temperature targets. At higher altitudes, the lower air pressure means you might need to cook longer or at slightly higher temperatures to achieve the same internal temperature. Oven calibration affects accuracy; if your oven runs hot or cold, use a thermometer to adjust your cooking times. Always monitor internal temps closely to ensure your food is safely and properly cooked.
Can Residual Heat Cause Overcooking After Removing Meat From Heat?
Like a wise old sage once said, “Patience is a virtue,” and it applies here. Residual heat can definitely cause overcooking after you remove meat from heat. Carryover cooking continues as residual heat redistributes inside the meat, raising its internal temperature. To avoid this, take your meat off the heat slightly before reaching your target temperature. Trust the process, and your meat will be perfectly cooked, not overdone.
How Do Internal Temperatures Vary Between Different Meat Cuts?
You’ll notice internal temperatures vary between meat cut variations because of differences in internal fat distribution and muscle structure. For example, a tenderloin heats quickly and stays tender, while a tougher brisket requires more time and lower temperatures. Keep in mind, thicker cuts may need more time to reach the desired internal temp, so use a reliable thermometer to make certain each cut is cooked perfectly without overdoing it.
What Are the Signs of Undercooked Meat Besides Temperature Readings?
You can tell meat is undercooked by looking for visual cues like a shiny, raw appearance or a too-rare color. Texture changes also help; if the meat feels overly soft, squishy, or gelatinous, it’s likely underdone. Juices that run clear instead of pinkish or red can be another sign. Trust your senses, and always check for these signs alongside a thermometer for best results.
How Long Should Meat Rest After Reaching the Target Internal Temperature?
You should let meat rest for about 5 to 15 minutes after reaching the target internal temperature. Resting time allows carryover cooking to finish, ensuring even heat distribution. During this period, juices redistribute, making your meat juicier and more flavorful. Resist the urge to cut into it right away, as slicing too soon can cause moisture loss. Proper resting time guarantees perfectly cooked, tender, and flavorful meat every time.
Conclusion
Knowing the right internal temperatures guarantees your meats are safe and perfectly cooked every time. Did you know that undercooked poultry causes about 20% of foodborne illnesses? By using a reliable meat thermometer and following guidelines, you can avoid these risks and enjoy juicy, flavorful dishes. Don’t guess—measure! Master these temperature targets, and you’ll impress everyone with your cooking skills while keeping safety a top priority.