
To toast nuts without burning them, preheat your oven to 350°F and spread the nuts in a single layer on a rimmed baking sheet lined with parchment paper. Toast for 8 to 12 minutes, shaking the sheet every few minutes and watching for a golden color and toasted aroma. Alternatively, use a dry skillet on medium heat, stirring constantly. Paying close attention to visual cues and timing helps enhance flavor and prevents overtoasting, so keep these tips in mind for perfect results.
Key Takeaways
- Preheat your oven to 350°F (175°C) and spread nuts in a single layer on a rimmed, parchment-lined baking sheet.
- Toast for 8-12 minutes, shaking the sheet every few minutes, and watch for a golden color and toasted aroma.
- Use visual cues and aroma to judge doneness, removing nuts immediately once they reach the desired level.
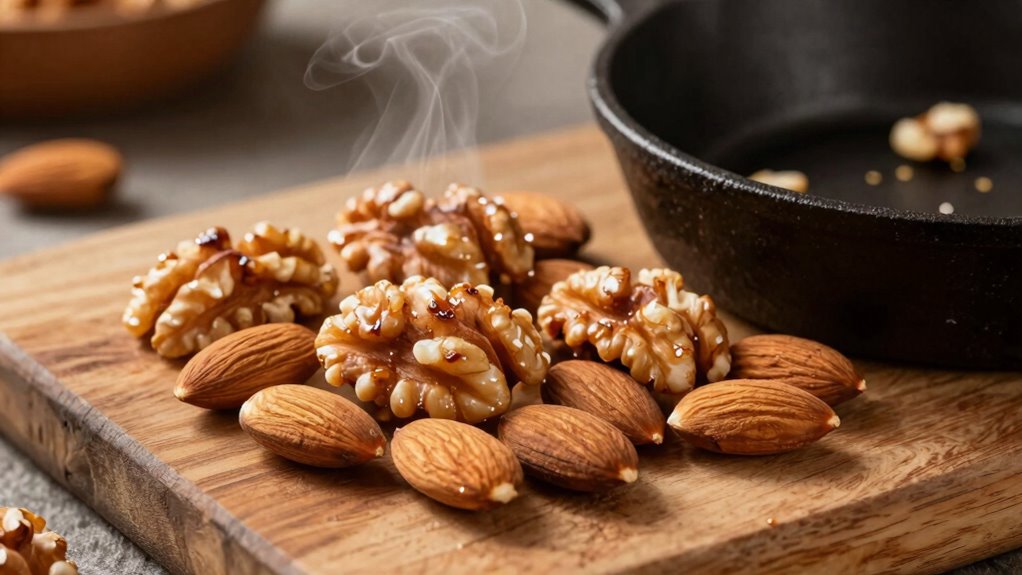
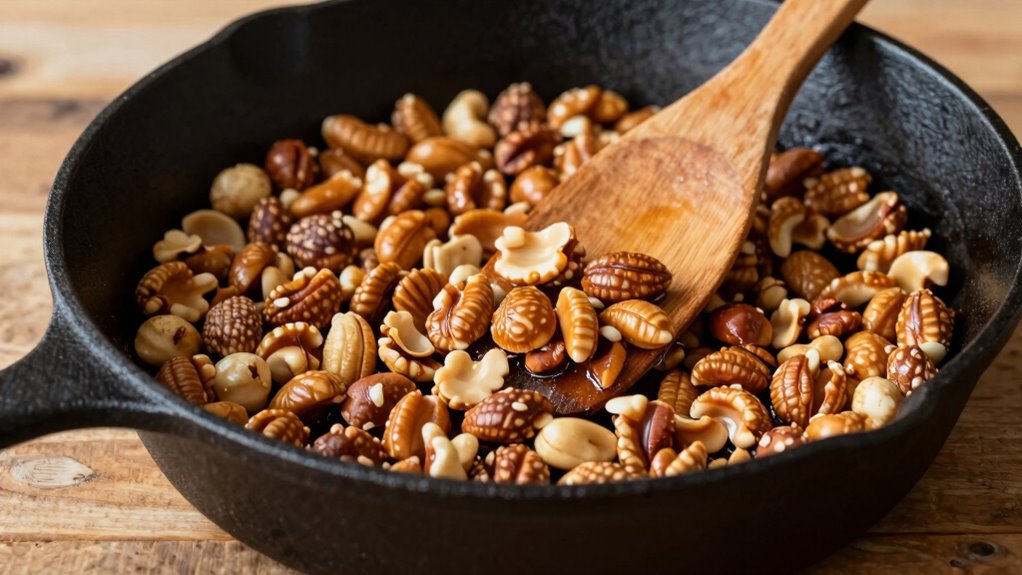
- For more control, toast nuts in a dry skillet over medium heat, stirring constantly, then transfer to a cool plate.
- Stay vigilant during the last few minutes to prevent burning, as oven variability requires close monitoring.
Toasting nuts enhances their flavor and adds a delightful crunch, making them perfect for snacking or adding to dishes. When done correctly, it brings out their natural oils and deepens their nutty aroma, elevating any recipe. The key to achieving ideal nut flavor enhancement lies in mastering oven toasting techniques that prevent burning while maximizing taste. You want to carefully control the heat and duration to bring out the best qualities in your nuts.
Start by preheating your oven to a temperature of 350°F (175°C). This moderate heat allows nuts to toast evenly without risking burnt edges or bitter flavors. Spread the nuts in a single, even layer on a baking sheet. Using a rimmed sheet is ideal to prevent nuts from spilling over, and lining it with parchment paper can make cleanup easier. When arranging the nuts, ensure they are not piled on top of each other, as this can cause uneven toasting. Your goal is uniform exposure to heat, which is vital for consistent nut flavor enhancement.
Bake the nuts for about 8 to 12 minutes, but stay vigilant. Every oven is different, so check on them frequently after the first 8 minutes. During oven toasting, you should listen for a toasty aroma and watch for a slight golden color. Shake the baking sheet gently every few minutes to turn the nuts and promote even toasting. This step is important because it prevents uneven browning and keeps the nuts from burning. Keep a close eye during the last few minutes, as nuts can go from perfectly toasted to burnt very quickly.
If you want an extra boost in flavor, you can toast nuts on the stovetop using a dry skillet. Heat the skillet over medium heat, add the nuts, and stir constantly. This method provides more control and allows you to monitor the process closely, but oven toasting techniques tend to offer more even results for larger batches. Once toasted, transfer the nuts to a cool plate immediately to stop the cooking process. This prevents residual heat from continuing to cook the nuts and ensures they stay crispy without burning.

200 PCS Unbleached Parchment Paper Sheets for Baking 12×16 Inches, Non-Stick and Non-Toxic Pre-cut Parchment Sheets for Oven, Cooking, Grilling, Air Fryer and Steaming – Fit for Half Sheet Pans
Natural, Unbleached Parchment Paper: Made from natural wood pulp, our parchment paper baking sheet is completely free from…
As an affiliate, we earn on qualifying purchases.
As an affiliate, we earn on qualifying purchases.
Frequently Asked Questions
Can I Toast Nuts in the Microwave Safely?
Yes, you can toast nuts in the microwave safely if you follow proper microwave safety guidelines. Use a microwave-safe dish, spread the nuts evenly, and microwave in short intervals, stirring in between to prevent burning. This method is a quick alternative to the oven, ideal if you’re short on time. Just keep a close eye to avoid over-toasting, and you’ll get flavorful, toasted nuts every time.
How Long Do Toasted Nuts Stay Fresh?
Toasted nuts stay fresh for about one to two weeks when stored properly. Keep them in an airtight container in a cool, dark place to preserve their flavor and crunch. For longer storage, consider refrigerating or freezing the nuts, which can extend their freshness up to a few months. Proper nut storage is key to maintaining their quality and preventing rancidity, so always make certain they’re sealed tightly after toasting.
Should Nuts Be Salted Before Toasting?
You can salt nuts before toasting if you want them seasoned, but it depends on your seasoning preferences and the nut varieties. For example, almonds and cashews absorb salt well, enhancing flavor, while delicate nuts like walnuts might become too salty. If you choose to salt beforehand, use a light hand and toast at a lower temperature to prevent burning and ensure even seasoning. Adjust based on the nut type and your taste.
Is It Better to Toast Nuts With or Without Oil?
You can toast nuts with or without oil, but if you want flavor enhancement, oil is your friend. Oil helps nuts toast evenly and adds a richer, deeper flavor. Dry roasting is fine if you prefer a lighter taste, but oil creates that irresistible crunch and aroma. So, whether you choose oil vs. dry roasting, remember: a little oil can elevate your nuts from basic to spectacular.
Can Toasting Nuts Improve Their Digestibility?
Toasting nuts can improve their digestibility by activating enzymes that break down complex compounds, making them easier to digest. This process also enhances flavor, giving nuts a richer, more aromatic profile. As you toast, the heat triggers nut enzyme activation, breaking down some antinutrients and aiding digestion. Plus, the flavor enhancement makes your snacks more enjoyable. Just be sure not to burn them, as that can create bitterness and reduce health benefits.

KSJONE Scratch Resistant Coating – Mini and Large Tadka Pans for Eggs, Spices, Melting Butter, Saag, Dal, Kadhi, Dhokla (4 Inch Diameter)
The steep sides of this mini pan helps keep food and spices contained as you cook, and the…
As an affiliate, we earn on qualifying purchases.
As an affiliate, we earn on qualifying purchases.
Conclusion
Now that you know how to toast nuts perfectly, you’re basically a flavor wizard! With just a little attention, you’ll unearth tastes so incredible, they might just make your taste buds do cartwheels. Forget boring snacks—your toasted nuts will be the stuff of legends, turning any dish into a culinary masterpiece. So go ahead, toast away and watch your kitchen transform into a flavor explosion zone. Your taste buds will thank you forever!

RSVP International Kitchen Roasting Collection Dishwasher Safe, Nut/Seed Toasting Pan, Stainless Steel
QUALITY CONSTRUCTION: Stainless steel pan with mesh screen
As an affiliate, we earn on qualifying purchases.
As an affiliate, we earn on qualifying purchases.

Nomad Nutrition SOUTHWEST Breakfast Skillet | Instant Freeze Dried Backpacking & Camping Food | Plant-Based, Non-GMO Hiking Meals with High-Energy, Vegan, Gluten-Free | 112g – 4 Pack
Bold Southwest Flavors – Kickstart mornings with vegan sausages, hash browns, and red peppers in a hearty, plant-based…
As an affiliate, we earn on qualifying purchases.
As an affiliate, we earn on qualifying purchases.