DPI, or dots per inch, measures how many ink dots your printer applies to each inch, impacting the sharpness and detail of your cake images. Higher DPI creates crisper, more vibrant prints, perfect for intricate designs and fine text, while lower DPI may look blurry or pixelated. Choosing the right DPI depends on your cake’s surface, design complexity, and printer capabilities. To learn how to optimize your edible prints, keep exploring the details below.
Key Takeaways
- DPI measures ink dots per inch, affecting the clarity, detail, and vibrancy of edible cake prints.
- Higher DPI (e.g., 300) produces sharper, more detailed images, ideal for intricate cake decorations.
- Using the correct DPI ensures the image matches the cake’s surface texture and size for optimal presentation.
- Different printing equipment have varying resolution capabilities, influencing the final image sharpness.
- Balancing DPI with design complexity and surface texture optimizes image quality without unnecessary ink or time.

Ediblethingz Cake Topper Image Printer Bundle Kit, Includes Printer 50 Premium Wafer Paper Sheets, 12 Supreme Icing Sheets, Cleaning Kit, Wireless All-in-One
COMPLETE PRINTER BUNDLE FOR CUSTOM CAKE AND DESSERT DECORATING: This all-in-one bundle includes a brand name wireless 4-in-1…
As an affiliate, we earn on qualifying purchases.
As an affiliate, we earn on qualifying purchases.
What Does DPI Mean for Edible Resolution?

DPI, or dots per inch, is an essential measurement for determining the quality of edible prints. It indicates how many ink dots your printer applies within a one-inch space, directly affecting print clarity. When choosing printing materials, higher DPI settings typically produce sharper, more detailed images, which is vital for intricate cake decorations. Proper color calibration ensures that the colors you see on your screen match the final edible print, making DPI even more impactful. If your printer has a low DPI, your images may appear blurry or pixelated, especially on larger surfaces. Conversely, a higher DPI allows for finer details and more vibrant colors, giving your cake decorations a professional, polished look. Always consider both printing materials and color calibration when optimizing DPI for edible printing. Understanding print quality standards can help you select the best resolution settings for your projects, especially when aiming for high-resolution images. Additionally, being aware of printer capabilities can guide you in choosing the appropriate DPI settings to achieve optimal results, ensuring you get the best possible edible print quality. Incorporating recommended DPI ranges based on your specific printer model can further improve your results and reduce wasted materials.
TerraLyxus Refillable 280XL 281XL 280 XL 281 XL Ink Cartridges Compatible for PIXMA TR8620 TR8620a TS702 TS702a TS6120 TS6220 TS6320 TS8120 TS8220 TS8320 TR7520 TR8520 TS9120
Wide Compatibility: Perfectly compatible for PIXMA TS702 TS702a TR8620 TR8620a TS6120 TS6220 TS6320 TS8120 TS8220 TS8320 TR7520 TS9520…
As an affiliate, we earn on qualifying purchases.
As an affiliate, we earn on qualifying purchases.
How Does DPI Impact the Clarity of Cake Prints?

Higher DPI settings make your cake prints look sharper and more detailed, so your designs appear crisp and vibrant. The quality also depends on the printing technology used, which can enhance or limit the final image clarity. Understanding these factors helps you choose the best settings for stunning edible prints.
Image Detail and Sharpness
When it comes to cake printing, the level of detail and sharpness largely depends on the resolution of the image you’re using. Higher DPI settings produce crisper, more defined images, making intricate decoration techniques stand out. This clarity enhances the visual appeal and allows for better flavor pairing, as vibrant, detailed images can complement various cake flavors. Additionally, selecting an appropriate DPI can help prevent pixelation issues that occur with lower-resolution images. Conversely, lower DPI images may appear blurry or pixelated, diminishing the overall impact. Sharp images help showcase fine details like text or subtle shading, elevating your cake’s presentation. To achieve ideal results, choose a resolution that balances clarity with your design’s complexity. Remember, a well-printed image with sharp detail enhances both the aesthetic and the perceived quality of your cake, making your decoration techniques truly pop.
Printing Technology Influence
The printing technology you choose directly affects how crisp and clear your cake images appear. Different printers use varying mechanisms, which influence the resolution and overall print quality. For example, inkjet printers designed for edible ink produce finer detail and smoother color shifts, enhancing image clarity. These printers also prioritize food safety, ensuring that edible ink is safe for consumption and free from harmful contaminants. Understanding the influence of printing technology helps you select equipment that maximizes resolution without compromising safety or image quality, resulting in more attractive, professional-looking cake prints. Additionally, being aware of print resolution standards can guide you toward choosing printers that deliver consistently high-quality results. Leveraging technological innovations in edible printing can further improve output precision and color accuracy, ensuring your cake prints stand out. Moreover, familiarizing yourself with printing mechanisms can help you better understand how different devices achieve their resolution levels and impact the final image quality. Knowing about resolution thresholds can also assist in setting realistic expectations for your printed images’ sharpness and detail, especially as advancements in printing technology continue to evolve.
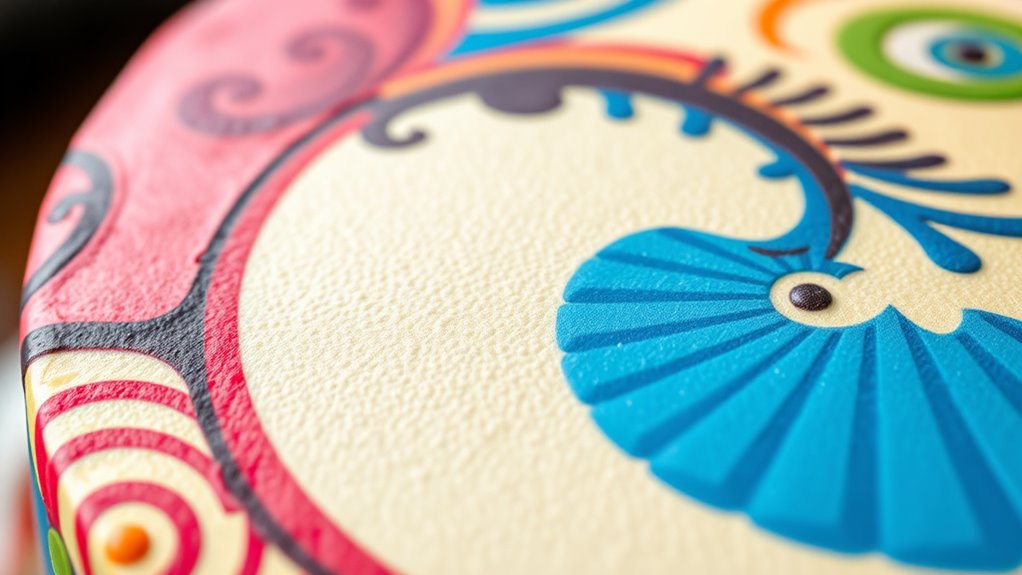
cake image DPI settings
As an affiliate, we earn on qualifying purchases.
As an affiliate, we earn on qualifying purchases.
DPI vs. PPI: What’s the Difference in Cake Printing?

Understanding the difference between DPI and PPI is key to achieving high-quality cake prints. DPI measures how many dots a printer can place per inch, affecting detail, while PPI relates to the image resolution on your screen. Recognizing how these technical terms impact cake quality helps you get the best edible print results. Additionally, understanding product and service scams can help you avoid poor-quality or fraudulent printing providers. Being aware of affiliate disclosure policies ensures transparency when choosing printing services through recommended links. Knowing how sound vibrations influence cellular regeneration in sound healing science can inspire a more holistic approach to creative projects. When selecting images for cake printing, it’s important to consider the appropriate resolution to ensure clarity and sharpness in the final product, especially since floating on water techniques can influence visual presentation.
Technical Definitions Clarified
Ever wonder what the difference is between DPI and PPI when it comes to cake printing? DPI (dots per inch) measures printing accuracy, affecting how detailed your edible image appears on the cake. PPI (pixels per inch), on the other hand, refers to the image resolution before printing, influencing how well the image scales without losing quality. Understanding this distinction helps you optimize image quality and avoid pixelation or blurriness. For example, knowing the image resolution ensures that your cake decorations look sharp and professional. Additionally, grasping the printing technology involved can help you choose the right equipment for your edible printing needs. Recognizing the electric dirt bike horsepower can give you insight into the power and performance of different models used as inspiration for high-quality cake designs.
Impact on Cake Quality
When it comes to cake printing, the distinction between DPI and PPI directly impacts the final appearance of your edible images. Higher PPI ensures sharp, detailed images that enhance your cake’s visual appeal, while lower PPI can result in blurry or pixelated prints. This clarity influences how well the design complements cake flavor and frosting textures. Consider these points:
- Crisp details enhance intricate designs, making edible images more realistic.
- Higher resolution prevents pixelation, especially on textured frosting surfaces.
- Better image quality complements the cake’s flavor profile, elevating overall presentation.
- Excessively high DPI might lead to longer printing times without noticeable gains in cake aesthetics.
- Understanding DPI vs PPI helps bakers optimize print quality for different cake styles and frosting types. Recognizing the appropriate resolution for your specific cake design can make a significant difference in the final outcome.
Balancing resolution with your frosting textures and flavor ensures a visually stunning, delicious cake.

Edible Paper, 25pcs Icing Sheets 11.7" x 8.3"A4 Size for Cakes Printable, Sugar Paper Frosting Sheets for Cake Toppers, Cookies and Decor, Edible Sugar Sheets for Printers
Edible Paper for Edible printer: YouTook cake frosting sheets are compatible with all the edible printers. Cooperate with…
As an affiliate, we earn on qualifying purchases.
As an affiliate, we earn on qualifying purchases.
What Are the Best DPI Settings for Different Edible Images?

Choosing the right DPI (dots per inch) setting is essential for ensuring your edible prints look sharp and vibrant. For detailed cake designs, a DPI of 300 works best, providing crisp images with fine detail. When printing simple or background images, 150 DPI can suffice, saving ink and printing time. If you’re creating large, less detailed decorations, 72-150 DPI may be enough, but keep in mind that lower DPI can reduce image clarity. Higher DPI settings, like 600, are usually unnecessary and may produce overly sharp images that don’t translate well with edible ink. Always consider the complexity of your design and the size of your cake when selecting DPI. Proper settings help achieve a professional look and prevent image pixelation or blurriness. Additionally, understanding the image resolution and its relation to print quality can help you make better choices for your edible images. To optimize your prints, it’s also important to match your print size with the appropriate DPI for the best results. Knowing how DPI impacts quality can guide you in selecting the ideal setting for different edible printing projects.
What Are Common DPI Ranges for Cake Decoration?

What are the typical DPI ranges used for cake decoration? Usually, you’ll find that DPI settings for edible prints fall between 150 and 300, depending on the detail needed. For intricate decorating techniques or detailed images, a higher DPI—around 300—is ideal. Conversely, for simpler designs or larger cake decorations, 150 DPI works well and reduces printing time. When considering cake flavor combinations, sharper images enhance visual appeal, elevating the overall experience. Common DPI ranges include:
- 150 DPI – suitable for bold, large designs
- 200 DPI – balances detail and print speed
- 250 DPI – ideal for detailed images
- 300 DPI – best for fine details and photorealistic prints
Matching DPI to your decorating techniques ensures the best visual outcome, regardless of cake size or complexity.
How Do You Pick the Right DPI for Your Printer and Project?
Selecting the right DPI for your printer and project depends on balancing detail, print speed, and the size of your cake design. Consider edible ink compatibility to guarantee vibrant colors and smooth application. Also, assess cake surface textures: smooth surfaces need higher DPI for sharp images, while textured surfaces may require lower settings.
| Surface Texture | Recommended DPI | Best Use Case |
|---|---|---|
| Smooth | 300-600 DPI | Fine detailed designs |
| Slightly textured | 150-300 DPI | Moderate detail |
| Rough or textured | 72-150 DPI | Large, simple images |
| Very textured | 72 DPI or lower | Basic outlines or backgrounds |
Choosing the right DPI ensures your edible print looks sharp and vibrant without sacrificing print speed or risking ink compatibility issues.
How Does Resolution Affect Color and Sharpness in Cake Prints?

Resolution directly impacts how vivid and sharp your cake prints appear. Higher DPI settings produce better color vibrancy and improved print contrast, making images more lifelike. When resolution is too low, colors may look dull, and details become blurry. To optimize your prints, consider these factors:
- Increased DPI enhances color vibrancy by capturing more detail.
- Sharpness improves as resolution reduces pixelation.
- Proper resolution balances vibrant colors with clear edges.
- Excessively high DPI may cause longer print times without noticeable gains.
What Mistakes Should You Avoid When Choosing DPI?

Choosing the right DPI is key to achieving the best possible cake print, but many people make mistakes that can compromise the final result. One common error is neglecting image compression; using low-resolution or heavily compressed files can cause pixelation and loss of detail. Always use high-quality, uncompressed images to ensure clarity. Another mistake is ignoring color calibration; mismatched colors between your file and the printer can result in dull or inaccurate colors on your cake. Calibrate your monitor and printer regularly to maintain color consistency. Also, avoid selecting a DPI that’s too high or too low without understanding your printer’s capabilities—this can lead to wasted ink or blurry prints. Being mindful of these factors helps you create vibrant, sharp cake images that truly stand out.
How Can You Make Your Cake Prints Look Crisp and Vibrant?

To make your cake prints look crisp and vibrant, focus on preparing your images carefully before printing. Proper image quality is key to stunning cake decoration. Here are four tips:
- Use high-resolution images with at least 300 DPI for sharp details.
- Adjust colors to make sure they pop without oversaturation.
- Keep images simple with clear lines, avoiding complex patterns that may blur.
- Save your files in a format compatible with edible ink printers, like PNG or JPEG, to prevent quality loss.
Additionally, verify your edible ink printer is clean and well-maintained to prevent smudging or color inconsistencies. When printing on fondant or icing sheets, use the right paper type for ideal adhesion and vibrancy. These steps help you achieve bright, crisp cake decoration prints every time.
Frequently Asked Questions
How Does DPI Affect the Edible Ink’s Longevity on Cakes?
Higher DPI improves ink absorption, leading to sharper, more detailed images on your cake. It also enhances image durability, making the print less likely to smudge or fade over time. When you choose a higher DPI, you guarantee the edible ink stays vibrant longer, maintaining its quality. So, for better longevity and a professional look, opt for a resolution that balances detail with ink absorption for ideal image durability.
Can Higher DPI Settings Cause Longer Printing Times?
Think of your printer as a busy artist in a race; higher DPI settings are like intricate brushstrokes, requiring more time. Yes, they can cause longer printing times because the printer’s print speed slows down to handle the detail. Plus, increased DPI uses more ink, impacting ink consumption. So, while higher DPI creates sharper images, it does so at the cost of speed and ink efficiency.
Is There a Difference in DPI Requirements for Different Cake Sizes?
Yes, you do need different dpi settings for various cake sizes. Larger cakes require a lower dpi to guarantee the edible image maintains quality without pixelation, while smaller cakes benefit from higher dpi for sharper details. When customizing cake decoration, consider the edible image size and the cake’s dimensions so that the resolution complements the design, providing a crisp, professional look without unnecessary printing time or ink usage.
How Does DPI Influence the Taste or Texture of Edible Images?
Higher DPI enhances image detail, but it doesn’t directly influence flavor impact or texture alteration of edible images. However, when you use very high DPI, it might require thinner edible paper, which can subtly change texture or taste. You’ll notice that lower DPI images might be coarser, potentially affecting the overall appearance and how the cake feels when eaten. Balancing DPI ensures your images look great without compromising taste or texture.
Are There Specific DPI Recommendations for Printing Detailed Photographs?
Think of printing detailed photos like painting with a fine brush—you want sharp, crisp lines. For the best image sharpness and color vibrancy, aim for at least 300 DPI. This level guarantees your edible images capture every tiny detail, making your cake look stunning and lifelike. Higher DPI, like 600, can give even more clarity, perfect for close-up shots or intricate designs.
Conclusion
Understanding DPI is like mastering the secret recipe for stunning cake prints. When you select the right resolution, your edible images come alive with vibrant colors and crisp details, transforming your cake into a edible masterpiece. Don’t let low DPI sink your design’s potential—think of it as planting seeds for perfection. With careful choices and a keen eye, you’ll turn every cake into a sweet work of art that leaves a lasting impression.