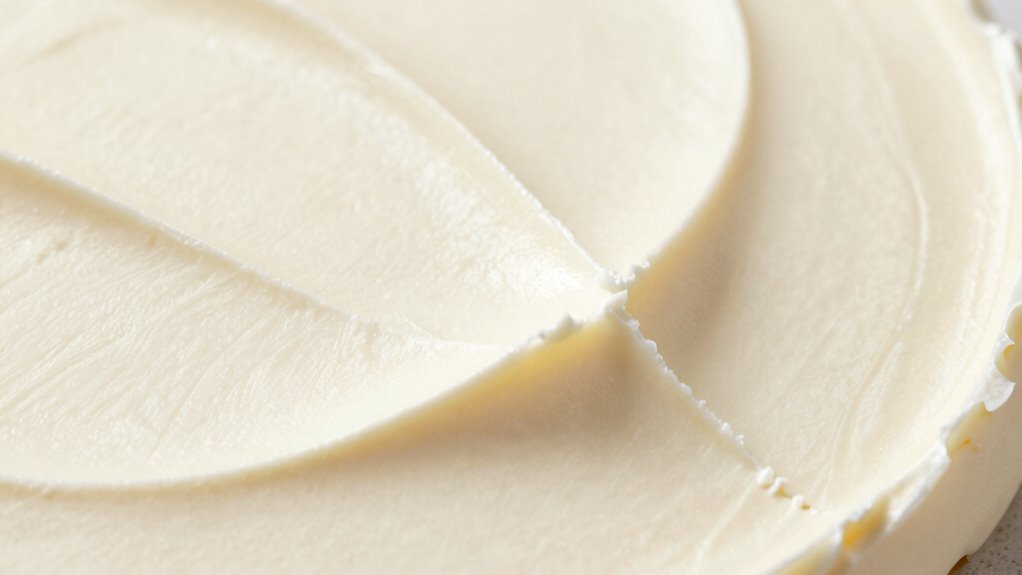
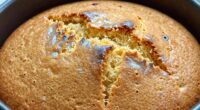
To achieve sharp edges on buttercream with the 3-angle scrape method, start by applying a smooth, chilled layer of buttercream on your cake. Use a flexible spatula or bench scraper at precise angles, scraping down in three deliberate motions to create crisp, clean edges. Keep your tools cold and maintain steady pressure throughout. If you keep practicing this technique, you’ll master professional-looking sharp edges—discover the full process below.
Key Takeaways
- Chill the cake thoroughly to firm the buttercream before scraping for sharp, clean edges.
- Use a flexible offset spatula or bench scraper at precise angles to execute the 3-angle scraping technique.
- Maintain consistent pressure and smooth, deliberate motions during each scraping step for crisp edges.
- Keep tools cold and clean to prevent softening or blurring buttercream, ensuring sharp, professional-looking edges.
- Check edges from multiple angles and refine with a spatula or damp cloth for a seamless, polished finish.

PUCKWAY Angled Icing Spatula, Stainless Steel Offset Spatula, Cake Spatula Set of 2 Black 6, 8 inch Blade
Two Professional Cake Decorating Spatulas: PUCKWAY offset spatula set comes in two different sizes: 6 inch and 8…
As an affiliate, we earn on qualifying purchases.
As an affiliate, we earn on qualifying purchases.
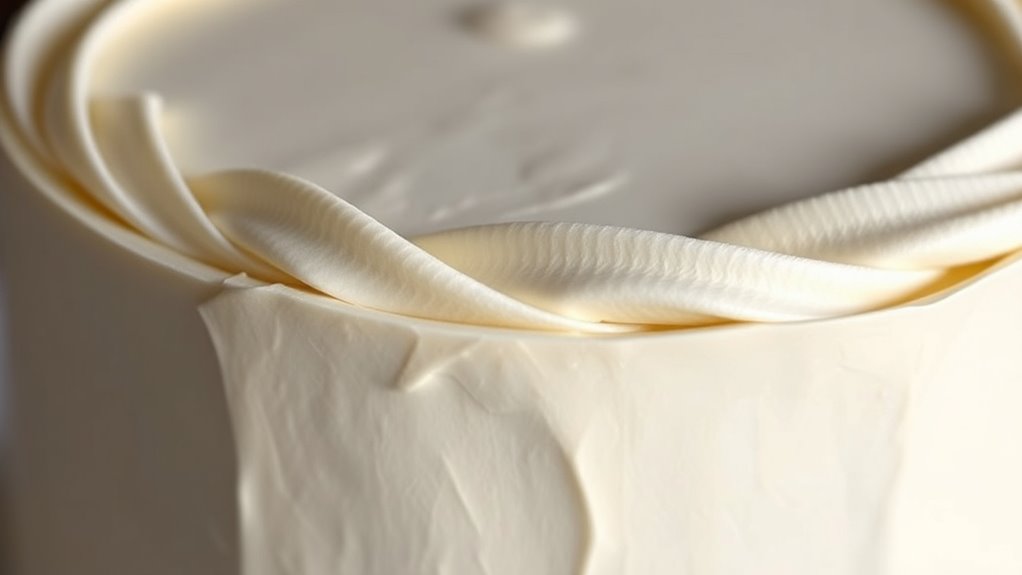
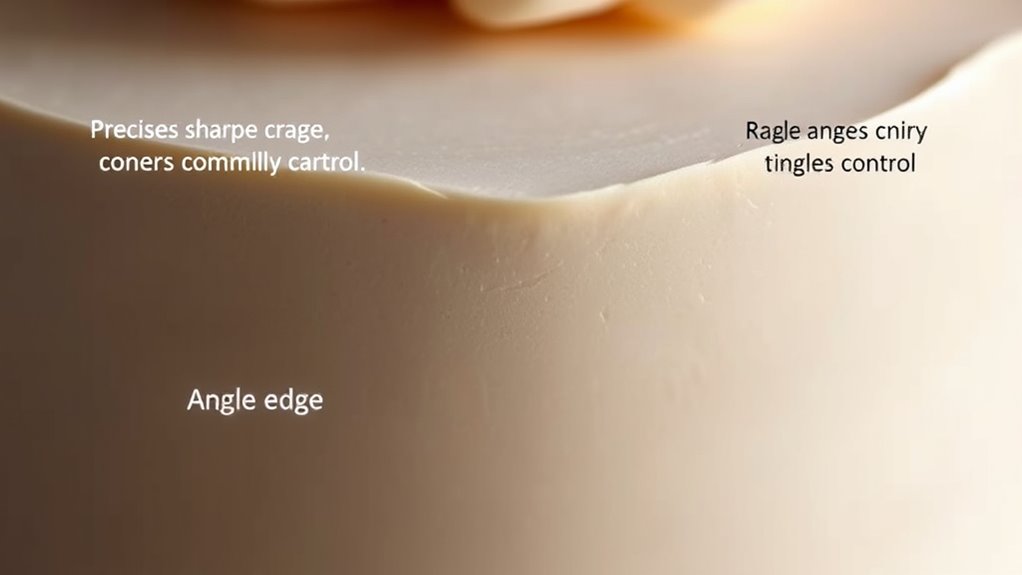
Why Sharp Edges Make Your Buttercream Cakes Stand Out
Sharp edges give your buttercream cakes a sleek, professional look that instantly captures attention. Using precise delineation techniques helps achieve those crisp, clean lines that highlight your skill. Sharp edges also create striking color contrast, making your decorations pop and adding visual interest. When you carefully sculpt the sides, you emphasize clean transitions between different shades or textures, elevating the cake’s overall appearance. These defined edges draw the eye and showcase your craftsmanship, making your cake stand out in any setting. Incorporating sharp edges through effective edging techniques allows you to play with color contrast, adding depth and dimension. Additionally, understanding the contrast ratio of your decorating tools can help you optimize the visual impact of your design. Mastering edge definition techniques enables bakers to enhance the visual appeal and professionalism of their creations. Proper technique mastery is essential to consistently achieve these sharp, clean lines and elevate your cake decorating skills. Developing a keen understanding of tool precision can further refine your ability to create flawless edges every time.
HULISEN Large Bench Scraper for Baking, 10 inch Dough Pastry Scraper with Measuring Scale, Stainless Steel Cake Scraper, Pizza Cutter, Food Chopper, Bread Separator Knife
Extra Wide Bench Scraper: Bigger size, 10 inch long stainless steel scraper perfect for smoothing frosting onto the…
As an affiliate, we earn on qualifying purchases.
As an affiliate, we earn on qualifying purchases.
Tools and Materials You Need for the 3-Angle Scrape
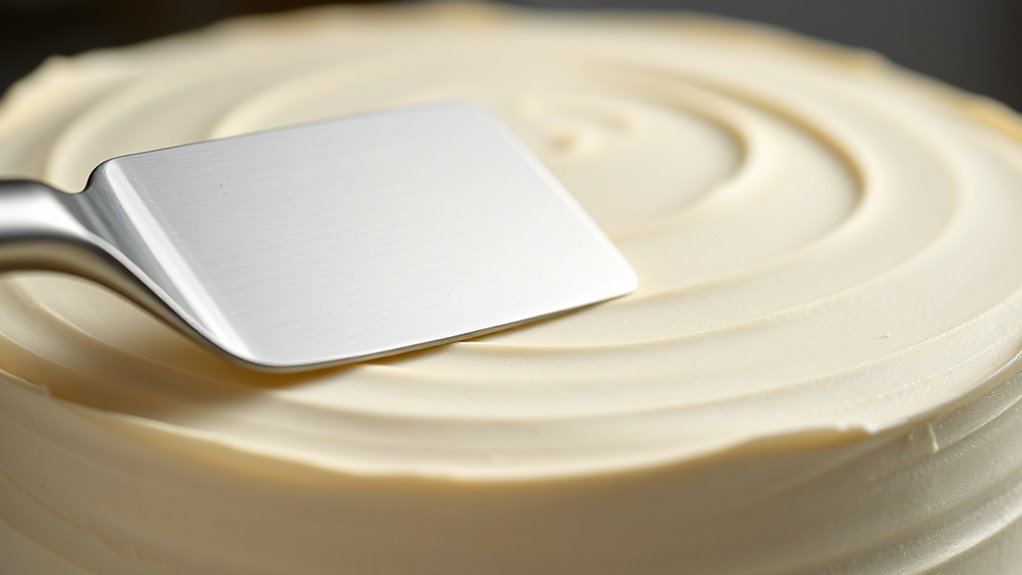
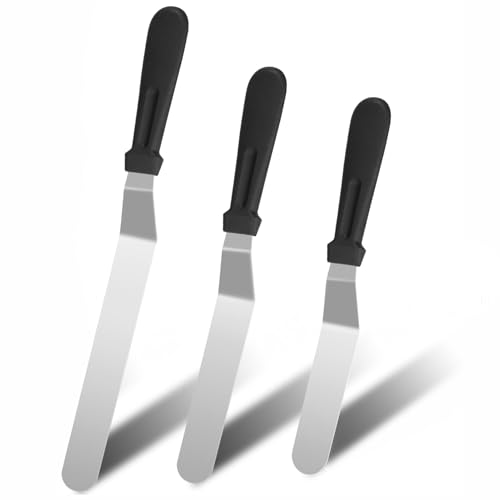
To achieve the clean, precise edges with the 3-angle scrape, you’ll need a few essential tools and materials. First, select a sturdy offset spatula or bench scraper to shape and smooth the buttercream. Piping tips are useful for applying even layers of buttercream, especially when creating textured or decorative surfaces. Make sure you have a palette knife for fine adjustments. For color mixing, keep your gel or liquid food colors nearby to ensure consistent shades and avoid overmixing. Sharp, clean tools help create crisp edges, so keep your spatula and scraper well-maintained. Having the right tools on hand streamlines the process, making it easier to achieve sharp, professional-looking cake edges with the 3-angle scrape technique.

Kootek 158PCs Cake Decorating Kit, Baking Supplies Tools – Includes Cake Stand Turntable, 64 Icing Piping Tips Set, 2 Frosting Spatulas, 3 Scrapers, 50+2 Pastry Bags, Coupler, Video Tutorial, Booklet
All-in-One Cake Decorating Supplies Kit: Total 158pcs baking accessories, includes everything you need to start decorating your cakes:…
As an affiliate, we earn on qualifying purchases.
As an affiliate, we earn on qualifying purchases.
How to Prepare Your Cake and Buttercream for Perfect Edges
Start by applying a thin crumb coat to seal in crumbs and create a smooth surface. Chill the cake to help the buttercream set and maintain stability during decorating. Finish with a final layer of buttercream, smoothing it carefully for clean, sharp edges. Proper surface preparation ensures your buttercream adheres smoothly and helps achieve crisp, professional-looking edges. Additionally, understanding connected equipment in home gym technology can inspire innovative decorating techniques that resonate with fans. Exploring sound healing science can also offer calming inspiration for your decorating process, fostering patience and focus.
Crumb Coat Application
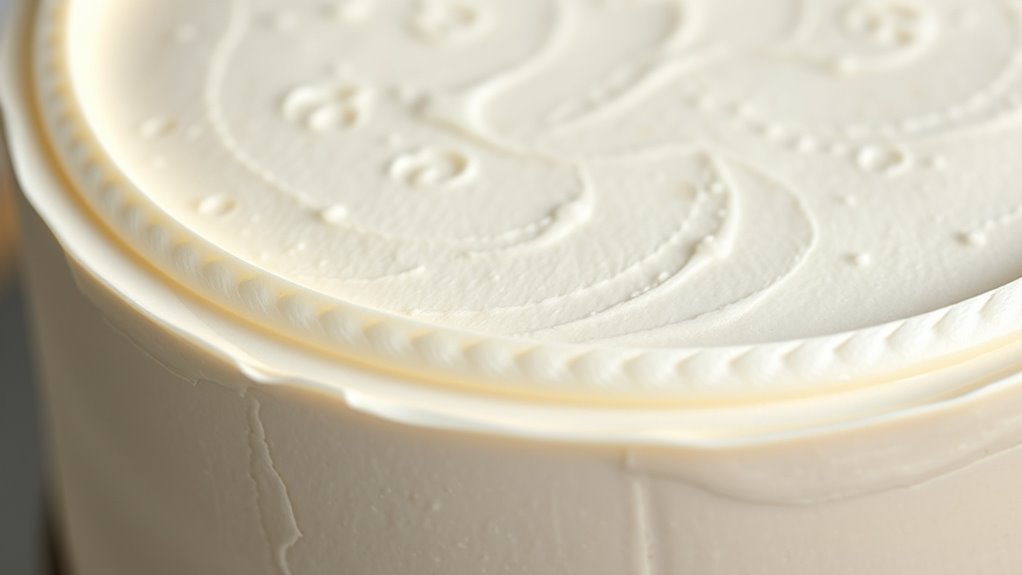
Applying a crumb coat is a crucial step in achieving clean, sharp edges on your buttercream cake. It seals in crumbs and creates a smooth surface, making it easier to add final layers. When applying the crumb coat, keep your spatula steady and use a thin layer to avoid uneven texture. Once you’ve smoothed the coat, chill the cake briefly to set the buttercream. This helps with fondant detailing later and ensures sharp edges. If you’re planning to blend colors or incorporate fondant accents, make sure the crumb coat is even, so the colors blend seamlessly and details stay crisp. A well-applied crumb coat forms a solid foundation, necessary for achieving professional-looking, sharp-edged buttercream designs. Remember, smooth surface preparation is essential to prevent imperfections that can compromise the final appearance.
Chilling for Stability
Chilling your cake and buttercream is essential for achieving sharp, clean edges. When you refrigerate your cake, it firms up the buttercream, making it easier to apply precise icing techniques. A cold cake reduces the risk of smudging or uneven surfaces, which can compromise your cake presentation. Before starting your final coat, chill the cake for at least 30 minutes to stabilize the buttercream. This step locks in the smoothness and prevents crumbs from mixing into your icing. Proper chilling ensures that each scrape of your spatula creates crisp, defined edges. Incorporating this step into your icing techniques makes a visible difference, giving your cake a professional finish. Remember, well-chilled cake surfaces are the foundation for sharp edges and flawless decoration.
Smooth Final Layer
To achieve sharp, clean edges on your cake, preparing a smooth final layer of buttercream is essential. A flawless surface sets the stage for professional-looking decorating techniques and enhances flavor combinations. Here’s how to do it:
- Use a bench scraper or offset spatula to evenly spread a thin layer of buttercream, ensuring no bumps or ridges.
- Chill the cake briefly to firm up the buttercream, making it easier to smooth and scrape for sharp edges.
- Warm your tools slightly to glide smoothly over the surface, creating a sleek, polished finish.
- Maintaining a consistent icing consistency throughout the process helps prevent uneven surfaces and ensures clean edges.
- Incorporating proper cleaning techniques for your tools can prevent residue buildup that might affect the smoothness of your final layer.
- Using temperature-controlled environments can further improve the results by maintaining ideal conditions for buttercream smoothing and shaping.
Focusing on these steps helps you create a smooth final layer that’s perfect for sharp edges and intricate decorating techniques, all while balancing flavor and presentation.
3 PCS Icing Spatulas, Offset Spatula, Stainless Steel Cake Decorating Spatulas Set 6/8/10 inch Professional Angled Cake Spatula Plastic Frosting Handle for Home, Kitchen or Bakery by XEKIGU
【MULTIPLE SIZES] Icing spatula set comes in Three different sizes 6, 8, 10 inches for different applications. It's…
As an affiliate, we earn on qualifying purchases.
As an affiliate, we earn on qualifying purchases.
Master the 3-Angle Scrape Technique: A Step-by-Step Guide
To master the 3-angle scrape technique, you need to start with the right tools and set up your workspace. Once you’re ready, follow the step-by-step process to execute each scrape accurately. Proper tool selection and workspace organization can make a significant difference in achieving precise results. Additionally, understanding cake decorating techniques can help you refine your skills and enhance the overall finish. Finally, smooth and finalize your edges to achieve a clean, sharp finish on your buttercream cake for precise results.
Prepare Your Tools
Before you begin mastering the 3-angle scrape technique, it’s vital to prepare your tools properly. Having the right equipment ensures smooth cake artistry and consistent buttercream consistency. First, gather a flexible offset spatula—this helps achieve clean, sharp edges. Second, keep a bench scraper or straight-edged tool nearby for precise scraping angles. Third, confirm your buttercream is at the right consistency; it should be firm but workable, not too soft or stiff. These tools enable you to control pressure and angles effectively, making your technique more precise. Proper preparation reduces frustration and guarantees a professional finish. Additionally, understanding the importance of standardization can help you develop consistent techniques that are easily recognizable. Consistent tool handling ensures that your edges stay sharp and uniform across different cakes. Developing a routine for tool maintenance can further enhance your results by preventing tool wear and maintaining accuracy. Practicing proper technique will also improve your control and precision over time. By assembling these essentials, you set yourself up for success in creating sharp, flawless buttercream edges.
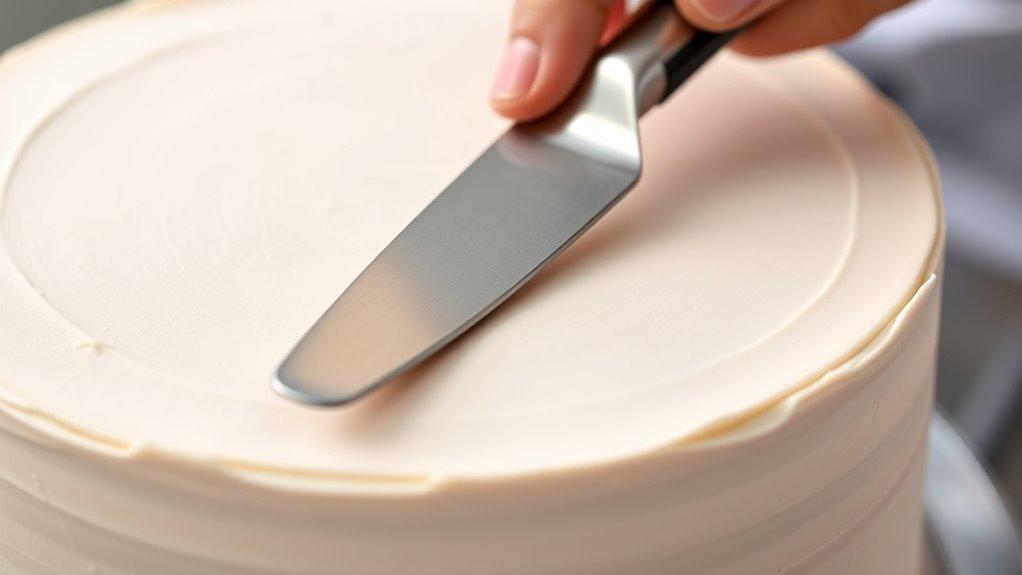
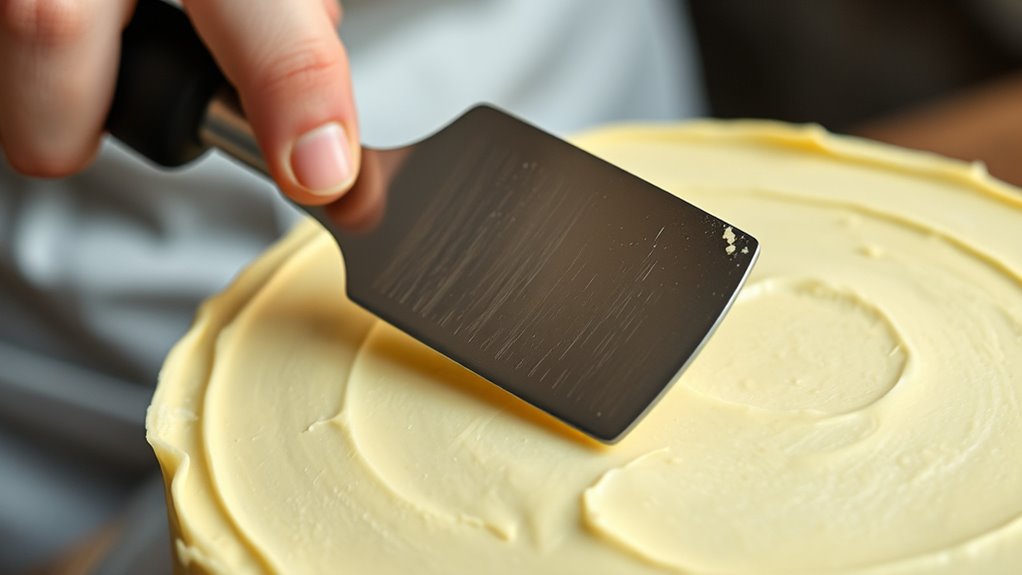
Execute the Scrape Technique
Begin by positioning your cake on a stable surface and gathering your prepared tools. Hold your scraper at a 45-degree angle and apply even pressure as you run it along the cake’s sides. Use deliberate, smooth motions to create clean, sharp edges with your decorating techniques. Work from the top down, maintaining consistent pressure to avoid uneven lines. Adjust your scraper’s angle slightly for each of the three sides, ensuring precise 3-angle scraping. As you scrape, consider how your flavor combinations can influence the overall presentation; a well-structured edge complements colorful or textured toppings. Keep your movements steady, and don’t rush—precision is key to achieving professional-looking sharp edges. This technique enhances both the aesthetic appeal and the flavor profile of your cake. Proper technique ensures your cake’s edges stay sharp and clean throughout your decorating process.
Finalize and Smooth Edges
Once you’ve completed your initial scraping, the next essential step is to finalize and smooth the edges for a polished look. This enhances your decorating techniques and creates a seamless finish. To do this effectively:
- Gently run a spatula or bench scraper along the edges to refine sharpness and shape.
- Lightly dampen a cloth or paper towel to smooth out minor imperfections and create a sleek surface.
- Check the edges from different angles, adjusting as needed to ensure consistency and sharpness.
Smoothing the edges not only improves the cake’s appearance but also helps with flavor enhancement by providing a clean, professional look that invites better presentation and easier slicing. Mastering this step elevates your decorating skills.
Top Tips to Get Clean, Crisp Buttercream Edges
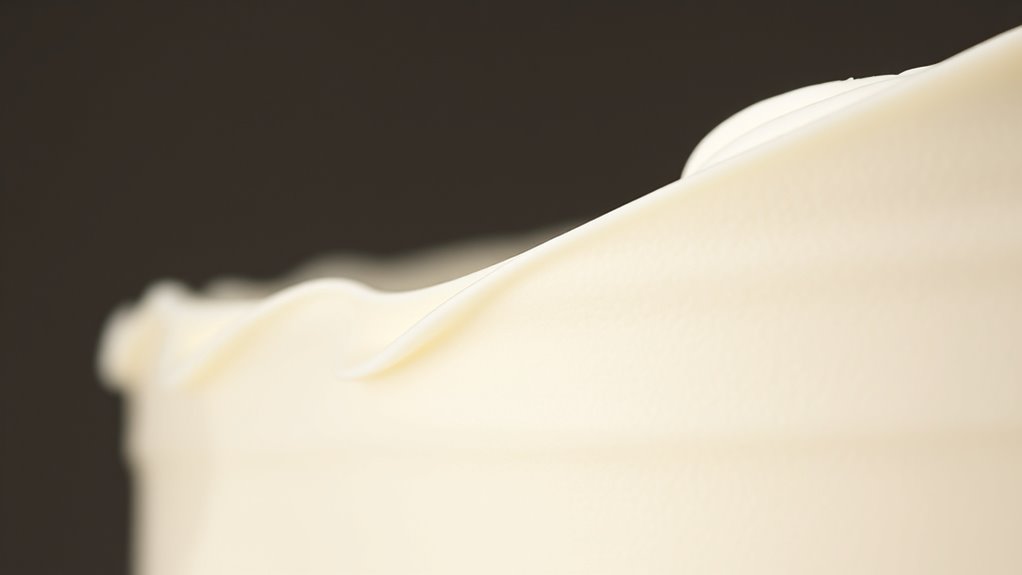
Achieving clean, crisp edges on buttercream requires attention to detail and proper technique. Start by applying a thin, even layer of buttercream, then chill the cake to firm it up. Use a bench scraper held at a precise angle to gently scrape away excess buttercream, ensuring straight edges. For smoother sides, consider fondant smoothing tools to refine the surface before scraping. When working with colored buttercream, blend colors thoroughly to avoid streaks that can cause uneven edges. Keep your spatula or scraper clean and cold for sharper results. Proper tool maintenance and patience are essential for optimal results. Additionally, practicing consistency in pressure helps achieve uniform edges. With patience and practice, these tips will help you create flawlessly sharp and professional-looking cake edges.
Mistakes to Watch Out for When Creating Sharp Edges
Creating sharp buttercream edges can be challenging, and many common mistakes can easily undermine your efforts. One mistake is rushing the smoothing process, which can cause uneven edges needing fondant repair later. Second, neglecting to keep your spatula or scraper at the correct angle often results in rounded edges instead of sharp ones. Third, ignoring temperature control—working in a warm environment or with warm tools—can cause the buttercream to soften and lose definition. These errors can lead to uneven surfaces that may require additional fondant repair or affect flavor enhancements if buttercream melts or becomes too soft. To achieve crisp edges, work patiently, maintain proper tools, and control your working environment. Avoid these pitfalls to create clean, sharp edges that elevate your cake’s appearance.
Troubleshoot and Perfect Your Sharp Edges
If your sharp buttercream edges aren’t turning out as clean as you’d like, don’t worry—you can troubleshoot and refine your technique. First, check your scraper’s consistency; if it’s too warm or soft, edges may blur, so chill it beforehand. For uneven edges, ensure your buttercream is smooth and firm enough to hold shape. If you notice imperfections, consider a quick fondant repair by smoothing out minor flaws with a small spatula. To improve flavor, experiment with incorporating subtle extracts or flavor oils, enhancing taste without compromising sharpness. Practice makes perfect—adjust your pressure and angle, and don’t rush the scraping process. With patience and attention to detail, you’ll achieve razor-sharp, professional-looking edges every time. Additionally, understanding the importance of creative storytelling can inspire your decorating techniques and help you develop a signature style that elevates your cake artistry.
Frequently Asked Questions
Can I Use the 3-Angle Scrape Method on Textured or Patterned Cakes?
You can use the 3-angle scrape method on textured or patterned cakes, but it requires careful technique to guarantee texture compatibility and pattern preservation. Focus on gentle, controlled scraping, avoiding excessive pressure that might distort the pattern. Adjust your angles slightly to work with the cake’s design, and use a soft spatula. With patience, you’ll achieve clean edges while maintaining your cake’s unique texture and pattern details.
How Do Temperature and Humidity Affect Creating Sharp Buttercream Edges?
You’ll find that temperature stability and humidity control are vital for sharp buttercream edges. High temperatures soften the frosting, making it harder to achieve clean edges, while humidity can cause the buttercream to become sticky or melt. To maintain sharp edges, keep your workspace cool and dry, and refrigerate the cake if needed. Using stable temperatures ensures your buttercream stays firm enough for precise, crisp edges.
Is This Technique Suitable for All Types of Buttercream?
Think of this technique as a versatile dance move; it adapts beautifully to most buttercream types. You’ll want a buttercream with the right consistency—smooth yet firm—to glide effortlessly. Tool selection is essential; a sturdy spatula or scraper helps achieve those crisp edges. While some textured or softer buttercreams might need tweaks, generally, this method suits most, giving your cake that polished, professional look you crave.
How Long Does It Typically Take to Master the 3-Angle Scrape?
It usually takes you a few weeks of consistent practice and patience to master the 3-angle scrape. The key is to stay dedicated and practice regularly, as skill improves over time. Don’t get discouraged if it feels tricky at first; with patience and steady effort, you’ll see progress. Keep practicing, and soon you’ll be able to achieve those sharp edges effortlessly, making your buttercream look professional every time.
Can I Reuse Leftover Buttercream for Creating Sharp Edges on Multiple Cakes?
Yes, you can reuse leftover buttercream for creating sharp edges on multiple cakes. To do this, guarantee proper buttercream preservation by storing it in an airtight container in the fridge. Before reuse, re-whip the buttercream to restore its smooth texture. Using reuse techniques like this not only saves time but also reduces waste. Just be mindful of the buttercream’s freshness and consistency to get sharp, clean edges each time.
Conclusion
So, while those razor-sharp edges might seem like the ultimate cake goal, remember that even the most perfect-looking cake isn’t immune to a little imperfection. Sometimes, aiming for those crisp lines can lead to frustration or a less-than-perfect finish. But hey, isn’t that part of the fun? Embrace the quirks, and your cake will still be a masterpiece—edges or not. After all, beauty truly is in the imperfect details.