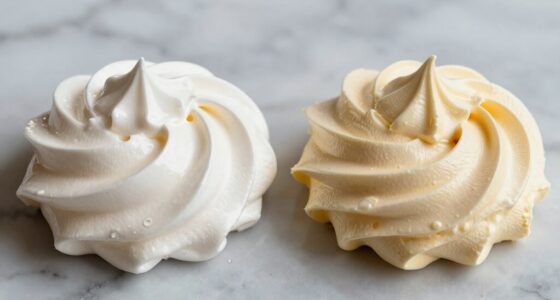
To prevent pull-up when stenciling on buttercream, make certain your frosting is firm, smooth, and at the right temperature. Choose flexible, sturdy stencils and apply gentle, even pressure, avoiding excess force. Secure the stencil with tape or weights to prevent lifting. Use vibrant, contrasting colors and apply thin layers for cleaner results. Carefully lift the stencil straight up once finished. Keep these tips in mind, and you’ll achieve sharper, more professional-looking designs, with even more secrets to perfect stenciling ahead.
Key Takeaways
- Use firm, smooth buttercream at optimal temperature to prevent softness that causes stencil lift.
- Choose flexible, sturdy stencils like silicone or mylar for better adhesion.
- Apply thin, even layers of icing and gentle, steady pressure during stenciling.
- Secure the stencil with light tape or weights to avoid movement and pulling.
- Remove the stencil slowly at a low angle once the design is set to prevent smudging.
Top picks for "stencil buttercream prevent"
Open Amazon search results for this keyword.
As an affiliate, we earn on qualifying purchases.
What Causes Pull-Up When Using Stencils on Buttercream?

Pull-up occurs when the stencil’s design lifts or smears into the buttercream, often ruining the clean look you want to achieve. One common cause is the wrong icing consistency; if the buttercream is too soft or runny, it doesn’t hold the stencil’s shape well. A thicker, more stable icing helps prevent this issue. Additionally, the stencil material plays an essential role—flexible, thin plastic stencils tend to lift easier, especially if they’re not sturdy enough. Using a stencil made from a rigid material can help maintain contact with the buttercream surface. When the icing isn’t firm enough or the stencil isn’t suitable, the design can smudge or lift during application, leading to unwanted smears and a messy appearance. Ensuring your tools are energy-efficient and reliable can also contribute to achieving cleaner stencil impressions. Moreover, proper stenciling techniques, such as applying gentle pressure and using a steady hand, are crucial for preventing pull-up. Using appropriate tools like a silicone spatula or a stencil brush can also improve the accuracy of your work and reduce the risk of design lifting. Being aware of the buttercream temperature can also make a significant difference in how well the stencil adheres without pulling up. Additionally, considering professional-grade stencils made specifically for culinary use can provide more consistent results.
How to Prepare Your Buttercream and Stencil for Perfect Results

To achieve clean, crisp stencil designs on buttercream, you need to properly prepare both your buttercream and stencil beforehand. Start with color mixing—use vibrant, well-blended shades to prevent bleeding. When selecting tools, choose a flexible, sturdy stencil that fits your design and a palette knife for precise application. Proper preparation also involves ensuring your buttercream is smooth and firm, which helps prevent pulling or smudging. Additionally, proper technique plays a crucial role in maintaining the integrity of your stencil and achieving a professional look. Remember that surface temperature can influence how well the stencil transfers, so work in a cool environment to maintain optimal consistency. Maintaining a consistent buttercream texture is essential to avoid uneven transfer or smudging.
Proven Techniques to Prevent Pull-Up During Stenciling

Ever wonder how to keep your stencil design from lifting or smudging during application? The key is to guarantee good color contrast between your frosting and stencil, which helps the design stay sharp. Using a stenciling tool with firm, steady pressure improves stencil durability, reducing the chance of pull-up. Apply your icing in thin, even layers so the stencil adheres better without slipping. Press lightly but firmly around the edges to prevent air bubbles or gaps. Choosing the right consistency—firm but not hard—also minimizes movement. Keep your stencil in place with gentle tape or weight, avoiding excess pressure. Additionally, maintaining a consistent technique and monitoring for air bubbles can significantly enhance the precision of your design. Ensuring proper surface preparation is essential for optimal adhesion and preventing pull-up. Proper temperature control of your frosting can also help maintain the ideal consistency, reducing the risk of smudging. Being aware of frosting stability and how it affects stenciling results can further improve your outcomes. Consistent techniques and attention to frosting consistency help you achieve crisp, clean designs that resist pull-up, giving your decorated cake a professional look.
How to Remove Stencils Without Smudging or Blurring the Design

Removing a stencil without smudging or blurring the design requires patience and a careful approach. Start by gently lifting the stencil from one corner, ensuring you don’t tug or force it, which can smudge the edible ink. If you used stencil adhesives, wait until the ink has set slightly before removal. Slowly peel back the stencil at a low angle, keeping it close to the surface to prevent lifting or smearing the design. Use a clean, dry tool like a small spatula or toothpick to gently lift any edges if needed. This careful removal minimizes disruption to your carefully applied edible ink. Taking your time ensures your stencil design stays crisp and vibrant, giving your buttercream decoration a professional finish. Additionally, understanding the importance of precision in application techniques can help achieve cleaner results and easier removal. Practicing consistent application pressure can also reduce the risk of smudging when removing the stencil. Being mindful of drying times can further improve the overall appearance of your design, making removal smoother and more successful. Moreover, paying attention to proper technique and technique consistency can greatly enhance your decorating outcomes and prevent frustrating mistakes.
Expert Tips for Flawless Stenciled Buttercream Decorations

Achieving flawless stenciled buttercream decorations hinges on a few key techniques that elevate your design from good to stunning. First, choose stencil materials that are flexible and sturdy, like silicone or mylar, to guarantee clean edges and easy placement. Use high-contrast colors; a bold color against a neutral buttercream background makes your design pop. Before applying the stencil, chill the buttercream slightly to reduce smudging and pull-up. When you apply the stencil, press gently and evenly to prevent bleeding. Always tap or dab your piping tip instead of dragging it, maintaining sharp lines. Proper stencil handling technique helps prevent accidental smudges and ensures a crisp finish. Additionally, practicing these methods can boost your confidence and consistency in decorating. Ensuring proper stencil adhesion is also crucial to prevent movement during application, which can cause smudges. Finally, remove the stencil carefully once you’ve finished, avoiding any abrupt movements that could smudge your work. These expert tips help you achieve crisp, professional-looking stenciled buttercream decorations every time.
Frequently Asked Questions
Can Different Buttercream Flavors Affect Stencil Adhesion?
Yes, different buttercream flavors can affect stencil adhesion because flavor influences consistency and texture. For example, a softer or more whipped buttercream might not hold the stencil as well, leading to pull-up issues. Conversely, thicker or more stable flavors like vanilla or chocolate tend to provide better adhesion. To guarantee good stencil results, choose flavors with consistent texture and avoid those with significant texture variations that can compromise adhesion.
What Tools Are Best for Precise Stencil Placement?
Are you wondering which tools help with precise stencil placement? You should use a silicone spatula or craft knife for accurate positioning, combined with painter’s tape or stencil pins to secure the stencil. When working with different stencil materials, these tools allow you to adjust and press gently, ensuring clean, sharp designs. Have you considered how your piping techniques can enhance stencil adherence and prevent pull-up? Proper tools make all the difference.
How Does Temperature Impact Stencil Work on Buttercream?
Temperature influences stencil work on buttercream by affecting temperature consistency and buttercream elasticity. If your workspace is too warm, the buttercream softens, making it prone to pull-up and smudging when applying the stencil. Conversely, a cooler environment helps maintain temperature consistency, keeping the buttercream firm and elastic. This stability ensures clean, precise stencil impressions without distortion or pull-up, giving you a smoother decorating process.
Is It Necessary to Chill Buttercream Before Stenciling?
Sure, you could skip chilling your buttercream, but then you’ll face the chaos of sticky messes and smudged stencil designs. Chilling firms up the buttercream texture, making it ideal for crisp, clean stencils. Without it, your stencil might slip, causing frustration and a less-than-perfect finish. So, yes, chilling is essential—your stencil design deserves a smooth, stable surface, not a gooey, unpredictable mess.
How Long Should Buttercream Set Before Applying a Stencil?
You should wait at least 15 to 30 minutes after applying your buttercream before using a stencil. Make certain the buttercream has a firm, but still smooth consistency, which helps prevent pull-up. Use a stencil material that’s sturdy yet flexible, like acetate or plastic, to get clean results. Chilling the cake briefly can also help set the buttercream, making it easier to stencil without disturbing the surface.
Conclusion
With the right prep and techniques, you can achieve crisp, clean stenciled buttercream designs every time. Don’t worry if it takes a few tries—think of your stencil as a guide, not a perfect portrait. Imagine lifting the stencil smoothly like peeling a sticker, revealing sharp edges beneath. Practice, patience, and gentle removal will turn your cake into a flawless canvas. Keep experimenting, and you’ll master perfect stenciling in no time!