To reduce flour use with the sheeter technique, focus on preparing your dough properly by resting it to improve elasticity and using minimal, evenly distributed flour or flour alternatives like rice flour or cornstarch. Keep the dough cool, handle it gently, and adjust hydration if needed. Using a lightly floured surface and equipment that’s clean and well-maintained also helps prevent sticking. For more tips on mastering this technique efficiently, learn how to optimize your process step by step.
Key Takeaways
- Use flour alternatives like rice flour or cornstarch for dusting to minimize excess flour and prevent sticking.
- Keep dough at proper hydration and elasticity to reduce the need for flour during sheeting.
- Chill dough before sheeting to improve handling and decrease sticking tendencies.
- Regularly clean and dry the sheeter to prevent dough buildup, reducing the need for flour.
- Apply minimal, even dusting and work in a cooler environment to control moisture and limit sticking.

Folding Dough Sheeter (15.8"), Countertop Dough Sheeter, Dough Sheeter, Manual Dough Sheeter, Adjustable Thickness, Stainless Steel Dough Roller Machine, Bread, Pizza, Cookies, Pie (1 Rolling Board)
𝐂𝐮𝐬𝐭𝐨𝐦𝐢𝐳𝐚𝐛𝐥𝐞 𝐃𝐨𝐮𝐠𝐡 𝐓𝐡𝐢𝐜𝐤𝐧𝐞𝐬𝐬: Manual dough rolling machine features 55 settings from 0–27mm, providing precise control over dough thickness…
As an affiliate, we earn on qualifying purchases.
As an affiliate, we earn on qualifying purchases.
What Is the Sheeter Technique and How Does It Help?
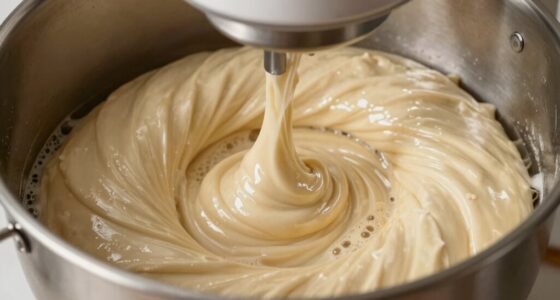
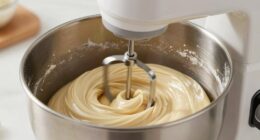
Have you ever wondered how bakers achieve perfectly thin, even dough sheets? The sheeter technique relies on controlling dough elasticity to roll out consistent layers efficiently. By gradually passing the dough through rollers, you reduce the need for excessive flour, which often leads to sticking. Instead of relying solely on traditional flour dusting, bakers use flour alternatives like cornstarch or rice flour to prevent sticking without compromising dough texture. This method ensures a smooth, uniform sheet with minimal flour use, saving resources and maintaining dough quality. Understanding the importance of dough elasticity helps in mastering this technique. The sheeter technique streamlines production, making it easier to produce large quantities of neatly rolled dough, perfect for pastries, pasta, or bread. Properly managing dough hydration is also crucial to achieve optimal elasticity and prevent sticking. Additionally, controlling dough temperature can enhance the effectiveness of the sheeting process and reduce sticking issues. Paying attention to gluten development can also improve dough handling and reduce the likelihood of sticking, especially when working with different types of flour. Incorporating techniques that optimize dough consistency can further improve the overall sheeting process. It’s a smart way to improve consistency while reducing flour waste.

12" Folding Manual Dough Sheeter with 2 Rolling Boards, Adjustable Thickness Dough Rolling Machine, Compact Stainless Steel Dough Sheeter for Pizza, Pastry, Pasta, Fondant, Cookie Dough & Home Baking
Manual Dough Sheeter With Dual Boards: This manual dough sheeter includes two large 27.5" x 14" PE rolling…
As an affiliate, we earn on qualifying purchases.
As an affiliate, we earn on qualifying purchases.
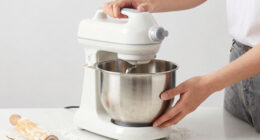
How Do I Choose the Right Equipment for Sheeter Work?

Choosing the right equipment for sheeter work depends on your specific needs and the scale of your production. If you handle delicate doughs requiring high dough elasticity, opt for a sheeter with adjustable thickness settings and gentle rollers to prevent tearing. For larger batches, a heavier-duty machine with higher capacity might be necessary. Consider flour alternatives or minimal flour dust to reduce sticking; some sheeters include non-stick coatings or easy-clean surfaces that help. Think about how much control you need over dough thickness and texture, and whether you prefer manual or automatic operation. Matching your equipment to your workflow ensures consistent results, minimizes sticking, and reduces flour use—key to mastering the sheeter technique effectively. Additionally, understanding power tool safety ensures safe operation when setting up and maintaining your equipment. Proper equipment maintenance also plays a vital role in preventing sticking and ensuring longevity of your sheeter. Incorporating regular cleaning procedures can further reduce residue buildup that contributes to sticking, and using automated features can improve efficiency and consistency in your process. Being aware of self-sufficiency principles can guide you in selecting versatile and durable equipment that supports long-term use.

Soeos Rice Flour 16 Ounce (Basic), 1 Pound (Pack of 1) , Rice Flour for Baking or Cooking with Resealable Bag, All Natural for Sourdough Bread, Vegan, Gluten-Free
Soeos Thai Rice Flour is created from premium Thai rice and is precisely milled. It is a flexible…
As an affiliate, we earn on qualifying purchases.
As an affiliate, we earn on qualifying purchases.
How Should I Prepare My Dough for Sheeting?

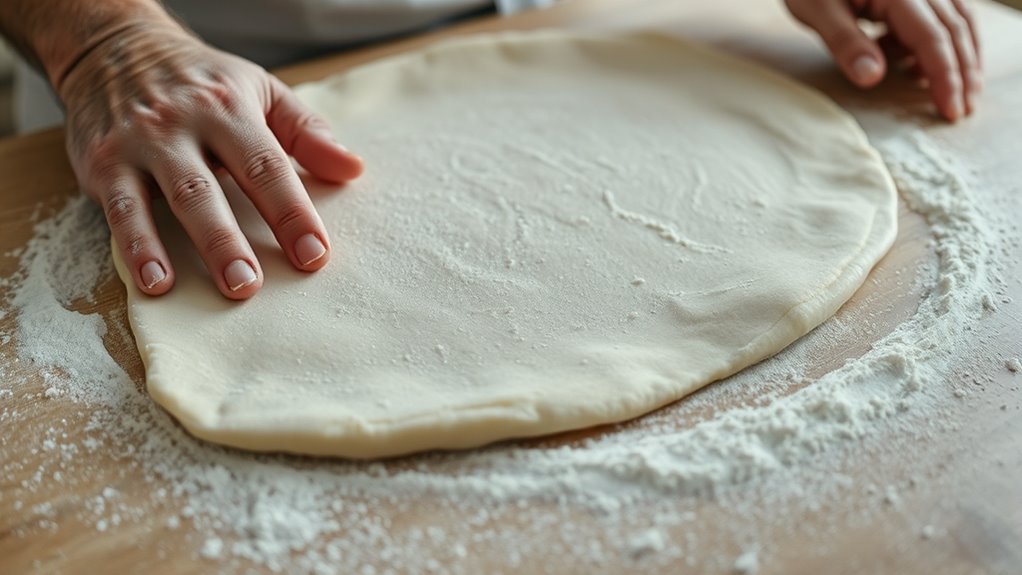
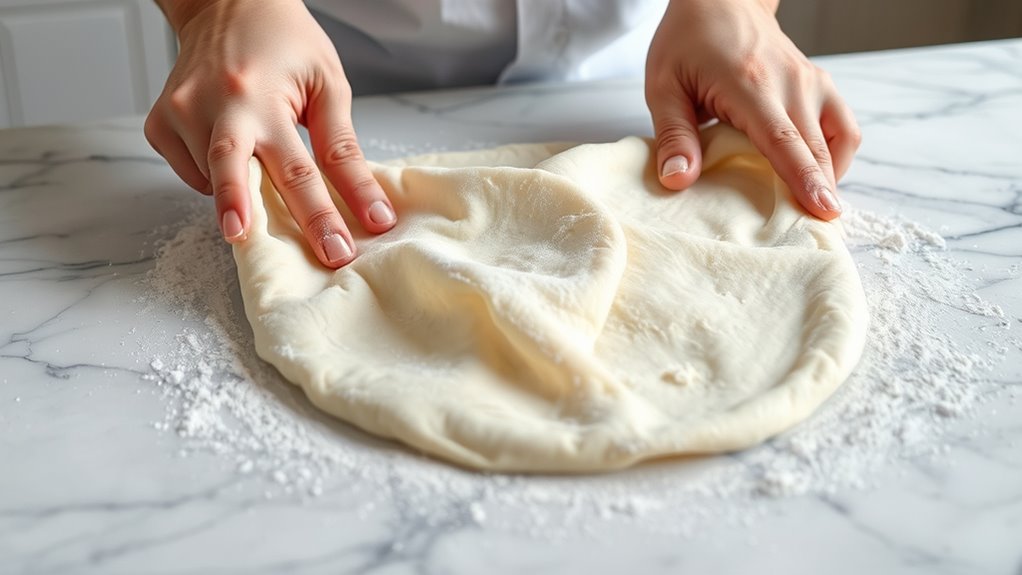
Proper dough preparation is essential to guarantee smooth sheeting and prevent tearing. To achieve this, verify your dough has good elasticity, which allows it to stretch without cracking. Use flouring alternatives like cornstarch or rice flour to lightly dust your surface and dough. This not only reduces sticking but also helps maintain the dough’s elasticity and flexibility, which are crucial for successful sheeting. Maintaining the right dough hydration levels is also vital to prevent tearing and ensure optimal stretchability. This reduces sticking without over-flouring, which can toughen the dough. Additionally, understanding your load‑planning and managing it effectively helps ensure consistent results. Managing the dough’s moisture content effectively is also key to maintaining elasticity and preventing tearing. Visualize the preparation process:
| Step | Action |
|---|---|
| 1 | Rest dough, relax gluten |
| 2 | Lightly dust with flouring alternatives |
| 3 | Gently shape into a flat disk |
| 4 | Check elasticity and smoothness |
This preparation ensures the dough is flexible, easy to handle, and ready for sheeting.

Plant-Based Cornstarch Dusting Powder (Soft Vanilla)
Super Abosrbent
As an affiliate, we earn on qualifying purchases.
As an affiliate, we earn on qualifying purchases.
How Can I Use the Sheeter Technique Step by Step?
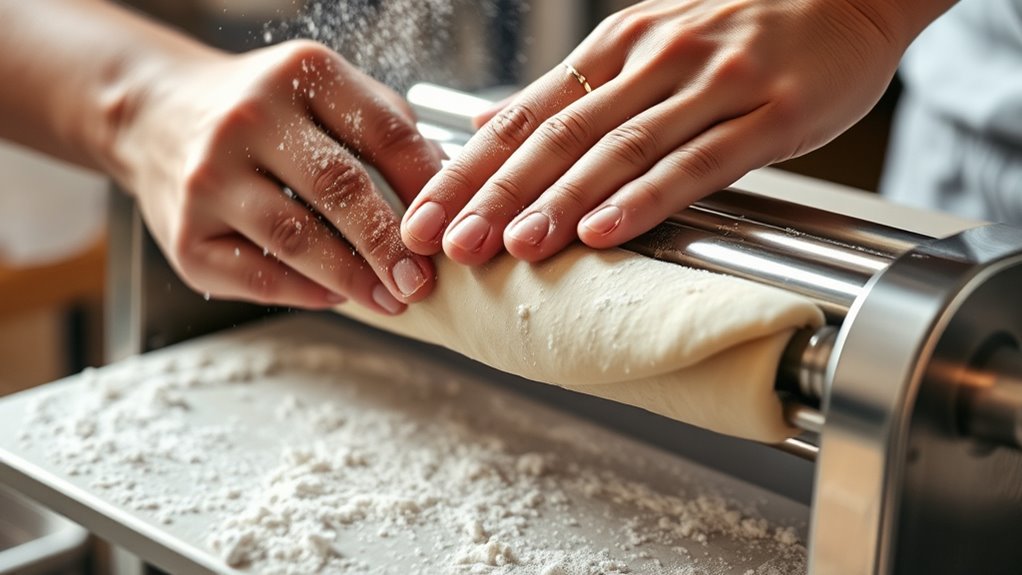
To effectively use the sheeter technique, start by preparing your dough as previously described—rest it to relax the gluten and lightly dust the surface to prevent sticking. Begin by flattening the dough into a rectangular shape, then pass it through the sheeter at a low setting to maintain dough elasticity. Fold and rerun the dough, gradually increasing the thickness setting until you reach your desired thinness. Use flour alternatives like fine rice flour or cornstarch on the surface to reduce sticking without excess flour. Keep the dough hydrated and flexible, which helps it pass smoothly through the sheeter. Proper measurement of the dough thickness ensures even sheets and minimizes sticking without overusing flour. Additionally, monitoring the dough’s elasticity during processing can prevent tearing and ensure a smooth rolling process. Maintaining consistent dough hydration levels is essential for achieving uniform results and avoiding tears, especially when working with low-flour recipes. Ensuring the dough has good gluten development can also improve its workability and reduce sticking issues.
How Can I Prevent Dough From Sticking Without Using Excess Flour?
Preventing dough from sticking without using excess flour starts with controlling moisture and surface conditions. Confirm your dough has good elasticity, which helps it resist sticking by maintaining its structure. Instead of piling on more flour, try using flour alternatives like rice flour, cornstarch, or powdered sugar on your work surface. Lightly dust these around the dough to create a barrier that reduces sticking without altering dough texture. Keep your work surface and rolling pin lightly floured or coated with a non-stick spray if necessary, but avoid overdoing it. Additionally, chill the dough slightly if it’s too soft, as firmer dough is less prone to sticking. Properly managing moisture and surface conditions keeps your dough workable without sacrificing dough elasticity or overusing flour. Using non-stick surfaces or mats can also help prevent sticking without adding extra ingredients. Employing proper dough handling techniques can further reduce the need for excess flour during your baking process, and understanding how air quality and environmental factors influence dough workability can further enhance your results. Being aware of kitchen humidity levels can also impact how sticky your dough becomes, so adjusting your environment accordingly can be beneficial.
What Are Common Mistakes When Using a Sheeter, and How Do I Avoid Them?

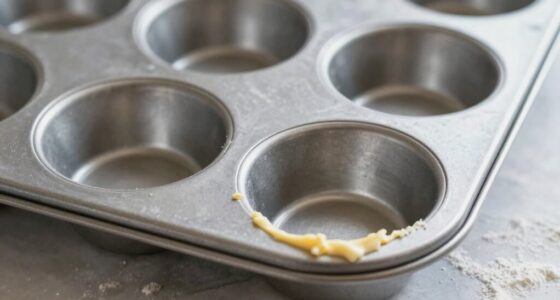
One common mistake is overflouring the dough, which can affect texture and handling. You also need to make certain your sheeter settings are consistent; changing them unexpectedly can result in uneven layers. Don’t forget to perform regular maintenance, as neglecting it can cause machine malfunctions and impact your results.
Overflouring Dough Properly
Overflouring dough on a sheeter is a common mistake that can lead to tough, dry pastry and uneven layers. To prevent this, you need to balance flour application carefully. Overflouring reduces dough elasticity, making it harder to stretch smoothly. Instead of relying solely on traditional flour, try using flour alternatives like rice flour or cornstarch to minimize sticking without overdoing it.
Here are some tips to avoid overflouring:
- Use a light dusting, just enough to prevent sticking.
- Regularly check dough elasticity to determine if more flour is needed.
- Avoid piling on flour; add gradually and evenly.
- Keep your sheeter clean and dry to reduce the need for excessive flour.
Inconsistent Sheeter Settings
Inconsistent sheeter settings are a common source of issues that can compromise your pastry’s quality. When the sheeter isn’t properly calibrated, it can lead to uneven dough thickness, affecting dough elasticity and handling. One mistake is changing settings without verifying calibration, resulting in inconsistent results. Always make sure your sheeter is calibrated correctly before use, and double-check settings between batches. Varying roller gaps or applying uneven pressure can also cause fluctuations in dough thickness. Keep your adjustments precise and consistent, and avoid rushing the setup process. Proper sheeter calibration helps maintain uniformity, which reduces sticking and overflouring. Additionally, attention to detail plays a crucial role in ensuring uniform dough processing. By paying close attention to your settings and ensuring they stay consistent, you’ll produce even, high-quality dough with less flour and fewer issues.
Neglecting Maintenance Routines
Neglecting regular maintenance routines is a common mistake that can lead to equipment breakdowns and compromised dough quality. When you skip cleaning and inspecting your sheeter, sticky residue and flour build-up can cause sticking issues and uneven layers. Poor kitchen hygiene can also result in mold or bacteria growth, risking food safety. Additionally, overlooking proper ingredient storage can lead to contamination or spoilage, affecting dough consistency. To avoid these problems, regularly clean all parts, lubricate moving components, and check for wear. Keep your workspace organized, store ingredients properly, and ensure the sheeter’s safety features are functioning. Consistent maintenance not only extends your equipment’s lifespan but also guarantees a cleaner, more efficient operation every time.
How Do I Maintain and Clean My Sheeter Properly?

To keep your sheeter running smoothly, you need to follow proper cleaning techniques and perform regular maintenance. This includes wiping down surfaces, removing debris, and checking for wear and tear. Staying consistent with these steps guarantees your sheeter stays in top condition and produces the best results.
Proper Cleaning Techniques
Maintaining your sheeter properly starts with regular cleaning after each use. This prevents dough buildup and keeps the machine running smoothly. After each session, wipe down the rollers and surfaces with a damp cloth, ensuring you remove any flour or dough residue. Pay attention to dough temperature, as warmer dough can stick more easily, making cleaning more essential. Also, check sheeter lubrication; clean and re-lubricate moving parts to prevent rust and maintain smooth operation.
- Remove leftover dough and flour promptly
- Use a soft brush or cloth for delicate parts
- Never use harsh chemicals that could damage surfaces
- Regularly inspect for buildup around rollers and gears
Regular Maintenance Tips
Regular maintenance of your sheeter is key to ensuring consistent performance and longevity. Regularly inspect and clean the rollers to prevent dough buildup that affects dough elasticity. Use soft cloths and appropriate cleaning solutions, avoiding harsh chemicals. Keep the blades sharp to ensure smooth operation and reduce sticking. Incorporate flour alternatives like cornstarch or rice flour to minimize sticking without overusing flour. Lubricate moving parts as recommended by the manufacturer to prevent wear. Here’s a quick maintenance checklist:
| Task | Frequency | Tips |
|---|---|---|
| Clean rollers | After each use | Use damp cloth, avoid water on electrical parts |
| Check blades | Weekly | Sharpen or replace if dull |
| Lubricate parts | Monthly | Use food-safe lubricants |
| Inspect for wear | Regularly | Replace worn components |
Why Is My Dough Sticking, and How Can I Fix It Quickly?

If your dough keeps sticking to your work surface or rolling pin, it’s likely because it’s too moist or warm. Proper dough hydration and temperature control are key to fixing this quickly. To prevent sticking, try chilling the dough slightly or dusting your surface with just enough flour.
- Use a thin layer of flour or cornstarch to reduce moisture on the surface.
- Keep your dough cool by refrigerating it if it warms up during kneading.
- Adjust dough hydration by adding small amounts of flour if it’s too sticky.
- Work in a cooler environment to maintain ideal temperature control.
Frequently Asked Questions
Can the Sheeter Technique Be Used for Gluten-Free Doughs?
Yes, you can use the sheeter technique for gluten-free doughs, but you’ll need a gluten-free adaptation. Since gluten-free doughs are often more fragile and stickier, guarantee your sheeter is compatible and equipped with non-stick surfaces or parchment. Lightly dust with gluten-free flour or use a silicone mat to prevent sticking. Adjust your pressure and speed for ideal results, helping you roll out gluten-free doughs smoothly without excess flour.
How Does Humidity Affect Dough Sticking During Sheeting?
Humidity impact your dough’s stickiness during sheeting by increasing moisture levels, making the dough stickier and harder to handle. To manage this, you need moisture control, such as adjusting the flour dusting or using a light spray of water to prevent sticking without adding excess flour. Keep an eye on the environment, and adapt your technique accordingly, ensuring your dough remains manageable and doesn’t stick to the sheeter.
Are There Alternative Methods to Reduce Flour Without Sticking?
Did you know that using non-flour dusting can cut flour use by up to 50%? To prevent sticking, you can opt for non-stick surfaces like silicone mats or smooth countertops. Lightly dust these areas with powdered sugar or cornstarch instead of flour, and keep the dough chilled. This approach minimizes flour, reduces sticking, and keeps your dough handling clean and efficient.
Does Using Less Flour Affect the Final Texture of Baked Goods?
Using less flour can change the final texture of your baked goods, making them potentially denser or less tender. To counteract this, try alternative flour types like rice or almond flour, which may behave differently. Additionally, adjusting dough hydration helps maintain elasticity and prevent sticking. By experimenting with these factors, you can reduce flour while still achieving the desired texture in your baked treats.
What Are the Best Practices for Storing Sheeter Equipment?
To store your sheeter equipment properly, focus on regular equipment maintenance and ideal storage conditions. Clean and dry the machine thoroughly after each use to prevent rust and buildup. Store it in a cool, dry place away from humidity and direct sunlight. Cover the equipment with a breathable cloth or plastic cover to protect it from dust. Maintaining good storage conditions ensures your sheeter stays in top shape and ready for your next baking session.
Conclusion
Mastering the sheeter technique is like taming a wild stallion—you’ll gain control and finesse in your baking. By choosing the right equipment, preparing your dough properly, and preventing sticking without excess flour, you’ll create perfect sheets every time. Remember, even the best tools need care, much like a well-tended garden. Stay patient and attentive, and you’ll avoid common pitfalls. With practice, you’ll turn your kitchen into a bakery’s symphony of precision and artistry.