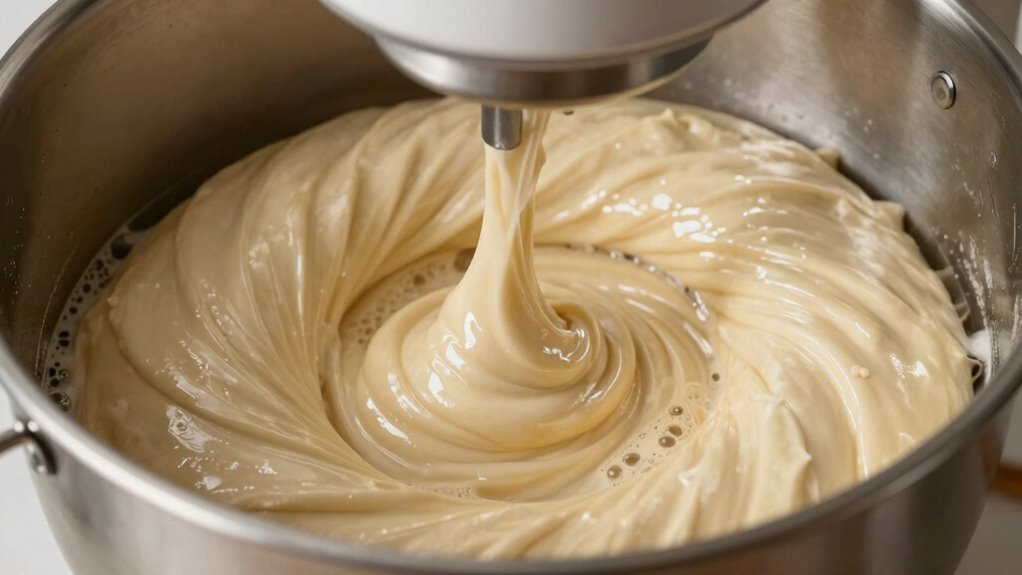
To know when spiral mixing is done, look for a smooth, slightly tacky dough with increased elasticity that springs back when pressed. You’ll see gluten strands forming and a shiny, web-like appearance indicating good gluten development. The dough should hold its shape without sagging or spreading. Performing the windowpane test by gently stretching a small piece until translucent confirms proper gluten strength. Keep observing these signs to perfect your mixing; more tips follow if you continue.
Key Takeaways
- Look for a smooth, elastic dough that springs back when pressed, indicating proper gluten development.
- Perform the windowpane test: stretch a small piece into a thin, translucent membrane without tearing.
- Check for increased dough volume and a slightly domed surface, signaling fermentation readiness.
- Observe the dough’s appearance: uniform, glossy, and free of dry or sticky spots.
- Ensure the dough feels slightly tacky but cohesive, with a resilient texture that holds shape well.
What Is Spiral Mixing and How Does It Work?

Have you ever wondered how bakers achieve a smooth, well-developed dough? Spiral mixing is a key technique that guarantees consistent results. It uses a specialized spiral mixer to blend ingredients thoroughly while gently kneading the dough. The spiral arm rotates within the bowl, mimicking traditional kneading motions but more efficiently. Proper kneading techniques during spiral mixing promote gluten development and even hydration. To keep the process smooth, regular spiral mixer maintenance is essential—cleaning and inspecting parts prevent breakdowns and ensure maximum performance. This method reduces overworking the dough, maintaining its elasticity and texture. When done correctly, spiral mixing produces a uniform dough, ready for the next development stage. It’s a crucial step for bakers aiming for high-quality, professional results. Additionally, utilizing energy-efficient equipment helps reduce environmental impact and supports sustainable baking practices. Incorporating sound maintenance practices can further extend the lifespan of your mixer and optimize performance. Understanding the development stages of dough helps bakers know precisely when the spiral mixing process is complete and the dough has reached optimal consistency. Moreover, understanding the technological advantages of modern spiral mixers can enhance efficiency and quality in the baking process.
How Does Dough Look in the Early Mixing Stage?
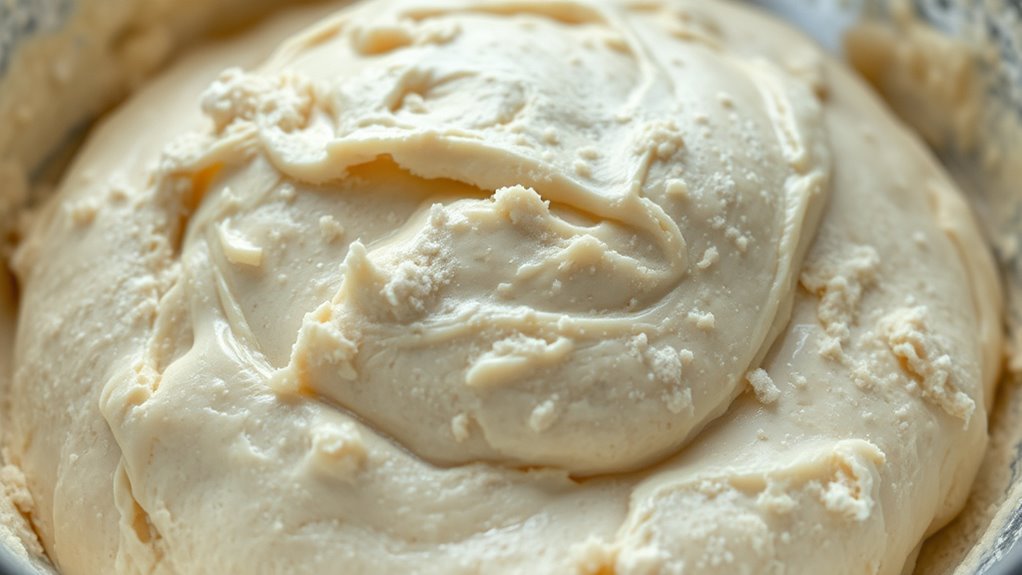
During the early mixing stage, dough begins to take shape as ingredients start to combine. At this point, the dough appearance is often shaggy and uneven, with dry flour still visible. It may look lumpy or crumbly, and the mixture might stick to the sides of your bowl. You’ll notice that the dough isn’t yet smooth or cohesive. It may feel rough and slightly sticky to the touch, but it hasn’t developed much elasticity. This stage is vital for hydration, so don’t worry if it looks messy; it will come together as mixing progresses. Your goal now is to guarantee all ingredients are evenly incorporated before moving on to more intense development. Recognizing these visual cues ensures you understand the dough development stages, helping you achieve optimal texture and structure. Additionally, understanding the initial dough appearance can guide you in adjusting mixing time and technique to reach the desired consistency. Being aware of the mixing process can also help prevent overmixing, which might affect the final bread texture.
How Can You Tell Gluten Is Developing During Mixing?

You can tell gluten is developing by looking for visible gluten strands forming in your dough. Performing the dough window test—stretching a small piece thin—also reveals its strength and elasticity. These signs indicate the gluten network is strengthening as mixing progresses. Additionally, proper mixing can create a hydrotherapy effect, improving dough elasticity and texture. Using the right tip size during mixing can help ensure an even development of gluten strands. Moreover, monitoring the dough’s hydration level can provide further insight into gluten formation and dough readiness.
Visible Gluten Strands
As the dough begins to develop, visible gluten strands start to form, indicating that the gluten network is strengthening. You’ll notice these strands become more apparent as the dough gains elasticity, making it stretchier without tearing easily. This gluten visibility is a clear sign that the dough is developing the structure needed for good bread. When you knead or mix, watch for thin, web-like strands forming between portions of dough. These strands should be smooth and slightly shiny, showing that gluten proteins are linking properly. If the dough feels elastic and the strands are prominent, you’re nearing the ideal gluten development. Keep an eye on these visual cues to ensure your dough has enough strength without overmixing, leading to a perfect texture in the final product. Pay attention to gluten formation during mixing, as it directly impacts the dough’s ability to trap gas and rise properly.
Dough Window Test
The Dough Window Test offers a simple way to assess gluten development during mixing. To perform it, stretch a small piece of dough gently into a thin, translucent sheet. If the dough holds its shape without tearing easily, the gluten network has developed well. Pay attention to fermentation indicators like bubbling or elasticity, which also reflect gluten strength. Proper dough hydration is essential; too much water can make the dough too slack, while too little hinders gluten formation. When the dough passes the window test, it indicates ideal gluten development, signaling that mixing is nearing completion. This test provides immediate visual feedback, helping you avoid over-mixing or under-mixing and ensuring your dough reaches the ideal stage for fermentation and baking.
How Do You Know When the Dough Is Fully Ready?

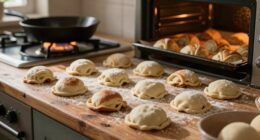
Wondering if your dough is ready for the next step? Look for fermentation indicators like increased volume, a slightly domed surface, and a bubbly, airy texture. These signs show that the yeast has been active and the gluten has developed enough. Flavor development is also essential; a well-fermented dough will have a mildly tangy aroma, indicating proper fermentation. You might notice a subtle sourness or complexity in smell, which signals that fermentation has progressed enough for good taste. Avoid overfermentation, which can lead to a sour, overly slack dough. When your dough exhibits these signs—volume, aroma, and bubbles—you can confidently proceed, knowing it has reached full readiness and is primed for shaping and baking. Additionally, understanding the dough development stages can help you better recognize the optimal point for fermentation. Proper fermentation ensures the gluten structure is well-developed, resulting in better dough elasticity and final bread texture. Recognizing these signs is crucial for achieving the desired bread quality and ensuring a successful bake. Paying attention to fermentation timing is key to mastering bread-making and achieving consistent results.
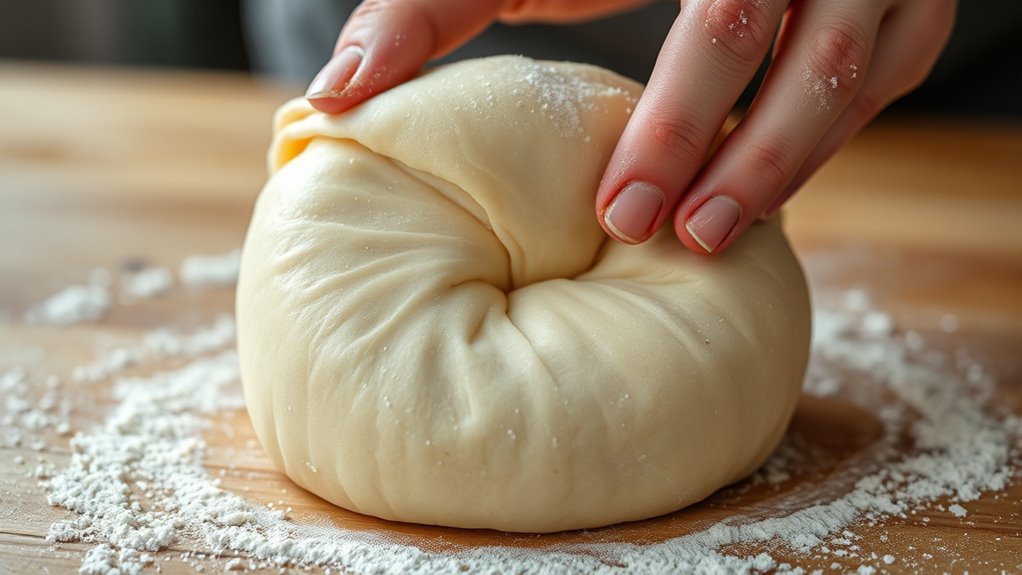
What Visual and Tactile Signs Show Proper Dough Development?
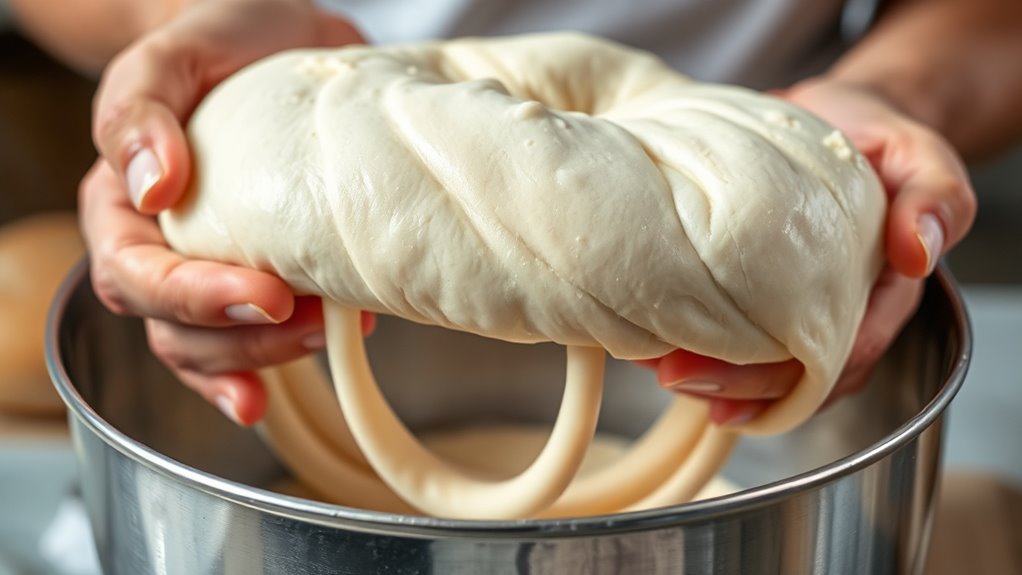
When dough has developed properly, it exhibits clear visual and tactile cues that confirm readiness. You’ll notice increased dough elasticity, making it spring back slightly when pressed. The surface becomes particularly smooth and uniform, indicating well-developed gluten. The dough also feels slightly tacky but not sticky, showing proper hydration and gluten formation. Additionally, it holds its shape well without spreading or sagging. These signs confirm that the dough has reached the right stage of development. By observing these visual and tactile cues, you can confidently proceed to the next step in your baking process. Remember, proper dough development is essential for achieving the desired texture and rise in your final product.
How to Use the Windowpane Test to Check Gluten Strength
After observing the visual and tactile signs of proper dough development, you can further assess gluten strength with the windowpane test. Take a small piece of dough and gently stretch it into a thin, even membrane. If the dough forms a translucent gluten network without tearing easily, it indicates good dough elasticity. A strong gluten network allows you to see light through the dough without breakage, confirming that the gluten development is complete. Proper dough elasticity is essential for achieving the right texture in baked goods. If the dough tears or resists stretching, it needs more mixing to strengthen the gluten. This test provides a clear, immediate way to check whether your dough has developed enough gluten to give it the right structure and elasticity for baking. Recognizing passive voice patterns can help you write more clearly and actively. Additionally, understanding gluten formation can improve your ability to judge dough readiness more accurately. Using the windowpane test regularly ensures consistent results and better baking outcomes. Developing a keen eye for dough appearance can further enhance your baking precision.
Avoid These Mistakes and Tips for Perfect Spiral Mixing Results

To achieve perfect spiral mixing results, it’s essential to avoid common mistakes that can compromise dough quality. Overmixing pitfalls, such as exceeding the ideal mixing duration, can develop the gluten too much, resulting in tough bread. Conversely, under-mixing can leave ingredients unevenly incorporated, affecting texture and rise. Keep a close eye on the mixing time and stop once the dough reaches the desired consistency. Also, avoid abrupt speed changes, which can cause uneven mixing. Properly monitoring the process ensures you don’t overwork the dough, maintaining its extensibility. Remember, patience is key. A few simple tips can make your spiral mixing more effective, leading to better dough development and a superior final product.
Avoid overmixing and sudden speed changes for optimal dough quality and perfect spiral mixing results.
- Stick to recommended mixing durations
- Watch for dough consistency, not just time
- Avoid sudden speed changes
- Stop mixing once gluten is sufficiently developed
- Be mindful of piercing and irritation to prevent contamination during handling
Frequently Asked Questions
How Long Should Spiral Mixing Typically Take for Different Dough Types?
You should typically spiral mix for about 3 to 8 minutes, depending on the dough type. For lighter doughs like pastries, aim for shorter mixing durations to avoid overworking. For heavier bread doughs, you might need closer to 8 minutes. Keep an eye on the dough consistency; it should become smooth and elastic, not sticky or overly stiff. Adjust the mixing time as needed to achieve the perfect dough texture.
Can Overmixing Damage the Dough’s Gluten Structure?
Yes, overmixing can damage your dough’s gluten structure, leading to gluten overdevelopment. When you overmix, the gluten strands become too tight, which reduces dough elasticity and can make your baked goods tough or chewy. To avoid this, watch for smooth, elastic dough that’s just coming together. Stop mixing as soon as you reach that ideal texture, preventing gluten overdevelopment and ensuring a tender, well-structured final product.
What Are the Common Signs of Underdeveloped Dough?
If your dough isn’t showing proper gluten formation, it’s likely underdeveloped. You’ll notice it feels slack, sticky, or overly soft, and it lacks the elasticity needed for good structure. This means the gluten network isn’t fully formed, so it won’t hold its shape well. To fix this, continue mixing until the dough feels more elastic and resilient, indicating that gluten development is progressing correctly.
How Does Ingredient Temperature Affect Spiral Mixing Efficiency?
You improve your mixing efficiency by ensuring ingredient temperature is just right, not too cold or hot. When ingredients are at ideal temperatures, they combine smoothly, reducing mixing time and preventing uneven dough development. Cold ingredients slow down gluten formation, while warm ones can cause overmixing or fermentation issues. Maintaining consistent ingredient temperature helps you achieve uniform dough, enhances mixing efficiency, and leads to better final texture.
Is There a Recommended Resting Period After Spiral Mixing?
After spiral mixing, you should allow a resting duration of about 15 to 30 minutes. This pause helps the gluten develop and guarantees even fermentation timing. During this resting period, the dough relaxes, making it easier to shape and improve texture. Don’t skip this step, as it enhances dough extensibility and overall quality, leading to better fermentation results and a more consistent final product.
Conclusion
Mastering spiral mixing guarantees your dough reaches ideal gluten development for perfect bread. Did you know that properly mixed dough can increase bread volume by up to 30%? Keep an eye on visual cues, feel for elasticity, and use the windowpane test to confirm readiness. With practice, you’ll confidently know when your dough is fully developed, resulting in bakery-quality loaves every time. Happy mixing and baking!