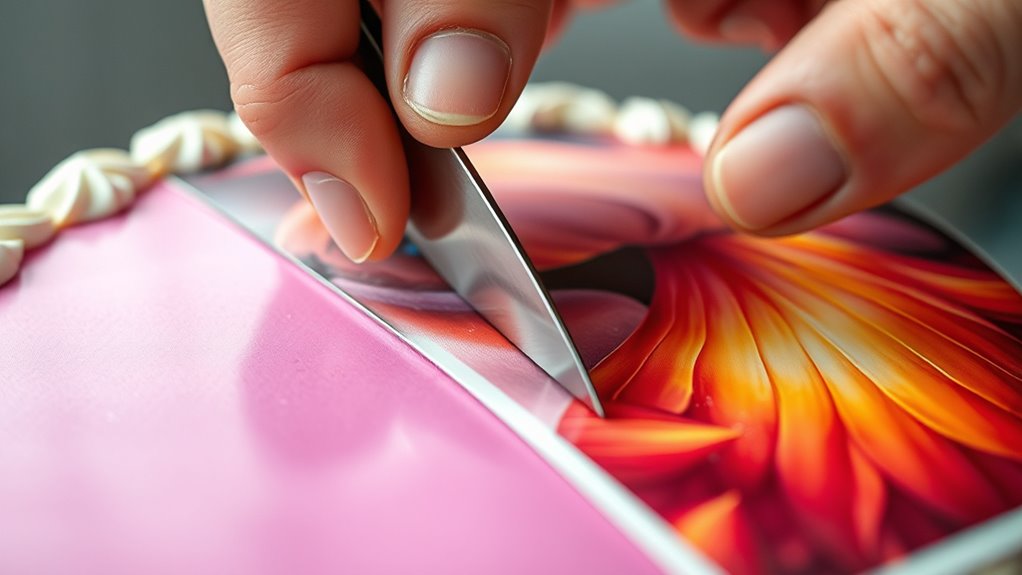
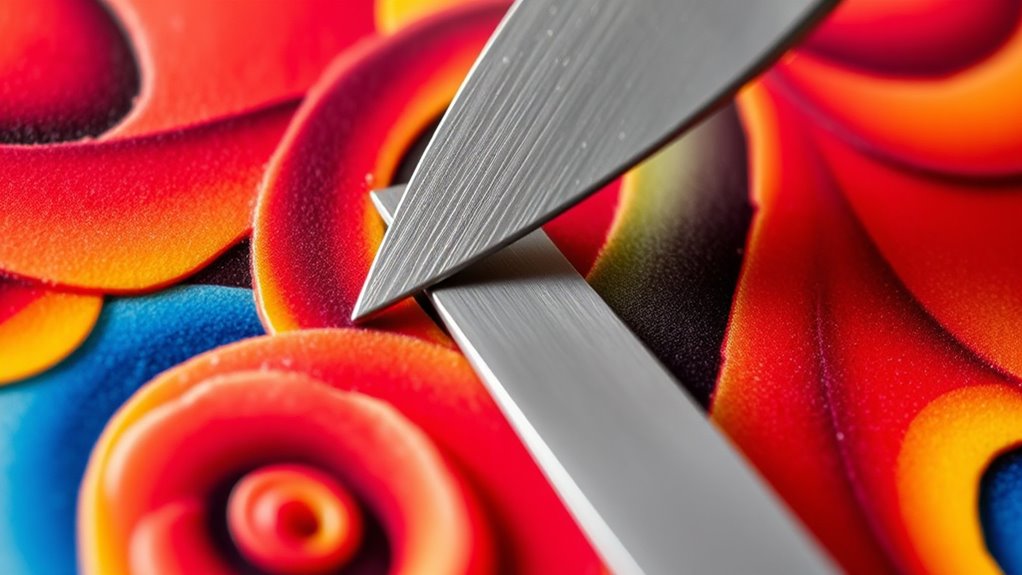
To cut edible images with clean edges and avoid tearing, start with sharp, clean tools like scissors or blades, and guarantee the images are properly chilled beforehand for stability. Work slowly with steady, gentle pressure, following the design lines carefully. Handle images carefully, and keep your workspace dust-free. If issues arise, reapply adhesive or trim uneven edges carefully. For more detailed tips, you’ll discover effective methods to perfect your cutting technique.
Key Takeaways
- Use sharp, clean blades and work slowly for precise, smooth cuts.
- Chill edible images in the freezer for 10-15 minutes to reduce tearing.
- Handle images gently with tools like tweezers to prevent surface damage.
- Follow design lines carefully, maintaining steady hand movements and consistent pressure.
- Store images properly before and after cutting to avoid moisture and damage.
Breville BOV845BSS Smart Oven Pro Countertop Oven, Brushed Stainless Steel
The Breville Smart Convection Oven Pro with Element iQ System is a high performance countertop oven; Home cooks...
As an affiliate, we earn on qualifying purchases.
What Tools Do You Need to Cut Edible Images Perfectly
To cut edible images precisely, you need the right tools that guarantee clean, accurate edges. Sharp scissors or craft knives are essential for detailed cuts, ensuring you don’t tear the image. A pair of small, precision-cutting tools helps when working around intricate designs. Keep your edible image storage area clean to prevent smudges or damage during cutting. Using edible image adhesives can help secure the image in place, reducing movement and ensuring accuracy. Proper storage keeps your images fresh and ready to cut without sticking or tearing. High-quality, clean tools combined with good storage habits make a significant difference. These tools help you achieve neat, professional results, whether you’re trimming around delicate details or cutting out precise shapes. Incorporating energy-efficient tools can further enhance your workflow by reducing waste and conserving resources. Additionally, selecting tools with sharp blades ensures cleaner cuts and minimizes the risk of tearing or damaging the edible images. Choosing ergonomic tools can also reduce hand fatigue during extended cutting sessions, leading to more precise results. To further improve your cutting precision, consider using cutting mats that provide a stable surface and protect your blades from dulling.

Ooni Halo Pro Spiral Mixer - Dough Stand Mixer with Attachments, 7.3 Quart Capacity and 58 Speed Settings - Charcoal Grey
Better Dough at Home - Make bakery-quality dough at home with groundbreaking spiral mixing technology used in professional...
As an affiliate, we earn on qualifying purchases.
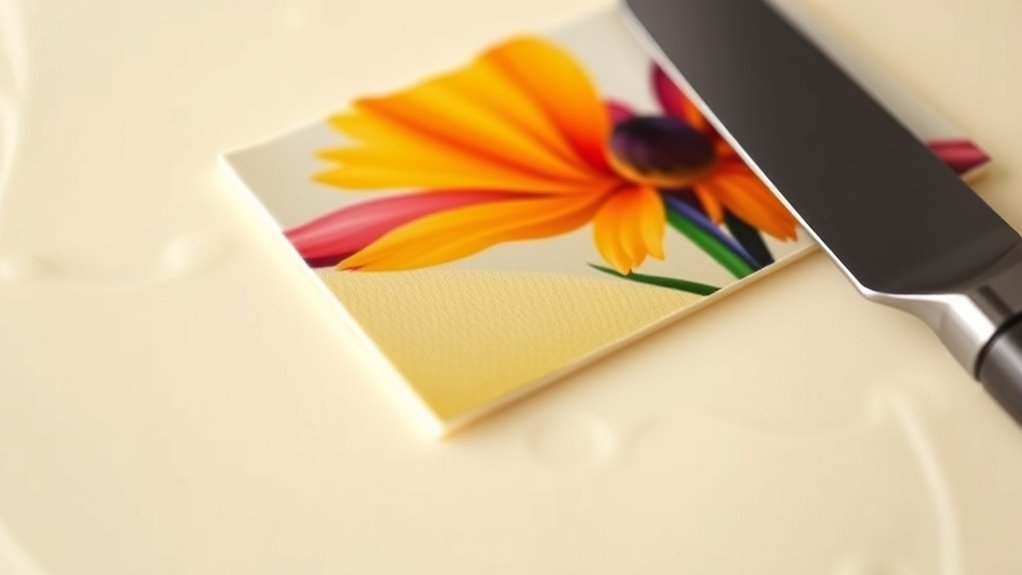
How Can You Prepare Edible Images for a Clean Cut
Preparing edible images properly sets the stage for a clean, precise cut. To guarantee flawless cake decoration and enhance food presentation, follow these steps:
Properly preparing edible images ensures clean cuts and professional cake decoration results.
- Chill the image in the freezer for 10-15 minutes to firm it up.
- Use a sharp, clean knife to prevent tearing.
- Gently lift the image from the backing sheet, avoiding stretching.
- Work on a flat, stable surface to control your cuts.
- Paying attention to visual cues can help you achieve more accurate and smooth edges. Additionally, being mindful of proper handling techniques can further protect the integrity of the edible image.
Handling the edible image carefully helps maintain its integrity and sharp edges. Proper preparation reduces tearing and ensures a professional look for your cake decoration. Taking these steps will make your cuts smooth and precise, elevating your food presentation and impressing your guests.

Breville BOV900BSS Smart Oven Air Fryer Pro and Convection Oven, Brushed Stainless Steel
The Breville Smart Oven Air Fryer Pro with Element iQ System is a versatile countertop oven allowing you...
As an affiliate, we earn on qualifying purchases.
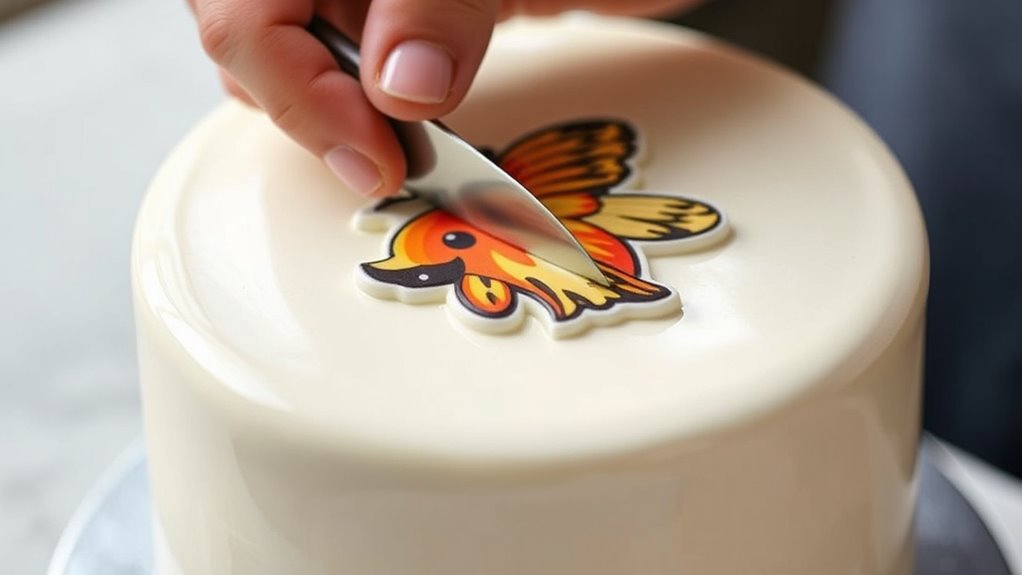
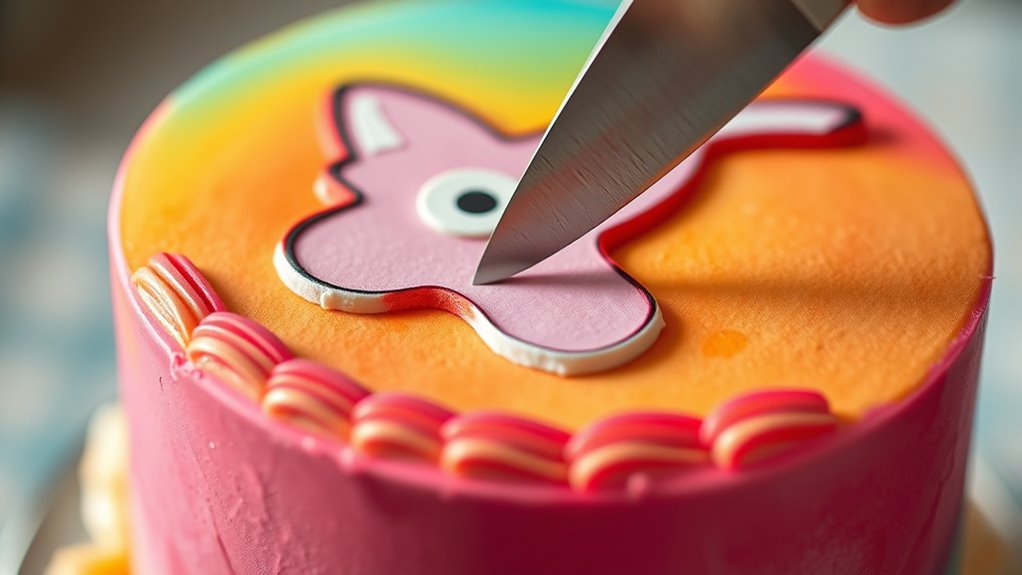
What Are the Best Techniques for Cutting Edible Images Precisely
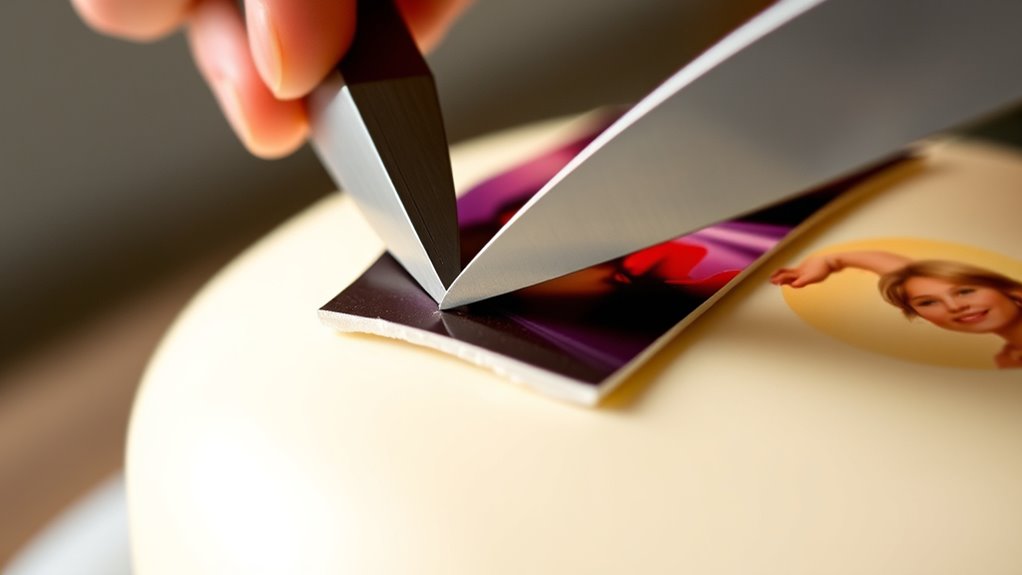
To cut edible images precisely, you need sharp tools that make clean edges. Chilling the images beforehand helps prevent sticking and tearing. Use gentle, steady pressure to maintain accuracy without damaging the design.
Use Sharp Cutting Tools
Using a sharp cutting tool is vital for achieving clean, precise edges when cutting edible images. Dull blades cause tearing and uneven edges, so maintaining your knife is essential. Here are key tips to guarantee sharpness and accuracy:
- Regularly sharpen your knife to keep it precise.
- Use a stable, smooth cutting surface to prevent slipping.
- Clean your knife thoroughly after each use to prevent residue buildup.
- Choose the right blade type—thin, sharp blades work best for detailed cuts.
Chill Edible Images First
Chilling edible images before cutting substantially enhances your precision and control. When you refrigerate or freeze the image, the gelatin sheets beneath the edible ink firm up, reducing flexibility and minimizing tearing. This makes it easier to trace and cut along intricate designs without distortion. Use a clean, sharp blade for best results. If your edible image is printed with edible ink, chilling helps prevent smudging or bleeding, ensuring crisp edges. For delicate details, place the image on a flat surface and chill for 15-30 minutes. Keep the image cold during the cutting process to maintain its shape. Proper chilling is especially important when working with gelatin sheets, as it stabilizes the structure and allows for cleaner, more precise cuts. Additionally, understanding Free Floating techniques can help you achieve a more natural and seamless look in your edible decorations. Incorporating appropriate tools designed for delicate cuts can further improve your results and protect the integrity of your edible images.
Employ Gentle, Steady Pressure
Applying gentle, steady pressure is essential for achieving clean, precise cuts on edible images. Maintaining proper pressure control prevents tearing and jagged edges, ensuring a smooth finish. To optimize your cutting technique, consider these tips:
- Adjust your cutting speed—slow and steady cuts reduce the risk of slipping or uneven edges.
- Apply consistent pressure throughout the cut, avoiding sudden pushes or pulls.
- Use a sharp blade to minimize force needed and enhance control.
- Steer smoothly along the design lines, resisting the urge to press harder at corners or curves.
Focusing on pressure control and cutting speed helps you achieve professional results. With patience and practice, your edible images will have crisp, clean edges every time.
Midea Flexify French Door Toaster Oven Air Fryer Combo, 26.4 QT, Extra Large Air Fryer Countertop Oven 10-in-1 Combo, 25% Faster Cooking and 90% Less Oil, Stainless Steel
Cyclone Air Fryer: Enjoy 25% faster cooking and 90% less oil compared to traditional fryers, . This all-in-one...
As an affiliate, we earn on qualifying purchases.
How Do You Prevent Tearing and Fraying When Cutting
To prevent tearing and fraying when cutting edible images, it is vital to choose the right tools and techniques. Start by ensuring proper edible image storage; keep images refrigerated and avoid exposure to humidity, which can weaken the paper. When selecting cutting surface options, opt for a smooth, firm surface like a glass or cutting mat, avoiding soft or uneven surfaces that can cause tearing. Use a sharp, clean blade or scissors to make precise cuts, reducing the risk of fraying. Light, steady pressure is key—don’t force the tool through the image. Additionally, handle the edible image gently and avoid unnecessary movement during cutting. Proper air purifier maintenance and keeping your workspace clean can also help prevent dust and debris from settling on your work area, which might interfere with your cutting process. Maintaining a clean workspace environment is essential for achieving clean edges and preventing damage to your edible images. Incorporating professional-grade tools can further improve the quality of your cuts and reduce tearing. Paying attention to filtration systems can help minimize airborne particles that could settle on your workspace, ensuring a cleaner environment for precise cuts.
What’s the Right Way to Handle Edible Images After Cutting
After cutting edible images, handling them carefully is essential to maintain their quality. Properly managing your edible image storage ensures they stay vibrant and intact for decorating. To do this effectively:
- Gently lift the image with a flat spatula or tweezers to avoid tearing.
- Place it on a clean, dry surface or backing paper for safe transfer.
- Avoid stacking or pressing down on the image to prevent smudging or curling.
- Store unused images in an airtight container away from heat and humidity.
When it’s time to decorate, handle the edible image with care to prevent damage. Proper edible image storage and gentle handling are key to achieving flawless edible image decorating and maintaining sharp, clean edges.
Troubleshooting: How to Fix Common Edible Image Cutting Problems
Even with careful handling, cutting edible images can sometimes lead to common issues like tears, uneven edges, or smudges. To fix these problems, start by inspecting your edible image storage and ensure it’s dry and properly sealed. Use a sharp, clean blade for precise cuts, and work slowly to avoid tearing. When edges are uneven, gently trim with small, controlled movements. For smudges, avoid touching the image’s surface and consider reapplying a thin layer of edible adhesive if needed. Additionally, understanding proper knife techniques can help improve your cutting accuracy and prevent damage. Being aware of image handling best practices can also minimize accidental tears and smudges during the cutting process. Proper storage methods can further help maintain the integrity of edible images before cutting. Incorporating proper lighting can also improve visibility and cutting precision, reducing errors. Practicing consistent cutting pressure can help achieve cleaner edges and more professional results.
Frequently Asked Questions
Can Edible Images Be Cut With Standard Craft Scissors?
Yes, you can cut edible images with standard craft scissors, but make certain they are sharp enough to prevent tearing. Use a gentle, steady cutting technique to achieve clean edges. Dull scissors can cause jagged or torn edges, so it’s best to keep them sharp and clean. Practice slow, precise cuts to maintain the image’s integrity and avoid damaging the design, especially around intricate details.
How Long Should Edible Images Dry Before Cutting?
You should let edible images dry for at least 10 to 15 minutes before cutting. Proper surface preparation helps them dry evenly, preventing tearing. Make certain the surface is smooth and dust-free, and avoid touching the image during this time. Rushing the drying process can cause smudging or tearing when you cut, so patience is key. Wait until the edges feel firm and dry for clean cuts without tearing.
Is It Necessary to Use a Protective Layer When Cutting?
You don’t always need a protective layer when cutting edible images, but it can improve cutting precision and prevent tearing. Using parchment paper or a thin plastic sheet helps create a smoother surface, making it easier to get clean, sharp edges. This extra step reduces the risk of damaging the image, especially for intricate designs. So, if you want perfect results, consider applying a protective layer before cutting your edible image.
Can You Reuse Leftover Edible Image Scraps?
Yes, you can reuse leftover edible image scraps, but you should prioritize food safety. Make sure the scraps are kept clean and stored properly to prevent contamination. Reusing scraps also offers customization options, allowing you to create additional decorations or toppers. However, avoid reusing images that have been exposed to dust or moisture. Always inspect scraps carefully before use to maintain quality and confirm safe, beautiful cake decor.
What Are the Safest Storage Methods for Cut Edible Images?
To keep your cut edible images fresh and safe, proper storage is key. You should wrap them tightly in plastic wrap or store in an airtight container to prevent exposure to environmental factors like humidity, light, and heat. Keep them refrigerated, avoiding temperature fluctuations. This way, you preserve their quality and freshness, avoiding surprises when you’re ready to decorate. Don’t underestimate the power of proper storage—it’s your secret to flawless edible images every time.
Conclusion
Mastering edible image cutting is like tending a delicate garden—you need patience, the right tools, and gentle care. When you follow the proper techniques, you’ll create crisp, beautiful edges that elevate your decorated treats. Remember, each cut is a brushstroke in your edible masterpiece. With practice, you’ll turn simple images into edible art, proving that precision truly is the secret ingredient to stunning desserts that leave a lasting impression.