Fridge proofing slows fermentation, which allows yeasts and bacteria to develop deeper, more complex flavors and results in a denser, tighter crumb. It also improves dough elasticity and preserves gas bubbles, making bread lighter and airy. Warm proofing speeds up fermentation, creating a softer crumb and a more open, irregular crumb structure, along with a thicker crust. Exploring these differences helps you choose the best method for your flavor and texture goals. Keep going to uncover more details.
Key Takeaways
- Fridge proofing develops deeper, more complex flavors through slow fermentation, while warm proofing yields bolder, quicker flavor development.
- Cold fermentation results in a denser, tighter crumb with softer crust; warm proofing produces a lighter, more open crumb and crisper crust.
- Fridge proofing improves dough elasticity and gas retention, leading to a more uniform texture; warm proofing creates a more irregular, airy crumb.
- Extended fridge proofing enhances aroma and flavor complexity, whereas warm proofing offers rapid results with less flavor depth.
- Temperature control during proofing directly influences enzyme activity, affecting both flavor development and final bread texture.
bread proofing box
As an affiliate, we earn on qualifying purchases.
As an affiliate, we earn on qualifying purchases.
Why Your Proofing Environment Impacts Flavor and Texture
Your proofing environment plays a crucial role in developing the flavor and texture of your baked goods. The proofing environment influences fermentation control, which determines how yeast interacts with the dough. A warm, humid environment speeds up fermentation, resulting in a softer crumb and quicker rise, but it can also produce less complex flavors. Conversely, a cooler environment slows fermentation, allowing more time for flavor development and a denser, more structured texture. Properly managing your proofing environment ensures consistent results and enhances the quality of your bread. Variations in temperature and humidity directly impact fermentation control, which shapes both the taste and mouthfeel of your baked goods. Understanding and adjusting your proofing environment is key to achieving your desired flavor profile and texture. Controlling fermentation is essential for consistent and high-quality baked products.
proofing dough containers
As an affiliate, we earn on qualifying purchases.
As an affiliate, we earn on qualifying purchases.
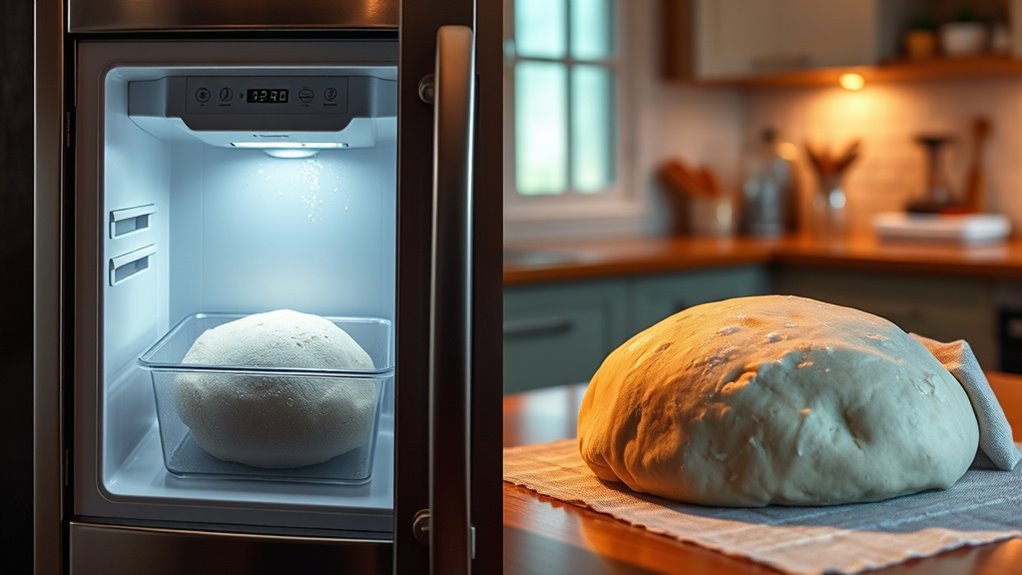
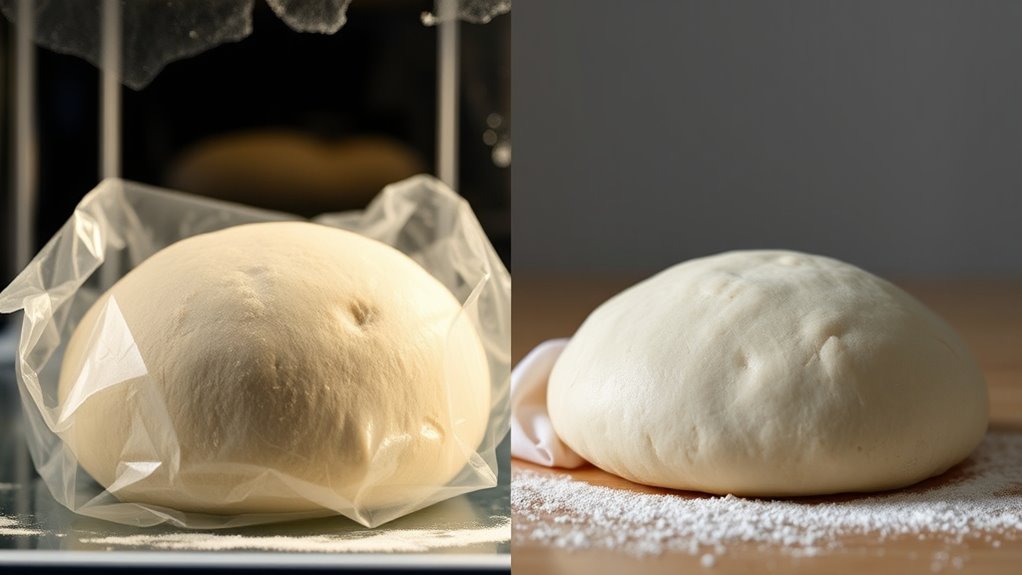
How Fridge Proofing Works and Its Benefits for Bread

When you fridge proof your dough, you slow down the fermentation process, giving flavors more time to develop. This extended proof enhances the dough’s depth of flavor and creates a better overall taste. Additionally, it helps improve the bread’s texture, making it more tender and evenly crumbed. Proper temperature control can also influence the fermentation process, leading to more consistent results. Understanding the temperature and humidity control capabilities of modern appliances can further optimize your proofing results and support healthy dog breeds and their unique needs. Recognizing how controlled environments impact fermentation can help bakers achieve optimal bread quality and often results in a more complex flavor profile.
Slows Fermentation Process
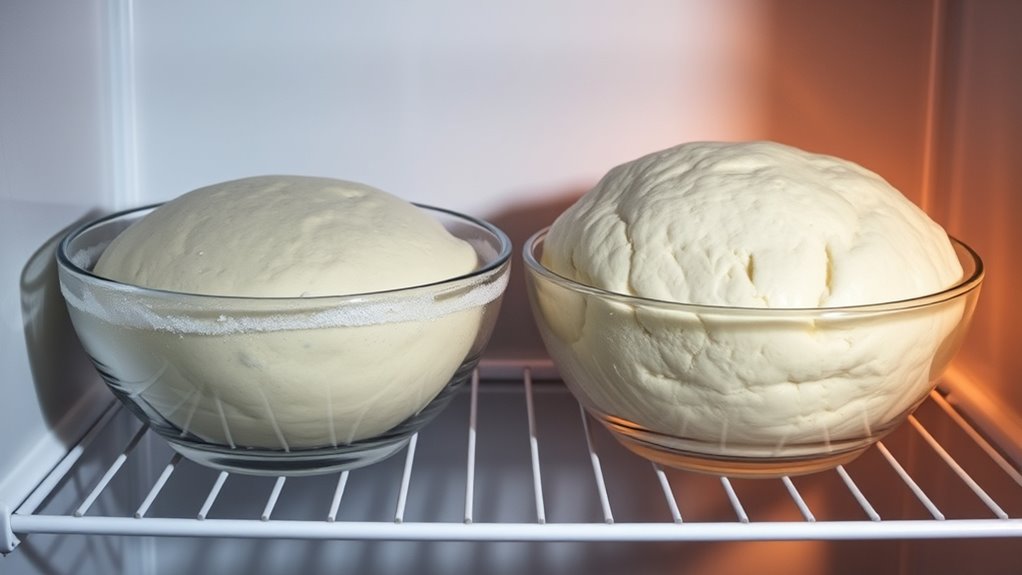
Fridge proofing works by considerably slowing down the fermentation process, allowing the dough to develop more complex flavors and better structure. This slowdown reduces the fermentation rate, giving yeast and bacteria more time to work subtly. As a result, the dough maintains its elasticity longer, preventing over-proofing. The cooler temperature also enhances dough resilience, making it easier to shape and handle. To understand this better, consider the following:
| Temperature | Fermentation Rate | Dough Elasticity | Ideal Use Case | Flavor Development |
|---|---|---|---|---|
| Fridge (around 4°C) | Slow | Maintains | Longer proofing | Milder, complex |
| Room Temp | Fast | Less stable | Quick bake | Less developed |
| Warm (above 24°C) | Very fast | Reduced | Immediate baking | Less flavor depth |
This control allows you to fine-tune your bread’s texture and taste. Additionally, understanding the role of temperature control can help optimize fermentation for different bread types. Incorporating professional techniques, such as fridge proofing, can significantly improve the final product. Using electric appliances like proofing boxes can help maintain consistent temperatures for optimal fermentation and consistent results.
Enhances Dough Flavor
By slowing down fermentation through cooler temperatures, fridge proofing allows yeast and bacteria to work more gradually, developing deeper and more complex flavors in the dough. This extended fermentation increases fermentation depth, giving your bread richer taste characteristics. As the microbes have more time to break down sugars and proteins, the flavor complexity intensifies, resulting in a more nuanced and satisfying profile. The slow process encourages the production of aromatic compounds, enhancing the bread’s overall flavor. Unlike quick proofing methods, fridge proofing promotes a more developed, well-rounded taste. This method is especially beneficial if you want to maximize flavor without rushing the process, ensuring each bite offers a richer, more layered experience. Additionally, the controlled environment helps improve the dough’s gluten structure, leading to better crumb and texture in the finished bread.
Improves Bread Texture
Cooling the dough during fridge proofing slows yeast activity, which allows gluten strands to develop more fully. This extended fermentation timing enhances dough elasticity, making it easier to shape and resulting in a softer crumb. The slow fermentation process also helps strengthen the gluten network, giving your bread a better structure. Additionally, high-quality ingredients used with proper proofing techniques can elevate the flavor profile of your bread. Here are three ways fridge proofing improves bread texture:
- Increased dough elasticity, leading to a chewier, more resilient crumb.
- Smoother, more uniform crumb structure due to gradual gluten development.
- Enhanced moisture retention, keeping bread tender longer.
Furthermore, understanding the proofing process can help bakers optimize their bread’s texture and flavor. Incorporating auditory processing techniques into baking routines can also enhance focus and precision during each step of bread making, leading to better results. Recognizing the importance of Indonesian decor masks can inspire artisans to incorporate cultural artistry into their baking presentation, adding a unique aesthetic touch. Additionally, selecting the right electric bike conversion kit can make transportation of baking supplies easier, especially for those who prefer eco-friendly options.
proofing baskets for bread
As an affiliate, we earn on qualifying purchases.
As an affiliate, we earn on qualifying purchases.
Why Warm Proofing Speeds Up Fermentation and Enhances Flavor
Warm proofing accelerates fermentation because higher temperatures boost yeast activity, allowing the dough to rise more quickly. When proofing temperature increases, fermentation speed speeds up, producing carbon dioxide faster and developing flavors more rapidly. This process results in a loaf with a lighter crumb and richer taste. To visualize the effects, consider this table:
| Proofing Temperature | Fermentation Speed | Flavor Development |
|---|---|---|
| Cold (fridge) | Slow | Milder, subtle flavors |
| Warm (room temp) | Fast | More complex, robust flavors |
| Hot (above optimal) | Too fast, uneven | Off-flavors, over-proofed |
Choosing the right proofing temperature allows you to control fermentation speed and flavor outcome, making warm proofing a preferred method for quicker results.
TempPro TP02S Digital Food Thermometer for Cooking Bread Baking Sourdough Liquids, Meat Thermometer Digital with Super Long Probe for Kitchen BBQ Yogurt Candy Making Accessory (Previously ThermoPro)
Fast and Accurate Reading: Kitchen thermometer for cooking features a 1 to 3 second readout speed and high…
As an affiliate, we earn on qualifying purchases.
As an affiliate, we earn on qualifying purchases.
How Temperature Shapes Flavor Development During Fermentation
Temperature plays a pivotal role in shaping the flavor profile of your bread during fermentation. The fermentation temperature influences how yeast and bacteria produce flavor compounds, directly affecting flavor development. When you regulate the temperature, you guide the fermentation process to develop specific tastes and aromas.
Here are three ways temperature impacts flavor development:
- Higher fermentation temperatures accelerate yeast activity, creating bolder, more complex flavors quickly.
- Lower temperatures slow fermentation, allowing subtle, nuanced flavors to develop over time.
- Consistent temperature ensures balanced flavor production, preventing off-flavors caused by uneven fermentation.
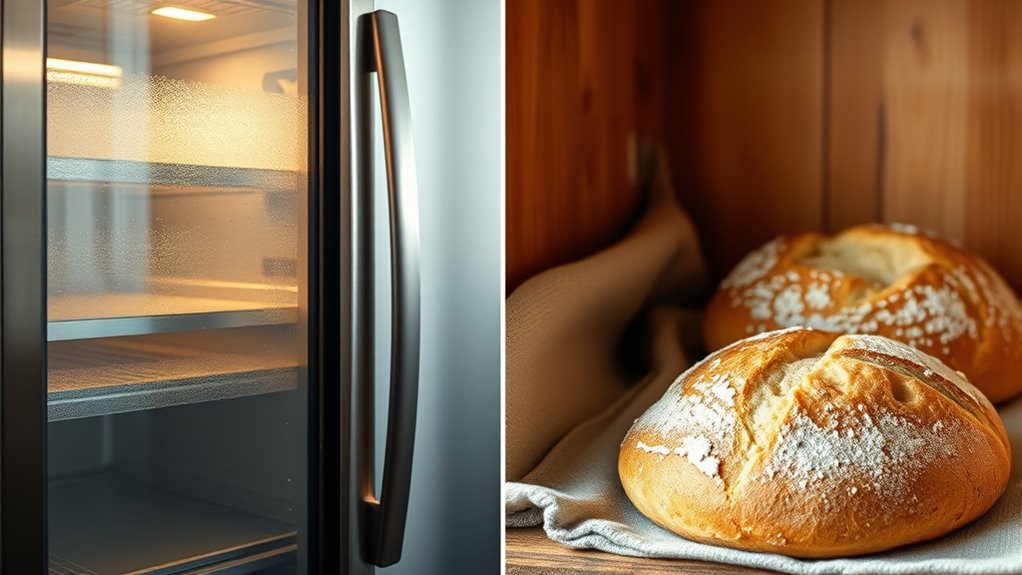
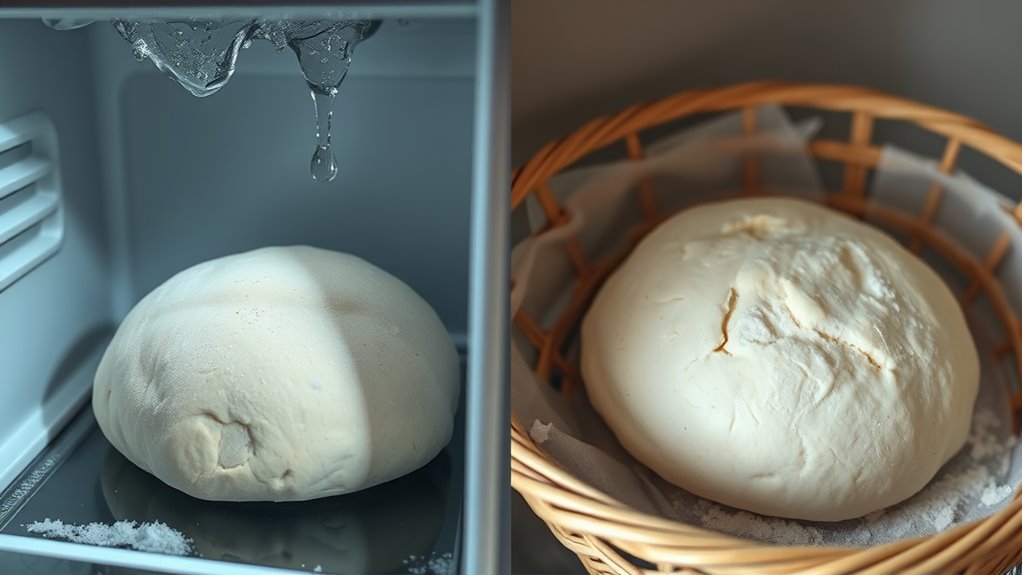
Comparing Texture and Crumb: Fridge vs Warm Proofing Outcomes
When you compare fridge and warm proofing, you’ll notice differences in crumb structure and crust crispiness. Cold proofing often results in a tighter crumb and a crisper crust, while warm proofing can create a more open texture with a softer crust. Gas retention also varies, impacting how airy and light your bread turns out. Additionally, proofing environment influences enzyme activity and yeast fermentation, further affecting the final texture and flavor. Temperature control during proofing also plays a crucial role in fermentation rate, impacting how the dough develops over time.
Crumb Structure Differences
The way dough is proofed considerably influences the final crumb structure, with fridge and warm proofing producing distinct textures. Warm proofing typically results in a more open, airy crumb due to enhanced dough aeration. In contrast, fridge proofing creates a denser, tighter crumb because fermentation slows down, limiting gas expansion. Here’s what you’ll notice:
- Warm proofing produces larger, irregular holes, enhancing lightness.
- Fridge proofing yields a more uniform, compact crumb.
- The crumb structure’s density directly impacts the bread’s chewiness and moisture retention.
- Proper proofing techniques are essential to achieve the desired crumb outcome and can vary depending on the type of bread you’re making.
Understanding these differences helps you choose the right method for your desired bread texture, ensuring a perfect final product every time.
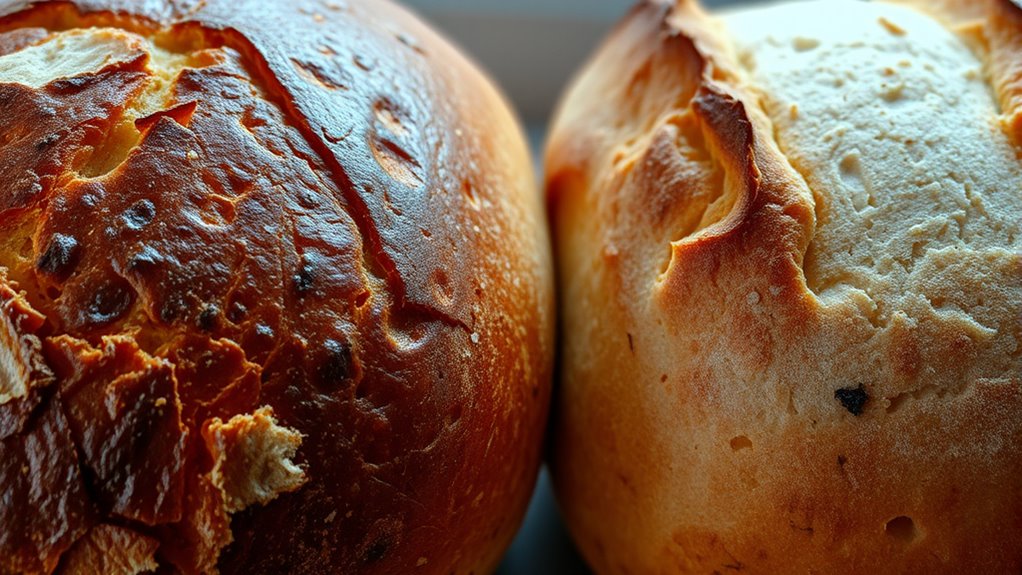
Crust Crispiness Levels
Crust crispiness is heavily influenced by your proofing method, with each approach producing distinct textural outcomes. Warm proofing often results in a thicker, crunchier crust because the dough’s hydration level promotes better oven spring, creating steam that helps form a crisp exterior. Conversely, fridge proofing tends to produce a softer crust, as the lower temperature slows fermentation and reduces oven spring, leading to less steam and a less crispy surface. Adjusting dough hydration also impacts crust texture: higher hydration yields a more open crumb and a thinner, crispier crust in warm proofing, while lower hydration produces a denser crust regardless of proofing method. Ultimately, your proofing choice shapes the crust’s crispiness by influencing oven spring and moisture retention.
Gas Retention Impact
Proofing methods directly influence how well dough retains gas during fermentation, shaping the final texture and crumb structure. When you fridge proof, the colder temperature causes a fermentation slowdown, which helps preserve gas bubbles and results in a lighter, airier crumb. Warm proofing, on the other hand, speeds up fermentation but can lead to gas escape if not carefully monitored.
Consider these points:
- Fridge proofing enhances gas retention, creating a more open crumb.
- Warm proofing risks gas loss due to rapid fermentation slowdown if overproofed.
- The control over fermentation pace affects how well the dough holds onto its gases, impacting texture.
Choosing the right method directly impacts the dough’s ability to retain gas and the final bread‘s lightness.
Which Proofing Method Fits Your Schedule and Baking Goals?
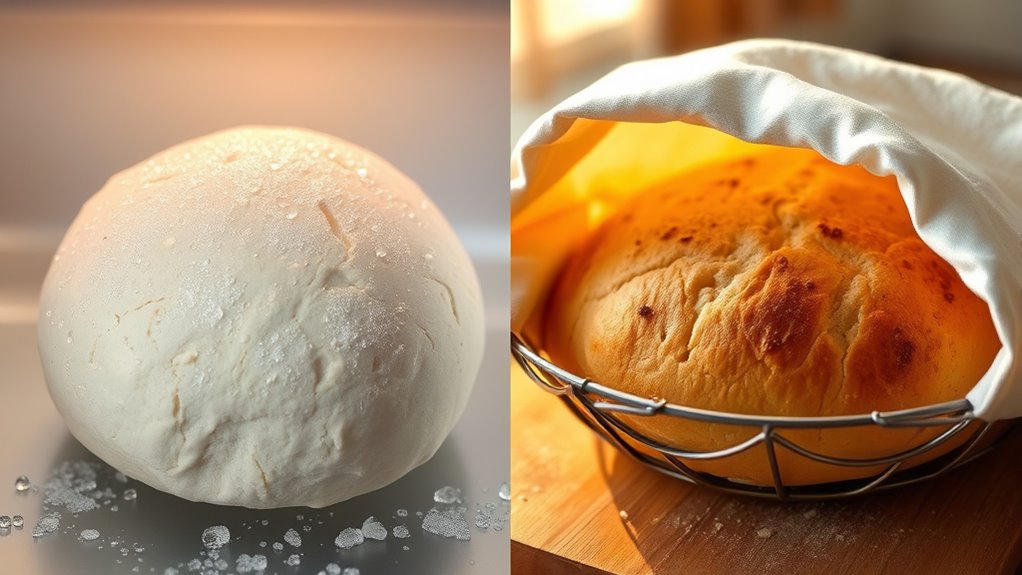
Are you wondering which proofing method best aligns with your schedule and baking goals? If you prefer flexibility, warm proofing offers quick results, usually within a couple of hours, making it ideal for last-minute baking. All you need is a warm, draft-free proofing container to speed up fermentation. On the other hand, fridge proofing requires more planning; it takes longer, often overnight or up to 24 hours, but allows for better flavor development and easier handling. If you’re balancing busy mornings or tight deadlines, warm proofing might suit you better. For those who enjoy a more hands-off approach and can plan ahead, fridge proofing fits well into your schedule. Choosing the right proofing method can also influence the flavor and texture of your baked goods, depending on the fermentation process. Properly managing temperature and timing is essential for achieving optimal results, especially considering the impact of proofing environment on dough development. Additionally, understanding how proofing environment interacts with yeast activity can help you fine-tune your baking process for consistent results. The fermentation process plays a crucial role in developing the aroma and overall quality of your bread. Selecting the appropriate proofing environment can also help control fermentation speed, ensuring your dough develops desired characteristics. Choose based on your available time and desired flavor profile to meet your baking goals.
Tips for Perfect Proofing in Fridge and Warm Environments
Achieving the perfect rise depends on creating the right environment, whether you’re using the fridge or a warm spot. To optimize fermentation timing and dough elasticity, follow these tips:
- Monitor fermentation closely—cold proofing takes longer, so check dough periodically to prevent over-proofing.
- For warmth, ensure your proofing area stays consistent; fluctuations can affect dough elasticity and lead to uneven rising.
- Use a lightly greased container or cover with plastic to prevent drying out, especially in the fridge, which slows fermentation.
- Understanding proofing environments helps you adjust your technique to achieve consistent results every time.
Adjust proofing times based on your environment, and always note how your dough responds. Proper temperature control helps develop flavor, improves fermentation timing, and guarantees a better texture for your baked goods.
How to Choose the Best Proofing Method for Your Baking Style
Choosing the right proofing method depends on your baking style and the results you want to achieve. Start by considering your preferred proofing container options—plastic tubs, glass bowls, or proofing baskets—and how they fit your workflow. If you prefer a slow, cold rise, fridge proofing with appropriate proofing containers allows flavor development and better texture control. For quicker results, warm proofing is suitable, but you may need to make proofing time adjustments to prevent over-proofing or under-proofing. Think about how much time you have and the type of bread you’re making. Experiment with different proofing container options and times to find the method that best complements your baking style and yields the desired flavor and texture.
Frequently Asked Questions
Can You Combine Fridge and Warm Proofing Techniques?
Yes, you can combine fridge and warm proofing techniques. Start by fermenting your dough in proofing containers in the fridge to develop flavor and slow fermentation. Later, move the dough to a warm spot for the final rise to guarantee proper proofing and volume. This method balances dough fermentation with flavor enhancement while achieving the right texture, giving you a well-proofed, flavorful loaf.
How Does Proofing Temperature Affect Gluten Development?
A gentle whisper of warmth nurtures your gluten structure, enhancing elasticity and strength. Warmer proofing temperatures accelerate fermentation rate, promoting more extensive gluten development, which leads to a lighter, airy texture. Cooler temperatures slow fermentation, resulting in a more delicate gluten network and a richer flavor. By controlling proofing temperature, you influence the gluten development process, shaping your bread’s final texture and taste to perfection.
Are There Specific Bread Types Suited for Fridge Proofing?
You should use fridge proofing for bread types like sourdough and enriched breads, which benefit from retardation benefits and cold fermentation. The low temperature slows yeast activity, enhancing flavor complexity and dough strength. This method works well for longer proofing times, improving texture and developing richer flavors. So, if you’re aiming for a more flavorful, well-structured loaf, fridge proofing is a great option for these bread types.
How Long Can Dough Safely Stay in the Fridge Before Baking?
You can keep dough in the fridge for up to 24 to 72 hours, but don’t let fermentation go too long, or it might over-proof and lose its flavor and texture. Refrigeration timing slows fermentation, giving you flexibility, yet staying too long can weaken gluten structure. Monitor your dough daily, and bake when it reaches the right rise and aroma—patience pays off for perfect bread.
Does Proofing Temperature Influence Bread Shelf Life?
Yes, proofing temperature influences bread shelf life by affecting proofing duration and overall dough quality. When you control the temperature carefully, you can extend or shorten proofing time, which impacts the bread’s freshness and texture. Warmer temperatures speed up proofing, possibly leading to over-proofed bread that spoils faster, while cooler temps slow down fermentation, helping maintain freshness longer. Proper temperature control is key to maximizing your bread’s shelf life.
Conclusion
So, whether you stash your dough in the fridge or let it rise warm and quick, remember that each method shapes your bread’s flavor and texture in surprising ways. Ironically, taking time often results in richer taste, while rushing can still produce a decent loaf—just not quite what you expected. Ultimately, your choice reflects your schedule and patience. Embrace the method that teaches you the most about your baking, even if it’s the one that takes longer.