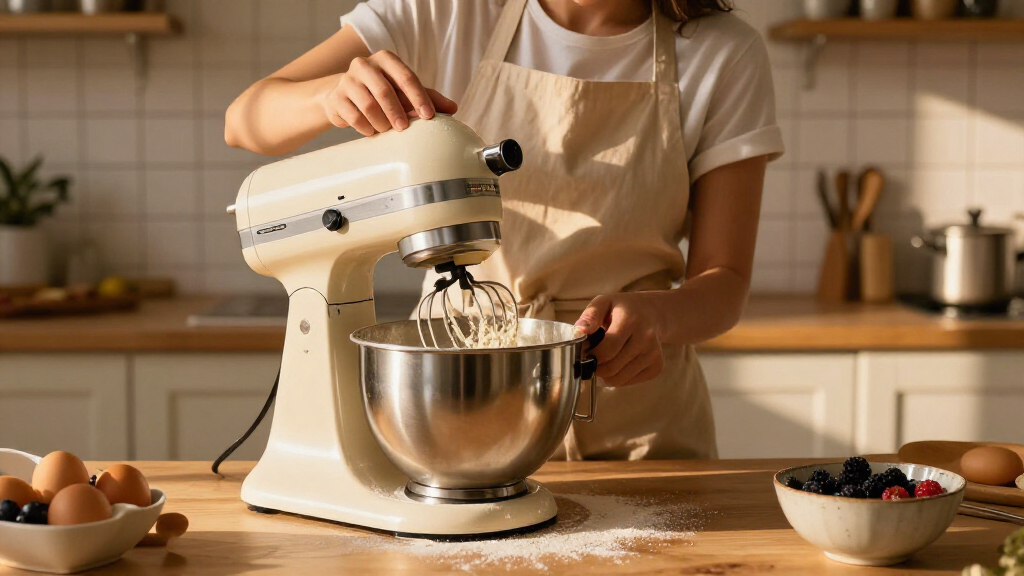
Learn how to set up a kitchen stand mixer and use its attachments and speeds for baking tasks such as creaming butter and sugar, mixing cake batter, whipping egg whites, and kneading bread dough. This guide is for beginner home bakers choosing or using a stand mixer for the first time. Allow 10-20 minutes for setup and mixing, plus the time required by your recipe.

Get baking supplies delivered free with Prime
- Fast, free delivery on millions of items
- Prime Video, Amazon Music and more included
- Member-only deals all year

Martha Stewart 5.3-Quart Tilt-Head Stand Mixer
- ✔ Bowl capacity: 5.3 quarts
- ✔ Speed settings: 12
- ✔ Design: Tilt-head
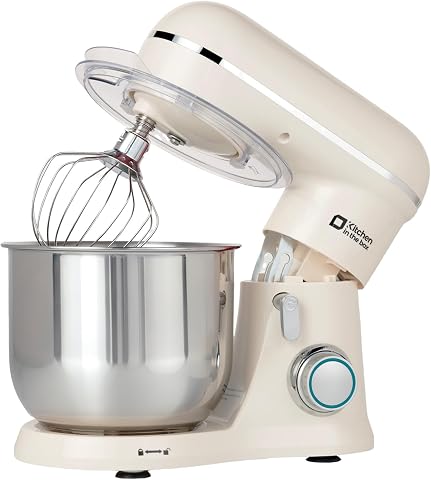
Kitchen in the Box 3.5-Qt Stand Mixer
- ✔ Bowl capacity: 3.5 quarts
- ✔ Motor power: 300 watts
- ✔ Speed settings: 10

Kitchen in the Box 3.2 Qt Stand Mixer with 6 Speeds, Black
- ✔ Bowl capacity: 3.2 quarts
- ✔ Motor power: 300 watts
- ✔ Speed settings: 6
Difficulty: Beginner | Time: 10-20 minutes to set up and mix; recipe timing varies
What You’ll Need
Tools & Materials:
- Kitchen stand mixer with bowl
- Flat beater, whisk, and dough hook, if supplied
- Recipe and measured ingredients
- Spatula and measuring tools
Knowledge:
- Basic ability to follow a recipe and measure ingredients
- Ability to identify the mixer’s speed control and bowl-locking mechanism
Read the mixer’s manual for attachment fitting, bowl locking, speed limits, and cleaning instructions. Models differ, so follow the manual if its directions differ from this guide.
Martha Stewart 5.3-Quart Tilt-Head Stand Mixer
When a recipe calls for a generous amount of dough or batter, the 5.3-quart bowl gives this mixer a meaningful advantage over both Kitchen in the Box options. The listed capacity accommodates batches of up to nine dozen cookies, a scale the 3.2- and 3.5-quart models are not intended to match. That extra room is useful for family baking or preparing several portions at once, though it takes up more space and may feel unnecessary if we usually bake one small recipe.Its 12 speed settings offer finer control than the six-speed 3.2-quart Kitchen in the Box and more steps than the 3.5-quart version’s ten speeds. The included tool set also has a distinct detail: a flat beater with a silicone edge, alongside a stainless steel whisk and dough hook. A removable splash shield can help contain ingredients, but it adds a setup and cleanup step. Compared with the Kitchen in the Box models, this is the more capacity-focused choice, with less emphasis on compact storage. We should also account for the larger bowl and shield when weighing convenience against batch size.
Pros:
- Largest stated capacity in this lineup at 5.3 quarts.
- Twelve speed settings provide the most listed speed choices here.
- Includes a silicone-edge flat beater, dough hook and stainless steel whisk.
- Tilt-head access and removable splash shield support bowl access and mixing.
Cons:
- The 5.3-quart bowl may be more capacity than small batches require.
- The removable splash shield adds a setup and cleanup step.
- Larger capacity is less suited to buyers prioritizing compact storage.
Best for: Bakers who regularly make large batches of cookies, dough or batter and have room for a larger mixer.
Not ideal for: Small households and occasional bakers who mostly make modest batches or need a particularly compact machine.
Bottom line: Choose this mixer when larger baking batches matter more than saving space or keeping the bowl size modest.
“Choose this mixer when larger baking batches matter more than saving space or keeping the bowl size modest.”
Kitchen in the Box 3.5-Qt Stand Mixer
For bakers who need a small machine but want more speed choices, this 3.5-quart Kitchen in the Box occupies the middle ground between the 3.2-quart model and Martha Stewart’s larger mixer. Its ten speeds give us more listed settings than the 3.2-quart mixer’s six, while the bowl adds a little capacity without moving into the 5.3-quart class. That makes it a practical match for everyday small-household baking, although neither compact model is the better fit for consistently large recipes.The mixer includes a dough hook, flat beater and wire whisk, plus a splash guard; its accessories are described as dishwasher-safe. Suction cups help stabilize it, and the stated weight is under five pounds, which can make it easier to move or store than a larger stand mixer. The tradeoff is the plastic-and-stainless-steel construction: the bowl is stainless steel, but the body is not presented as all metal. Compared with the 3.2-quart Kitchen in the Box, this version offers a larger bowl and more speeds. Compared with the Martha Stewart, it saves space but gives up substantial batch capacity.
Pros:
- Compact 3.5-quart bowl suits everyday small batches.
- Ten speed settings exceed the six listed on the smaller Kitchen in the Box.
- Suction cups support stability during mixing.
- Includes three core attachments and a splash guard; accessories are dishwasher-safe.
Cons:
- The 3.5-quart bowl is limiting for larger baking batches.
- Construction combines plastic with the stainless steel bowl.
- The listed details do not specify a bowl dishwasher-safe claim.
Best for: Bakers with limited counter space who want a compact mixer with more speed settings and a little more bowl room than the 3.2-quart option.
Not ideal for: Anyone who regularly prepares large batches or wants a construction description centered on a metal body.
Bottom line: This is the most flexible compact pick when ten speeds and a modest bowl matter more than large-batch capacity.
“This is the most flexible compact pick when ten speeds and a modest bowl matter more than large-batch capacity.”
Kitchen in the Box 3.2 Qt Stand Mixer with 6 Speeds, Black
This is the simplest fit for a baker who wants the core stand-mixer tools in a compact package. The 3.2-quart stainless steel bowl is the smallest in this roundup, so it suits occasional baking and modest portions better than family-size batches. Its six speeds cover a shorter range of settings than the 3.5-quart Kitchen in the Box’s ten, and the gap is even wider against the Martha Stewart model’s twelve. For basic mixing tasks, however, a smaller number of settings can be easier to navigate.The tilt-head design provides access to the bowl, while a splash guard and suction feet address two practical annoyances: reaching the mixture and keeping the unit steady. It includes a whisk, flat beater and dough hook, matching the core attachment set offered by the other picks. The description says accessories are dishwasher-safe but does not clarify whether the bowl is, so we should check care instructions before relying on machine cleanup. Compared with the 3.5-quart model, this one gives up a little capacity and four speed settings; in return, its role is clear for small kitchens and light baking. The Martha Stewart mixer is a better choice when we need headroom for bigger batches.
Pros:
- Small 3.2-quart size suits modest batches and compact kitchens.
- Tilt head and splash guard make bowl access and mixing more convenient.
- Suction feet help keep the mixer steady.
- Includes a whisk, flat beater and dough hook.
Cons:
- Smallest bowl capacity in the lineup limits batch size.
- Six speeds provide fewer listed settings than either other mixer.
- Dishwasher-safe details do not specify the bowl.
Best for: Beginners or occasional bakers who make small batches and want a compact mixer with the standard three attachments.
Not ideal for: Bakers who need more bowl capacity, more speed options or clarity that the bowl is dishwasher-safe.
Bottom line: Pick this model for straightforward small-batch baking when compactness and the core attachments take priority over capacity and speed range.
“Pick this model for straightforward small-batch baking when compactness and the core attachments take priority over capacity and speed range.”
As an Amazon Associate we earn from qualifying purchases.
Before You Start
Unplug the mixer before fitting or removing an attachment. Place it on a stable, dry counter with room for the head or bowl to move. Check that the bowl and attachment are clean, dry, and undamaged. Measure ingredients before mixing; adding them in the wrong order or trying to correct a mixture after overmixing can affect the result.
Step-by-Step Instructions
Step 1: Choose the right mixer and bowl size
Match the mixer’s bowl capacity and motor guidance to the recipes you bake most often. A flat beater handles many cakes, cookies, and frostings; a whisk aerates cream or egg whites; a dough hook kneads yeast dough. Check the manual for minimum and maximum batch sizes. If you regularly bake large batches or dense dough, choose a model rated for that load instead of assuming any mixer can handle it.
Tip:Capacity figures describe bowl volume, not necessarily the amount of flour or dough the mixer can safely handle. Use the model’s recipe or load guidance for dense mixtures.
Check: You can identify the attachment and the permitted batch size for your recipe.
Step 2: Set up the mixer
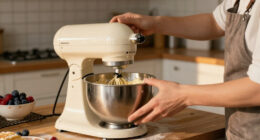
Put the mixer on a level counter near the ingredients, then lock the bowl into its base. With the mixer unplugged, attach the tool specified by the recipe: use the flat beater for cake or cookie mixtures, the whisk for whipped mixtures, or the dough hook for yeast dough. Lower the head or raise the bowl according to the model, and confirm the attachment is secured and clears the bowl.
Tip:If the beater scrapes the bowl or leaves ingredients unmixed at the bottom, check the manual for the model’s clearance adjustment. Do not bend or force an attachment to change its height.
Check: The bowl is locked, the tool is secure, and there is no contact between the attachment and bowl.
Step 3: Add ingredients in recipe order
Check the recipe, then add each measured ingredient in the order given. For creaming, this commonly means beating softened butter with sugar before adding eggs and dry ingredients. For dough, liquids and dry ingredients may go in different sequences depending on the recipe. Lower the mixer head or raise the bowl before starting, and keep hands and utensils out of the bowl.
Tip:Use softened butter when a recipe calls for it; melted butter behaves differently. Scrape the bowl with a spatula only after switching the mixer off and unplugging it.
Check: Ingredients are measured, added in recipe order, and contained in the locked bowl.
Step 4: Start at low speed
Set the speed control to off, plug in the mixer, and begin at the lowest speed. Let dry ingredients settle into the mixture before increasing speed. Follow the recipe’s speed and timing; raise speed gradually only when the recipe calls for it. Starting slowly helps limit flour clouds and splashes.
Tip:Do not use a high speed to mix a heavy dough. Follow the manual’s speed limits for the dough hook and dense mixtures.
Check: The mixer runs steadily, and ingredients stay in the bowl without a cloud of flour or splatter.
Step 5: Mix to the recipe’s visual cues
Watch the mixture and stop at the texture described in the recipe. Cream butter and sugar until the mixture looks lighter and fluffy; mix cake batter only until combined; whip cream or egg whites until the stated peaks form. For bread dough, knead only until it reaches the recipe’s texture. Turn the mixer off before checking, scraping, or removing the bowl.
Tip:Mixing time varies with the mixer, batch size, and ingredient temperature. Use visual and texture cues alongside the recipe’s timing rather than running the mixer longer automatically.
Check: The mixture matches the recipe’s stated cue—for example, fluffy, just combined, soft peaks, or elastic dough.
Step 6: Stop and check the mixture safely
Switch the speed control off and wait until the attachment stops completely. Unplug the mixer before scraping the bowl or checking for unmixed ingredients. Scrape the sides and bottom with a spatula if needed, then reattach the tool, plug in, and mix briefly at low speed. Avoid adding extra flour or liquid unless the recipe or a clear texture problem calls for it.
Tip:Do not use a spoon or spatula while the mixer is running. Attachments can catch utensils and pull fingers toward moving parts.
Check: No large pockets of dry ingredients remain, and the mixture has not been worked beyond the recipe’s texture cue.
Step 7: Remove the mixture and clean up
Turn off and unplug the mixer. Lift the head or lower the bowl as the manual directs, then remove the attachment. Transfer the mixture using a spatula, taking care around the attachment hub and any sharp edges. Wash the bowl and attachments according to the manual; wipe the mixer body with a damp cloth and keep water away from the motor and controls.
Tip:Some attachments are not dishwasher-safe. Check the manual before putting them in a dishwasher or soaking them.
Check: The mixture is ready for the next recipe step, and the mixer, bowl, and tools are clean and dry before storage.
Common Mistakes to Avoid
- Starting at high speed and scattering flour or liquid. — Begin on the lowest setting and increase speed gradually as the recipe directs.
- Using the whisk or dough hook for a task suited to the flat beater. — Match the attachment to the mixture and check the recipe and manual when unsure.
- Overmixing cake batter or dough by relying only on the clock. — Stop at the recipe’s visual or texture cue; mixer speed and batch size change timing.
- Scraping the bowl or adjusting an attachment while the mixer is plugged in. — Switch off, wait for the tool to stop, and unplug before reaching into the bowl or handling parts.
Troubleshooting
Problem: Flour puffs out of the bowl when mixing.
Solution: Stop the mixer, let the dust settle, and check that the bowl is locked. Restart at the lowest speed and raise it gradually after the flour is incorporated.
Problem: Ingredients collect at the bottom or sides instead of mixing.
Solution: Switch off and unplug the mixer, scrape the bowl, and check that the attachment is seated correctly. If the tool misses the bowl consistently, consult the manual about clearance adjustment.
Problem: The mixer moves, strains, or becomes unusually hot with dough.
Solution: Stop mixing. Check the recipe batch against the model’s dough and speed limits, then reduce the load or divide it into smaller batches if the manual allows. Stop using the mixer if unusual heat, smell, or noise continues.
What Success Looks Like
The mixer stays stable and runs at a speed suited to the recipe. The mixture reaches the texture specified by the recipe without unmixed pockets or signs of overmixing. You can remove the bowl and attachment safely, and the mixer is clean and ready to store.
Next Steps
Continue with the recipe’s baking or chilling directions. After each use, unplug the mixer, clean its parts according to the manual, and store attachments dry. If you bake a new type of dough or a larger batch, check the mixer’s load and speed guidance before mixing.
Frequently Asked Questions
Which attachment should I use for cake batter?
Use the flat beater for most cake batters unless the recipe or mixer manual specifies another tool. Use a whisk when the recipe needs air incorporated into eggs or cream.
Can I knead any bread dough in a stand mixer?
No. Check the mixer manual for dough capacity and speed limits. Dense or large batches can strain a mixer, so divide the dough if the manual permits.
How do I know when to stop mixing cake batter?
Stop when the ingredients are just combined or when the recipe’s cue is reached. Continuing to mix after flour is incorporated can make some cakes dense or tough.
Why does the mixer leave ingredients at the bottom of the bowl?
Pause, switch off, unplug, and scrape the bowl with a spatula. Check that the bowl and attachment are correctly fitted. If the gap remains too wide, consult the manual for a permitted clearance adjustment.