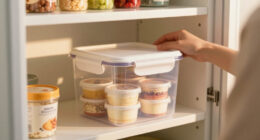

Keeping your KitchenAid Artisan stand mixer clean is essential for maintaining its performance and extending its lifespan. Proper cleaning also ensures your food remains safe and free from cross-contamination. Follow these simple, practical steps to keep your mixer in tip-top shape.
Remember to unplug your mixer before cleaning and handle all parts carefully to avoid damage.
Gather Your Cleaning Supplies
- Soft, damp cloths
- Warm water and mild dish soap
- Non-abrasive sponge or cloth
- Cleaning brush or toothbrush
- Dry towels or microfiber cloth
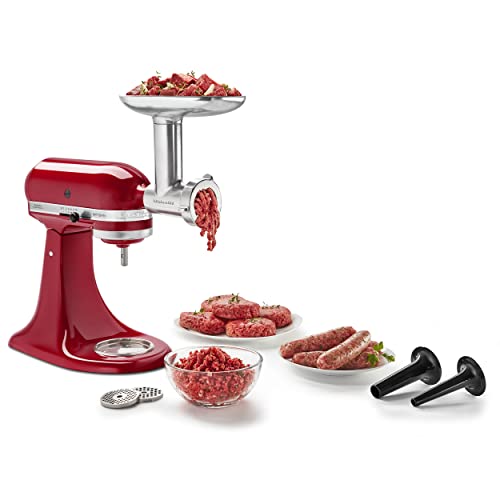
KitchenAid KSMMGA Food Grinder Attachment for All KitchenAid Stand Mixers
- Compatibility: Fits all KitchenAid stand mixers
- Grinding Plates: Includes fine, medium, and coarse plates
- Sausage Stuffer Tubes: Two included for sausage making
As an affiliate, we earn on qualifying purchases.
Disassemble the Mixer and Attachments
- Unplug the mixer from the power outlet.
- Remove the attached accessories such as the paddle, whisk, or dough hook.
- Detach any removable attachments or accessories, including the bowls and any external attachments you use regularly.
Clean the Mixer Body and Removable Parts
- Wipe the main body of the mixer with a damp cloth to remove dust and splatters.
- Wash removable attachments and bowls with warm, soapy water. Use a soft sponge or cloth to prevent scratching.
- Use a small brush to clean hard-to-reach areas, such as the attachment hub or crevices.
- Dry all parts thoroughly with a clean towel or microfiber cloth to prevent rust.
Clean the Attachments and Accessories
For attachments like the Food Grinder or Pasta Roller, follow the manufacturer’s cleaning instructions. Usually, this involves wiping with a damp cloth and avoiding submerging in water unless specified. Use a brush to clean any remaining dough or food residues, then dry completely before storage.
Reassemble and Maintain
Once all parts are dry, reassemble your mixer, ensuring all attachments are securely fitted. Regularly inspect parts for wear or damage and replace as needed to keep your mixer functioning smoothly.
Store your mixer and attachments in a clean, dry place.
Products That Help

KitchenAid Stand Mixer Attachment
- ✔ Dimensions: 8 x 6 x 4 inches
- ✔ Warranty: 1 year
- ✔ Cleaning: Wipe with damp cloth
KitchenAid Stand Mixer Attachment
The KitchenAid Metal Food Grinder attachment is a versatile addition to your stand mixer, perfect for grinding meats, vegetables, and more. It features multiple grinding plates and sausage stuffer tubes, making food prep efficient and clean. Pre-chilling the grinder helps maintain a neat, consistent grind, and its organized storage case ensures easy access.
Pros:
- Multiple grinding plates included
- Sturdy metal construction
- Easy to clean and store
- Compatible with all KitchenAid stand mixers
Cons:
- Sold separately from the mixer
- Requires pre-chilling for best results
Best for: Grinding meats, vegetables, and creating fresh foods
Not ideal for: For users needing a built-in grinder
Bottom line: Best for those wanting an efficient, durable food grinder attachment.
Frequently Asked Questions
Can I submerge the mixer in water for cleaning?
No, always wipe the mixer body with a damp cloth and avoid submerging electrical parts in water to prevent damage.
How often should I clean my KitchenAid stand mixer?
Clean your mixer after each use, especially if you’ve used it for sticky or food-prep tasks, to maintain hygiene and performance.
Are all attachments dishwasher safe?
Not all attachments are dishwasher safe. Check the manufacturer’s instructions for each attachment; generally, parts like the food grinder require hand washing.
What should I do if my mixer is not turning on?
Ensure it is plugged in securely, the outlet has power, and the safety switch is engaged. If problems persist, consult the troubleshooting section of the user manual.
Affiliate disclosure: As an Amazon Associate we earn from qualifying purchases. Prices and availability are accurate as of the time of publishing.