
To store frosting safely, keep it in an airtight container in the refrigerator for up to a week, ensuring it’s at room temperature before sealing to prevent condensation. When ready to use, let it sit at room temperature for 15-20 minutes, then re-whip with a mixer, adding a little milk if needed to restore smoothness. Proper storage and re-whipping help maintain its texture and flavor—continue to explore more tips for perfect frosting.
Key Takeaways
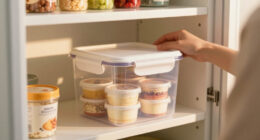
- Store frosting in an airtight container in the refrigerator for up to 7 days to prevent drying and odor absorption.
- Allow refrigerated frosting to reach room temperature, then re-whip with a mixer, adding small amounts of milk or cream if needed.
- Press plastic wrap directly onto the frosting surface before sealing to minimize air exposure and crusting.
- Check for spoilage signs before reuse, and always use clean utensils to avoid contamination.
- Re-whip frosting until smooth and fluffy, adding liquid gradually to restore ideal spreading or piping consistency.

Storing and re-whipping frosting correctly guarantees it stays fresh and maintains its ideal texture. Proper frosting preservation is essential if you want to enjoy your baked goods over several days or need to prepare frosting in advance. The key is to keep it at the right temperature and in an airtight container to prevent it from drying out or absorbing unwanted odors. When stored properly, frosting can last up to a week in the refrigerator. Before storing, ensure your frosting is at room temperature so it doesn’t develop condensation, which can lead to spoilage. If the frosting is already made and you’re not planning to use it immediately, transfer it into a clean, airtight container. Press a piece of plastic wrap directly onto the surface of the frosting to prevent air exposure, then seal the lid tightly. This method minimizes frosting preservation issues like drying or crusting over.
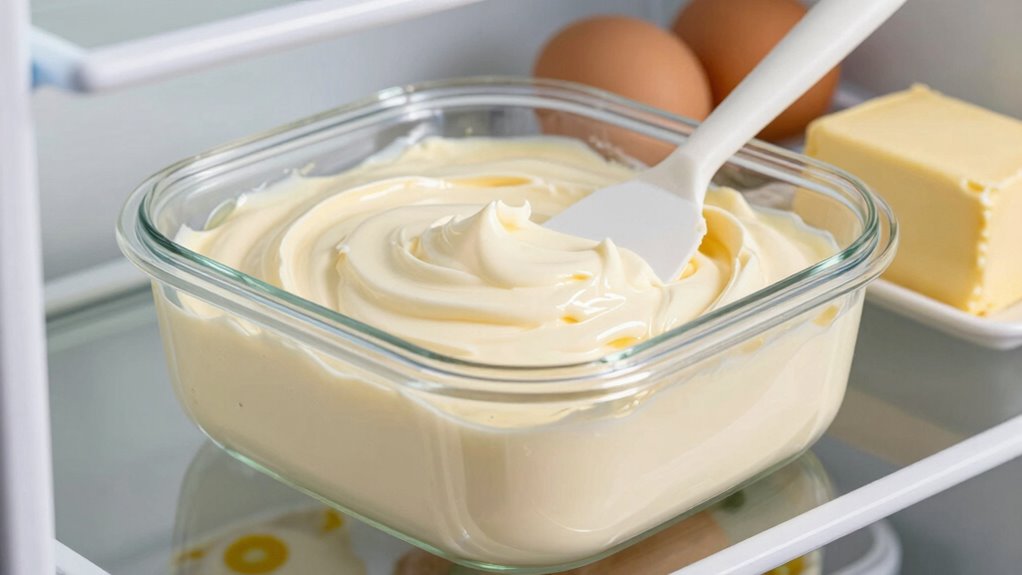
When you’re ready to use the stored frosting, you might notice it has become slightly stiff or less spreadable. That’s where texture restoration comes into play. To bring it back to a smooth, workable consistency, you’ll need to re-whip it. Start by removing the frosting from the refrigerator and letting it sit at room temperature for about 15-20 minutes. Then, give it a good stir with a spatula or whisk to loosen it up. Next, transfer the frosting to a mixing bowl and whip it on medium speed using a hand or stand mixer. Add a small splash of milk or heavy cream—just a teaspoon at a time—to help achieve a creamy, spreadable texture. Re-whipping not only restores the frosting’s smoothness but also affects the texture by reincorporating air, making it light and fluffy again.
If the frosting appears too runny after re-whipping, place it in the refrigerator for 10-15 minutes to firm up slightly, then re-whip for a few more seconds. Conversely, if it’s too stiff, a little more liquid will help. The goal is to reach a consistency that’s easy to spread or pipe without sagging or tearing. Remember, patience is key. Taking the time to properly store and re-whip your frosting ensures it maintains its best qualities, giving you a professional finish on your desserts. With these tips, you can confidently prepare frosting ahead of time, knowing it’ll stay fresh and be easy to work with whenever you need it.

GoodCook EveryWare Extra Large 12 inch Round Container 2 pack, BPA Free
- Size: 12-inch round container with lid
- Versatile Use: Stores and transports large food items
- Baked Goods: Perfect for cupcakes, brownies, cookies
As an affiliate, we earn on qualifying purchases.
As an affiliate, we earn on qualifying purchases.
Frequently Asked Questions
Can I Freeze Frosting for Long-Term Storage?
Yes, you can freeze frosting for long-term storage. Just transfer it to an airtight container or wrap it tightly to prevent freezer burn. When you’re ready to use it, thaw it in the fridge overnight and re-whip to restore its smooth texture. This works well for various frosting flavor variations, especially if you plan to use it for decorative piping techniques later. Just remember, freezing may slightly alter the frosting’s consistency.
How Do I Prevent Frosting From Drying Out?
To prevent frosting from drying out, you should always cover it tightly with plastic wrap or store it in an airtight container. This keeps moisture in and maintains the frosting’s consistency. If you notice ingredient variations, like butter or cream cheese, adjust the amount of liquid or add a small amount of milk. Regularly check your frosting and re-whip it if it starts to become stiff or dry.
Is It Safe to Reuse Leftover Frosting?
Yes, it’s safe to reuse leftover frosting if you follow proper food safety and storage tips. Store it in an airtight container in the refrigerator for up to a week. Before reusing, check for any signs of spoilage like an off smell or mold. Re-whip the frosting to restore its texture, and always use clean utensils. These storage tips guarantee your frosting remains safe and delicious for your next baking project.
What Types of Frosting Refrigerate Best?
You’ll find that buttercream and cream cheese frostings refrigerate best because they maintain their consistency and stay fresh longer. Use airtight storage containers to prevent moisture loss and keep the frosting from absorbing other fridge odors. Before redecorating, let the frosting come to room temperature and re-whip it to restore its smooth consistency. Proper storage guarantees your frosting stays delicious and safe for later use.
How Can I Fix Runny or Curdled Frosting?
If your frosting is runny or curdled, don’t worry—you can fix it by adjusting its consistency. First, try refrigerating leftovers for about 15-20 minutes to firm it up. If it’s still too soft, add a little more powdered sugar and gently mix until smooth. Remember, proper storage helps maintain frosting quality, making it easier to re-whip and achieve the perfect texture for decorating.

Hamilton Beach 6-Speed Electric Hand Mixer With QuickBurst and Bowl Rest
- Storage Case: Snap-on case for beaters and whisk
- Multiple Speed Settings: 6 speeds plus QuickBurst button
- Includes Attachments: 2 beaters and 1 whisk included
As an affiliate, we earn on qualifying purchases.
As an affiliate, we earn on qualifying purchases.
Conclusion
Now that you know how to store and re-whip frosting safely, you’ll never have to waste leftovers again. Imagine you made a batch for a birthday cake, but there’s some leftover frosting. Just cover it, refrigerate, and re-whip it before spreading your next masterpiece. With proper storage, your frosting stays fresh and smooth, ready for your next decorating adventure. So go ahead—save those leftovers and keep your frosting perfect every time!

Beautiful 3.5Qt Stand Mixer by Gourmias, Tilt-Head Electric Mixer with 12 Speeds, Stainless Steel Bowl, Compact Kitchen Mixer for Baking, Dough, Whipping and Mixing (Porcini Taupe)
- Powerful Motor with 12 Speeds: Precise mixing, beating, whipping, kneading
- Lightweight and Compact Design: Easy to store and handle
- Tilt-Head for Easy Access: Simplifies adding ingredients and changing attachments
As an affiliate, we earn on qualifying purchases.
As an affiliate, we earn on qualifying purchases.
Reynolds Kitchens Quick Cut Plastic Wrap, 225 Square Feet
- Product Type: Plastic Wrap with Slide Cutter
- Length: 225 Feet Long
- Width: 12 Inches Wide
As an affiliate, we earn on qualifying purchases.
As an affiliate, we earn on qualifying purchases.