
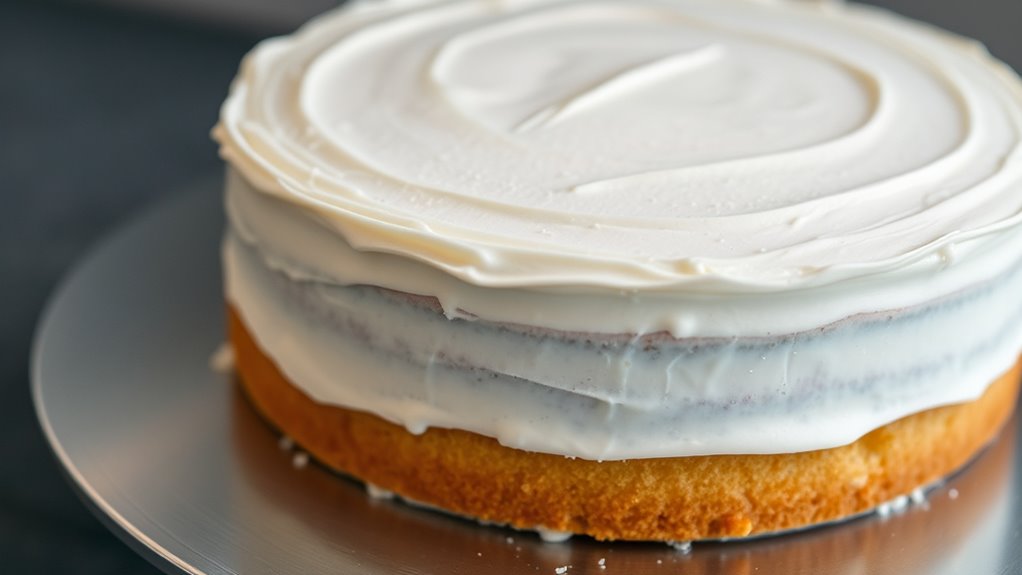
A crumb coat is a thin layer of frosting you apply to seal in crumbs and create a smooth surface for your cake. It helps your cake look professional by preventing crumbs in the final layer and providing a solid base for decorations. Proper application, chilling, and smoothing are key. If you’d like to learn more about perfecting your crumb coat and achieving bakery-quality results, keep exploring the essential tips and techniques.
Key Takeaways
- The crumb coat is a thin layer of frosting that seals in crumbs for a smooth final surface.
- It creates a professional, polished look by providing an even base for decorative layers.
- Applying and chilling the crumb coat prevents crumbs from showing through the final frosting.
- Proper smoothing and fixing imperfections during this step improve cake stability and appearance.
- The crumb coat simplifies decorating, ensuring a flawless, bakery-quality cake finish.
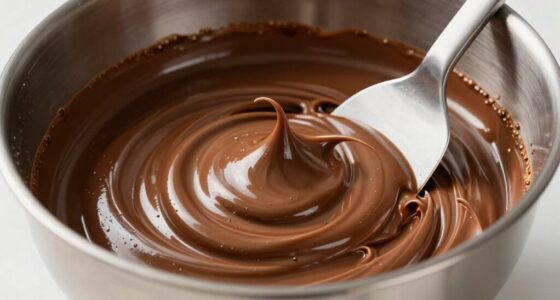
cake crumb coat frosting spatula
As an affiliate, we earn on qualifying purchases.
As an affiliate, we earn on qualifying purchases.
What Is a Crumb Coat and Why Does It Matter?
A crumb coat is a thin layer of frosting spread over a cake to trap loose crumbs and create a smooth surface for the final layer. It’s a vital step in cake decoration because it guarantees your finished look is clean and professional. Without this initial coat, crumbs can mix with your final frosting, making the surface look messy. When applying the crumb coat, you’re practicing basic frosting techniques that help you control the consistency and evenness of your icing. This layer acts as a foundation, making subsequent frosting layers easier to apply smoothly. It also helps improve the overall appearance of your cake, giving you a flawless canvas for decorative details. Mastering the crumb coat boosts your confidence and elevates your cake decorating skills. Additionally, understanding the importance of proper frosting techniques can significantly enhance the final presentation of your baked creations.
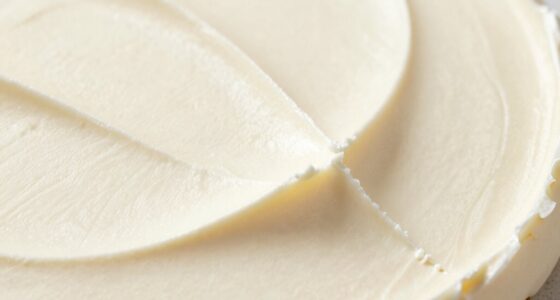
smooth cake decorating tools
As an affiliate, we earn on qualifying purchases.
As an affiliate, we earn on qualifying purchases.
How Does a Crumb Coat Help Your Cake Look Professional?
A crumb coat creates a smooth surface that immediately enhances your cake’s appearance, making it look more polished and professional. It also seals in crumbs, preventing them from showing through your final layer of frosting. This simple step makes a big difference in achieving a sleek, bakery-quality finish. Additionally, applying a crumb coat allows for easier upgrades and maintenance of your cake’s decoration, ensuring a clean and refined final look. Proper techniques and tools can further improve the overall presentation and durability of your decorated cake. Understanding net worth and the success journey of bakers can inspire you to elevate your cake decorating skills, much like how smart home devices enhance modern living through automation and seamless integration. Employing proper techniques can help you achieve consistent and professional results with each cake you decorate.
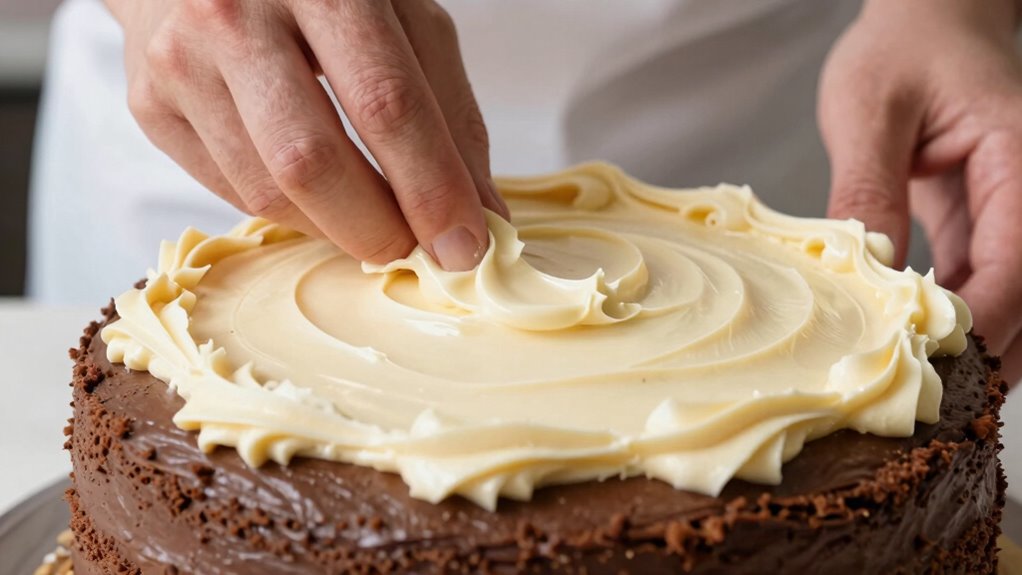
Smoothing Surface For Elegance
Since the crumb coat acts as a foundation, it helps create a smooth surface that looks professional and polished. This even layer minimizes crumbs and imperfections, making it easier to achieve a sleek finish. When applying fondant, a smooth surface is essential for flawless coverage, and knowing fondant tricks can make a big difference. A well-crumb-coated cake also allows you to focus on aesthetic details without distractions, enhancing the overall elegance. Additionally, a smooth base helps with flavor pairing by ensuring the cake’s surface is even, so fillings and toppings sit perfectly. Taking the time to smooth out your crumb coat sets the stage for a professional-looking cake that’s both beautiful and delicious. It’s the key to a refined, polished appearance. Incorporating cake decorating techniques can further elevate your final presentation. Proper layering and smoothing techniques contribute significantly to achieving that perfect, finished look. Being mindful of cake surface preparation can also improve the overall outcome and presentation of your decorated cake.
Sealing Crumbs Effectively
Applying a crumb coat isn’t just about creating a smooth surface; it also seals in crumbs and prevents them from showing through your final layer of frosting. This step is vital for professional-looking cake decoration because it guarantees a flawless finish. By sealing the crumbs effectively, you make sure your decorative frosting layers stay clean and smooth, avoiding messy or uneven appearances. Using proper frosting techniques, such as applying a thin, even layer and chilling the cake afterward, helps lock in crumbs securely. This process minimizes crumbs mixing into your final coat and makes subsequent layers easier to smooth out. Additionally, employing energy-efficient methods during the frosting process can contribute to more sustainable baking practices. For example, using a quality spatula helps spread the frosting more evenly and reduces waste. Incorporating sustainable baking practices can also improve overall efficiency and reduce environmental impact. Overall, sealing crumbs effectively sets the foundation for a polished, beautiful cake that looks as good as it tastes.
cake leveling and smoothing kit
As an affiliate, we earn on qualifying purchases.
As an affiliate, we earn on qualifying purchases.
When Should You Apply the Crumb Coat During Cake Prep?

Timing is key when it comes to applying the crumb coat, so you should do it after your cake layers are completely cooled and stacked but before adding the final layer of frosting. This ensures your cake maintains its structure and prevents crumbs from mixing into the final coat. Use this step to refine your baking techniques and set the stage for smooth frosting application. Applying the crumb coat at the right moment also allows the flavors to meld better, especially if you plan to incorporate flavor combinations like fruit preserves or flavored fillings. Waiting until your cake is properly cooled guarantees it won’t slide or shift during this process. Proper cooling is essential for achieving a stable and smooth crumb coat, helping to prevent cracks or uneven surfaces. Additionally, a well-timed crumb coat can improve the overall appearance and professional look of your cake, especially when combined with smart home tools that help maintain ideal conditions during baking and decorating. Incorporating temperature control devices can further optimize the environment for a flawless finish. Being mindful of baking environment factors, such as humidity and temperature, also contributes to better results.
professional cake frosting spatula
As an affiliate, we earn on qualifying purchases.
As an affiliate, we earn on qualifying purchases.
What Tools and Ingredients Do You Need for a Perfect Crumb Coat?

To achieve a smooth and even crumb coat, you’ll need a few essential tools like an offset spatula and a turntable. Choosing the right ingredients, such as a buttercream or ganache, also makes a big difference. With these tools and ingredients in hand, you’ll set yourself up for a flawless finish. Additionally, using smart contract technology can enhance the security and automation of your baking process, ensuring consistency in your cake decorations. Incorporating precision techniques can also help you apply the crumb coat more evenly and efficiently. Developing techniques for even application can further improve your overall cake aesthetic and presentation, especially when understanding filtration and airflow in your tools and environment. Proper equipment maintenance is also crucial to keep your tools in optimal condition, which ultimately contributes to a professional look.
Essential Tools Needed
You’ll need a few essential tools and ingredients to achieve a smooth and even crumb coat. A offset spatula is vital for spreading the frosting evenly across the cake’s surface, helping you achieve those sleek, professional lines. A turntable makes the process smoother, allowing you to rotate the cake easily while applying the coat. Pastry bags and piping tips can help with detailed work or smoothing out edges. For fondant techniques, a fondant smoother can be useful if you decide to incorporate fondant accents later. Keep your ingredients simple—good quality buttercream or frosting ensures a smooth application and enhances flavor combinations. Having the right tools and ingredients at hand guarantees a flawless crumb coat that forms a solid base for decorating and finishing touches. Power tools and heavy‑duty equipment can also be invaluable for tasks like cutting and shaping larger cake components or preparing decorative elements with precision to achieve a professional look.
Key Ingredient Choices
Choosing the right tools and ingredients makes all the difference in achieving a smooth, even crumb coat. Start with a sturdy offset spatula and a bench scraper to help you spread and smooth the frosting effectively. For the frosting itself, aim for the right consistency—should be thick enough to hold shape but soft enough to spread easily. If your frosting is too stiff, add a small amount of milk or cream; if too thin, mix in a bit more powdered sugar. Ingredient substitutions can help customize your crumb coat; for example, using buttercream or cream cheese frosting can affect texture and flavor. Using quality ingredients and adjusting for the proper frosting consistency ensures a professional-looking, seamless crumb coat that sets the stage for your final decoration.
How Do You Apply a Crumb Coat Step by Step?
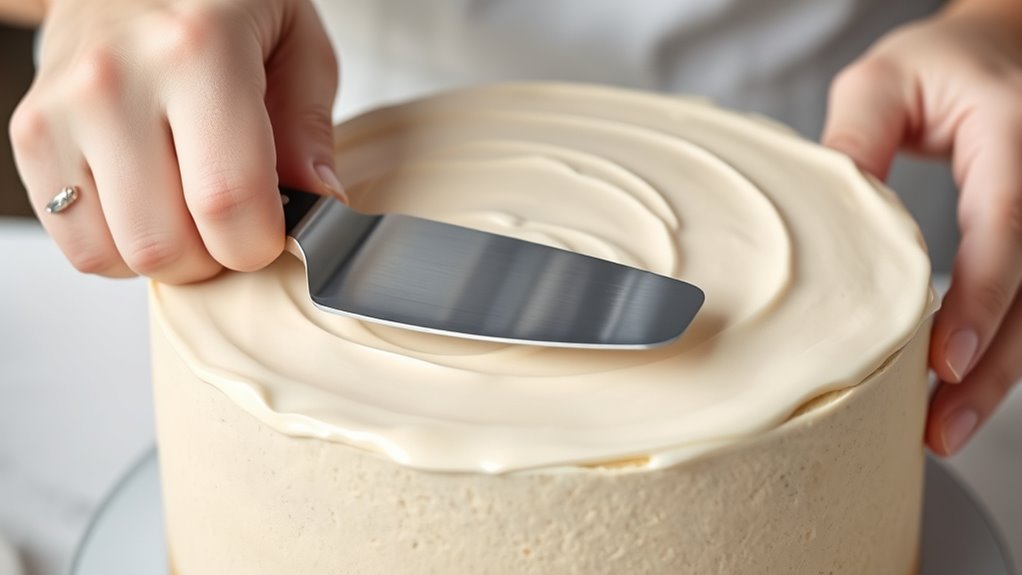
Applying a crumb coat is a straightforward process that helps create a smooth base for your final frosting layer. First, prepare your frosting and ensure your cake is crumb-free. Using a spatula, spread a thin layer of frosting over the cake, focusing on sealing in crumbs. Keep your strokes gentle and even, rotating the cake as needed. Chill the cake for about 30 minutes to set the coat. Remember, a good crumb coat enhances decorating techniques and allows flavors to meld better.
Applying a crumb coat creates a smooth, professional-looking cake base that helps flavors meld seamlessly.
- Use a bench scraper for smooth edges
- Keep your spatula at a slight angle for even coverage
- Work quickly to prevent the coat from melting or sliding
- Don’t overload with frosting; aim for a thin layer
- Chill between layers for a professional finish
How Can You Achieve a Smooth, Even Crumb Coat?

To get a smooth, even crumb coat, focus on spreading the frosting evenly with a spatula or knife, keeping your movements steady. Make sure to chill the cake between layers to set the frosting and prevent uneven textures. This combination helps create a flawless base for your final layer.
Proper Spreading Technique
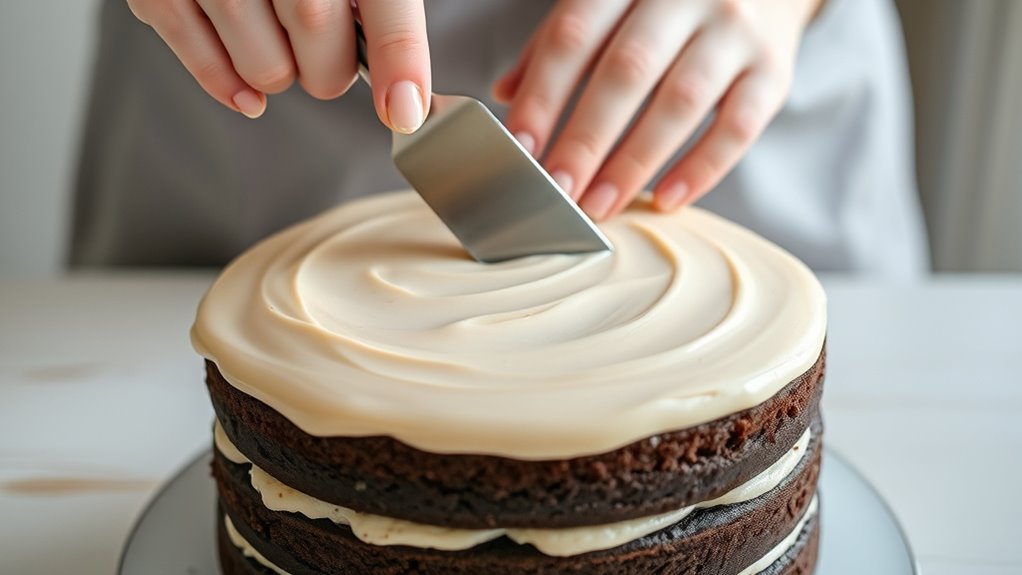
Achieving a smooth, even crumb coat starts with proper spreading technique. To assure even coverage, use a spatula or offset knife to apply the frosting in gentle, controlled strokes. Keep your spreading consistency consistent—neither too thick nor too thin—to prevent lumps or gaps. Work from the center outward, rotating the cake as you go, to distribute frosting evenly. Use a bench scraper or straight edge to smooth the surface, removing excess frosting. Remember, patience is key—small, deliberate movements yield the best results. Focus on maintaining steady pressure and a uniform motion. This careful approach guarantees a flawless, professional-looking crumb coat that creates a perfect base for your final layer.
- Maintain steady, even pressure
- Use a gentle, sweeping motion
- Work from the center outward
- Keep spreading consistency uniform
- Rotate the cake for even coverage
Chilling Between Layers
Chilling the cake between layers is vital for creating a smooth, even crumb coat. When you chill, it firms up the icing, making it easier to apply subsequent layers with precision. This step also helps you perfect your icing techniques, preventing crumbs from mixing into the fresh coat. As you add each layer, chilling ensures the icing stays in place, which is essential for achieving a flawless finish. Additionally, chilling between layers allows you to focus on flavor layering, as you can add fillings or decorative elements without disturbing the base coat. Once chilled, your crumb coat will be firm and stable, giving you a clean surface to work with for the final icing. This simple step considerably improves your cake’s overall appearance and texture.
What Are Common Mistakes When Applying a Crumb Coat—and How Can You Avoid Them?

Applying a crumb coat might seem straightforward, but common mistakes can easily ruin your cake’s surface and make decorating more difficult. One typical crumb coat pitfall is applying it too thick, which causes uneven edges and excess crumbs. Not smoothing it out properly can lead to visible flaws that are hard to fix later. Rushing the process may result in an uneven layer that doesn’t set well. Additionally, neglecting to chill the cake after applying the crumb coat can cause it to slide or crack. To avoid these issues, focus on spreading a thin, even layer and smoothing it carefully. If you encounter a problematic crumb coat, remember that fixing crumb coat flaws by gently scraping and reapplying is often simple but essential for a polished finish.
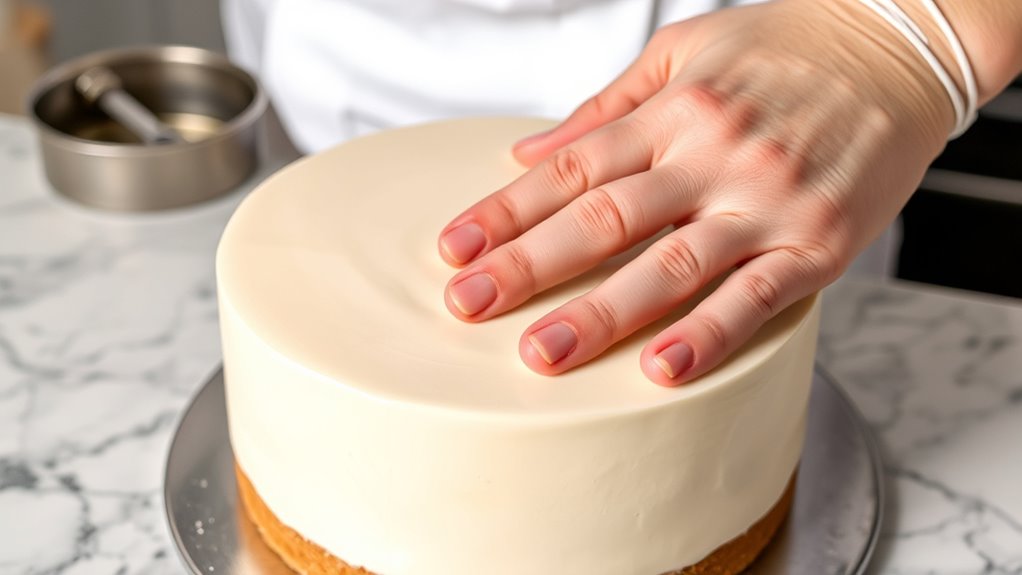
How Do You Chill and Set the Crumb Coat Properly?

Once you’ve spread your crumb coat evenly, the next vital step is to chill the cake to set the layer properly. Placing it in the fridge for about 30 minutes to an hour allows the thin layer of frosting to firm up, creating a solid base for the final coat. This is an essential baking tip because it prevents crumbs from mixing into your smooth top layer. Use a level surface to keep the cake steady. Proper chilling also enhances flavor pairing, as a well-set crumb coat helps preserve the cake’s moisture and taste. Avoid rushing this step; patience ensures a clean, professional look. Once chilled, the crumb coat becomes a sturdy foundation, making the final decoration process much easier and more polished.
What’s the Next Step After the Crumb Coat Before Final Decoration?

After your crumb coat has set and the cake is ready, the next step is to apply the final layer of frosting. This layer should be smooth and even, setting the stage for fondant smoothing or decorative piping. Use a bench scraper or offset spatula to achieve a flawless surface. If you’re adding fondant, guarantee the frosting is perfectly smooth to prevent bumps or air bubbles. For decorative piping, practice steady, controlled movements to keep lines crisp and clean. Remember to chill the cake briefly if needed, so the final coat firms up. Properly finished frosting allows your decorations to look professional and polished.
Applying a smooth, even final coat ensures professional-looking cake decorations.
- Achieve a smooth surface for fondant smoothing
- Guarantee even frosting thickness
- Prevent air bubbles or bumps
- Create a stable base for piping
- Maintain a chilled, firm surface
How Can You Fix Common Crumb Coat Problems Quickly?
While a smooth final coat can make your cake look professional, it’s common to encounter issues with the crumb coat that need quick fixes. If your crumb coat is uneven or shows crumbs, don’t panic. You can use a hot spatula or bench scraper to gently smooth out imperfections and reapply a thin layer of frosting. Chilling your cake for 15-30 minutes helps set the crumb coat, making it easier to fix problems. For cracks or air bubbles, carefully fill them with a small amount of frosting and smooth with a spatula. Remember, patience is key in cake decorating.
| Issue | Quick Fix | Result |
|---|---|---|
| Crumbs showing | Reapply a thin layer, chill | Flawless surface |
| Cracks | Fill with frosting, smooth | Seamless finish |
| Air bubbles | Poke and smooth out | Even texture |
| Uneven surface | Use a hot spatula to smooth | Professional look |
Frequently Asked Questions
Can You Skip the Crumb Coat and Still Get a Professional Look?
You can skip the crumb coat, but it might jeopardize your cake’s aesthetics and overall finish. The crumb coat helps seal in crumbs, creating a smooth, professional look, especially with intricate designs or fondant. Using proper baking techniques, including the crumb coat, ensures your cake’s surface is even and polished. Without it, you risk visible crumbs and uneven textures, making it harder to achieve that flawless, bakery-quality appearance.
How Thin Should the Crumb Coat Layer Be?
Ever wondered how to get that smooth, professional finish? Keep your crumb coat icing thickness just enough to create a thin, even layer—roughly 1/8 inch. The coating consistency should be smooth but not runny, making it easy to spread without excess. This thin layer seals in crumbs, preventing them from showing through your final coat. Wouldn’t you agree that a perfect crumb coat sets the stage for a flawless cake?
What Types of Icing Are Best for a Crumb Coat?
You should use buttercream with a firm, but spreadable consistency for your crumb coat, ensuring it’s not too soft or runny. This helps create a smooth surface and promotes fondant adhesion. Avoid overly stiff icing, which can crack, or too soft, which can slide off. A well-balanced buttercream crumb coat locks in crumbs and provides a perfect base for decorating, making your cake look professional and polished.
How Long Should You Wait Before Applying the Final Coat?
Think of it like waiting for a dial-up connection to stabilize—you should wait about 30 minutes after applying your crumb coat before adding the final layer. This allows the icing consistency to set and the cake to cool down, preventing cracks or slipping. Rushing this step can ruin your smooth finish, so patience guarantees your final coat goes on flawlessly, making your cake look professionally done.
Does the Temperature of the Cake Affect the Crumb Coat Process?
Yes, the temperature of your cake affects the crumb coat process. You want the cake to have temperature stability during cake cooling to prevent melting or sliding of the frosting. If your cake is too warm, it can cause the crumb coat to become too soft or uneven. Allow your cake to cool completely in a stable environment before applying the crumb coat, ensuring a smooth, professional finish.
Conclusion
Mastering the crumb coat can elevate your cake decorating skills. Did you know that a proper crumb coat reduces overall decorating time by up to 30%? By applying it carefully and chilling thoroughly, you’ll achieve a smooth, professional finish that impresses every time. Keep practicing, avoid common mistakes, and you’ll turn simple cakes into stunning creations. Remember, patience and attention to detail are your best tools for bakery-quality results every time.