
To achieve clean piping lines, focus on controlling your hand pressure. Use a steady, even grip, and adjust the pressure gradually to avoid squishing or leaving gaps. Keep your hand relaxed and maintain consistent pressure throughout your push or squeeze. Rest your hand lightly on the surface for stability, and practice slow, deliberate motions. If you keep refining this technique, you’ll master the art of perfect pipes—discover the full tips ahead.
Key Takeaways
- Maintain a steady, even grip on the piping tool to ensure consistent hand pressure during application.
- Adjust pressure gradually to avoid surface scratches or uneven lines, finding the right balance for clean results.
- Keep your hand relaxed and supported lightly on the surface for stability and control.
- Practice slow, deliberate strokes to develop a steady hand and improve piping precision.
- Regularly check and fine-tune your pressure to maintain uniformity and professional-quality lines.
Why Hand Pressure Is Key to Clean Piping Lines
Have you ever wondered why applying proper hand pressure is essential when cleaning piping lines? The key lies in maintaining piping consistency and ensuring effective removal of debris. When you control pressure carefully, you prevent damage to the piping’s surface and avoid uneven cleaning. Too much pressure can cause scratches or deformations, while too little may leave residues behind. By mastering pressure control, you achieve a smooth, uniform clean that enhances the piping’s longevity and performance. Proper hand pressure allows you to adapt to different pipe diameters and conditions, ensuring thorough cleaning without compromising the piping integrity. Developing an understanding of pressure application techniques can improve your overall cleaning effectiveness. Additionally, being aware of the materials involved helps in selecting the appropriate pressure and tools for each specific piping type. Recognizing the importance of consistent pressure is crucial for preventing damage and ensuring optimal results. Maintaining a steady pressure level helps in achieving a uniform finish and avoids costly repairs or rework. Ultimately, consistent pressure application is your best tool for achieving clean, well-maintained piping lines every time.
How to Pick the Right Piping Tip and Perfect Your Icing

Choosing the right piping tip is essential for achieving the perfect finish on your baked goods or decorated desserts. The key is matching your icing consistency to the tip—stiff icing works well with larger tips for bold designs, while softer icing is easier to pipe through smaller tips for delicate details. Piping accessories, like couplers and tips, help you switch designs easily and keep your work neat. Experiment with different tips, such as star, round, or petal shapes, to create various textures and effects. Remember, the right tip enhances your icing’s flow and precision. Keep your icing at the right consistency, and use quality piping accessories to guarantee smooth, clean lines every time. European cloud innovation can also inspire new techniques and tools for decorating.
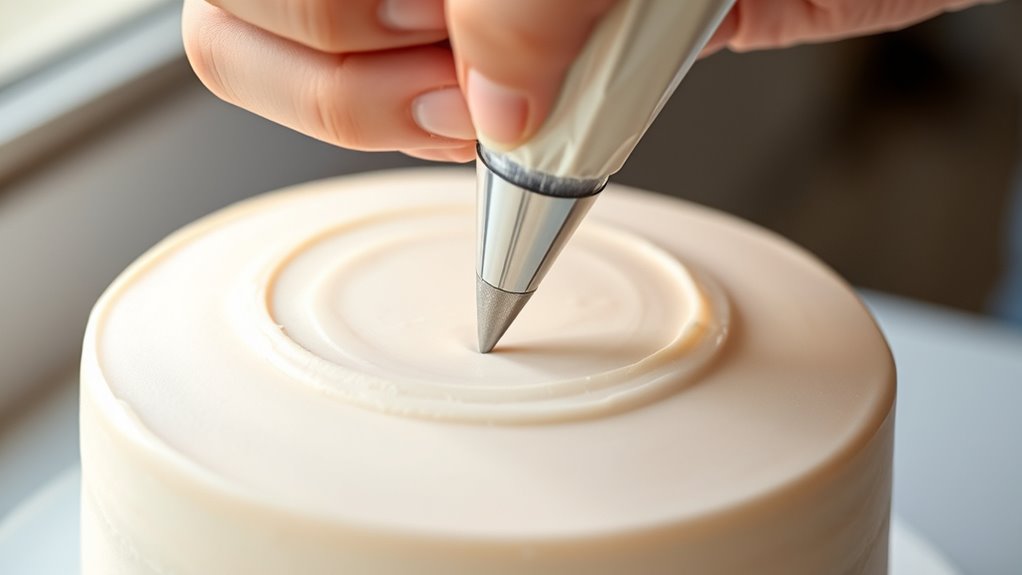
How to Develop a Steady Hand for Consistent Lines
Ever wonder how some decorators achieve perfectly straight, smooth lines every time? It all comes down to controlling your piping speed and maintaining consistent icing. To develop a steady hand, start slow, focusing on even, controlled movements. Rushing can cause waviness or uneven lines, so keep your pace steady. Make sure your icing consistency is just right—thick enough to hold shape but soft enough to pipe smoothly. Practice tracing lines on parchment, gradually increasing your confidence. Keep your hand relaxed, resting it lightly on the surface for stability. Consistent piping speed prevents sudden jerks, and adjusting icing consistency helps maintain a flow that’s easy to control. Additionally, mindful technique and awareness of your hand position can contribute to better control. Developing a steady hand through regular practice can improve your line quality and overall piping precision. Incorporating proper technique awareness can make a significant difference in achieving cleaner lines, and consistent practice will help your hand become steadier, leading to cleaner, more professional-looking lines every time. For best results, consider focusing on your piping grip to enhance your control and reduce fatigue.
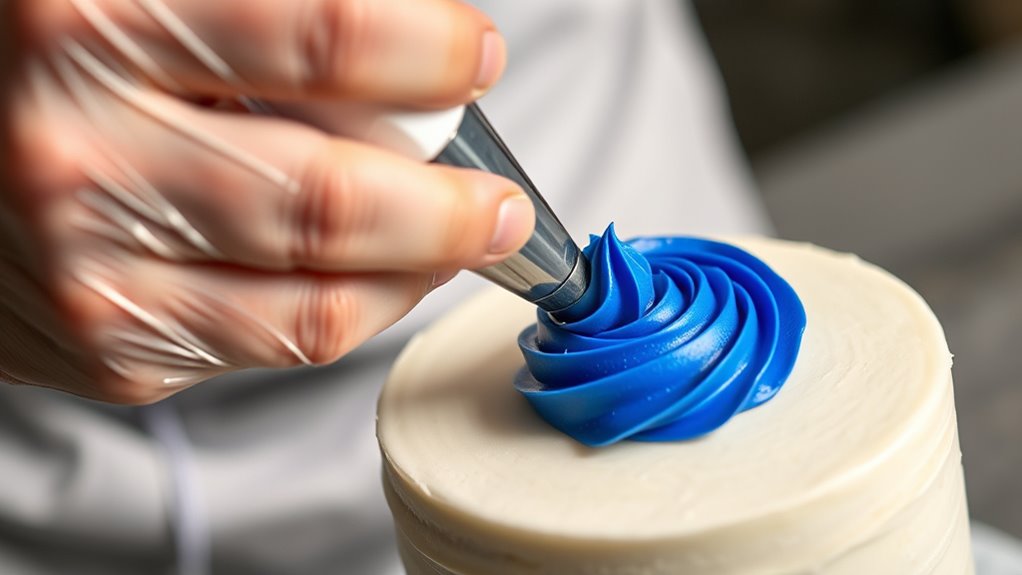
Master the Hand Pressure Technique in Piping
Mastering hand pressure is essential for achieving consistent piping results. To do this, focus on controlling your piping pressure, which directly impacts the icing control and the smoothness of your lines. Apply gentle, even pressure on the piping bag, maintaining a steady grip throughout. Too much pressure causes uneven lines and mess, while too little can result in thin, inconsistent icing. Practice adjusting your pressure gradually to find the right balance that produces clean, uniform lines. Keep your hand steady and use your wrist for small, controlled movements. Remember, consistent piping pressure helps you maintain icing control, resulting in professional-looking designs. With regular practice, you’ll develop a feel for the right pressure, making your piping more precise and effortless. Additionally, practicing on different piping techniques can help improve your overall control and consistency.
Common Piping Mistakes and How to Fix Them

Many common piping mistakes can cause leaks or poor flow, but you can rectify them with the right approach. Recognizing errors early helps you apply effective correction strategies quickly. Understanding these issues saves time and ensures your piping system functions smoothly. Consulting professional guidance from experienced plumbers or reliable resources can further prevent costly errors and ensure optimal performance. Additionally, paying attention to proper pipe fitting techniques can significantly reduce the risk of future issues. Incorporating auditory processing strategies can assist in diagnosing and addressing certain piping issues by improving listening and troubleshooting skills, ultimately leading to more accurate problem resolution. Moreover, inspecting ventilation considerations can help prevent moisture buildup and related complications in your piping system. Being aware of system design principles can also help you identify potential problem areas before they develop into major issues.
Common Piping Errors
Incorrect piping is a common source of problems in plumbing systems, leading to leaks, reduced efficiency, and costly repairs. Common errors include:
- Poor joint connections that cause leaks and compromise piping aesthetics. Using proper fitting techniques and ensuring secure connections can prevent these issues.
- Misaligned pipes disrupting decorating precision and causing stress on fittings. Proper alignment is essential to maintain system integrity.
- Inconsistent pipe support, leading to sagging or damage over time. Adequate support helps distribute weight evenly and prolongs pipe lifespan.
- Using incompatible materials, which can cause corrosion or failure. Material compatibility is vital for maintaining system durability.
- Neglecting proper installation procedures can result in long-term system issues and costly fixes. Following recommended guidelines ensures reliable operation and reduces the risk of future problems.
Effective Correction Strategies
To effectively address common piping mistakes, you need targeted correction strategies that focus on proper installation and maintenance. First, assess the issue carefully, prioritizing piping safety to prevent leaks or failures. Use the right piping tools—such as pipe wrenches, cutters, and sealants—to correct misalignments or loose fittings. For leaks, tighten connections securely but avoid over-tightening, which can cause damage. When fixing crooked or uneven pipes, realign sections carefully, ensuring proper support and stability. Regular inspections help spot issues early, reducing the risk of costly repairs. Remember, proper handling and maintenance of piping tools ensure safety and precision. Additionally, understanding power tool safety and proper setup can significantly improve the accuracy and efficiency of your repairs. Proper installation techniques are essential to prevent future issues and prolong the lifespan of your piping system. Employing material compatibility considerations ensures that the chosen pipes and fittings are suitable for their intended use, reducing the likelihood of corrosion or failure. Incorporating proper support and bracing can further prevent misalignments and system stress. Using quality materials not only enhances durability but also simplifies correction processes when adjustments are needed. Consistently applying these correction strategies keeps your piping system efficient, safe, and durable over time.
Tips for Perfect Piping Results Every Time

To achieve perfect piping results every time, focus on applying consistent pressure throughout your work. Using proper piping techniques helps create clean, even designs and prevents mistakes. Mastering these points guarantees your piping turns out professional and polished.
Consistent Pressure Application
Have you ever wondered why your piping looks uneven or messy? The key is maintaining consistent pressure application. When you focus on pressure control, your piping becomes more uniform. To achieve this, keep these tips in mind:
- Use steady, even pressure throughout each stroke.
- Practice gradual pressure increases for smooth lines.
- Keep your hand steady to prevent sudden pressure shifts.
- Regularly check your piping consistency and adjust as needed.
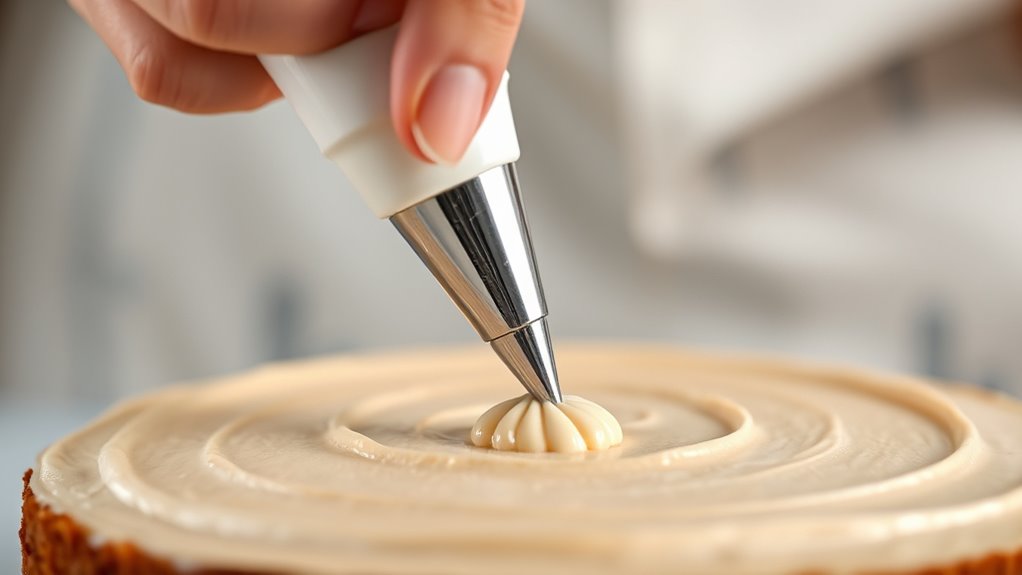
Proper Piping Technique
Achieving perfect piping results hinges on mastering proper technique, which guarantees smooth and uniform lines every time. You should focus on controlling your piping speed; steady, consistent movement helps maintain even lines. Avoid rushing, as this can cause uneven icing flow and messy edges. Additionally, ensure your icing consistency is just right—too stiff, and it’s hard to pipe smoothly; too runny, and it won’t hold its shape. Keep your piping bag steady, applying gentle, consistent pressure, and release gradually at the end of each stroke. Practicing slow, deliberate movements will help develop muscle memory for even, clean lines. With attention to piping speed and icing consistency, your piping technique will improve, resulting in professional-looking decorations every time.
Frequently Asked Questions
Can Hand Pressure Be Adjusted for Different Piping Materials?
Yes, you can adjust hand pressure for different piping materials by considering material flexibility and pressure calibration. Softer, more flexible materials require gentler pressure to avoid damage, while sturdier materials can handle more pressure. Practice calibrating your hand pressure based on the pipe’s flexibility, ensuring clean lines without compromising the integrity of the piping. This approach helps you achieve precise, professional results across various piping materials.
What Safety Measures Should Be Taken When Piping With Hand Pressure?
Did you know that improper piping can cause accidents in up to 30% of construction sites? When piping with hand pressure, always wear protective gear like gloves and goggles to shield against potential splashes or debris. Use pressure regulation tools to maintain safe levels, preventing sudden bursts. Stay alert, follow safety protocols, and double-check your equipment to guarantee a secure, accident-free piping process.
How Does Ambient Temperature Affect Piping Pressure Control?
Ambient temperature profoundly impacts piping pressure control because temperature fluctuations can cause the material to expand or contract. When it gets warmer, pressure tends to increase, making regulation more challenging. Conversely, cooler temperatures may reduce pressure. You should monitor environmental conditions closely and adjust pressure regulation accordingly to prevent leaks or pipe damage. Properly accounting for ambient temperature helps maintain consistent pressure and ensures safe, efficient piping operations.
Are There Ergonomic Tools to Reduce Hand Fatigue During Piping?
Yes, ergonomic tools can greatly reduce hand fatigue during piping. Look for ergonomic piping tools like padded grip wrenches, lightweight pipe cutters, and adjustable pipe bliers designed to fit comfortably in your hand. These tools help you maintain better control, reduce strain, and prevent fatigue during prolonged work. Investing in ergonomic piping equipment ensures you work more efficiently and comfortably, minimizing discomfort and boosting your overall productivity.
How Long Does It Typically Take to Master the Hand Pressure Technique?
Mastering the hand pressure technique usually takes a few weeks of consistent practice, but it varies based on your skill development. You’ll notice improvement as you develop muscle memory and gain confidence in controlling pressure. To speed up the process, focus on steady, even pressure and practice regularly. With dedication, you’ll see results faster, and soon, clean, precise lines will become second nature in your piping work.
Conclusion
Now that you’ve got the hand pressure trick down, your piping will look as flawless as a Renaissance masterpiece. Remember, practice makes perfect—think of it as your own personal scriptorium. Keep experimenting with tips and steady hands, and soon you’ll be creating beautiful, clean lines effortlessly. Don’t fret if it takes a few tries—every great chef started somewhere, even Michelangelo with his chisel. Happy piping!