
To create chocolate curls and shavings without breaking, make sure your chocolate is properly tempered for flexibility and shine. Keep it at the right temperature—around 88-90°F for dark chocolate—and work quickly while shaping. Handle delicate decorations gently with tweezers or a small spatula, and avoid applying too much pressure. Rewarm the chocolate slightly if it becomes too firm. With these tips, you’ll master smooth, break-free garnishes—learn more to perfect your technique.
Key Takeaways
- Ensure chocolate is properly tempered to maintain flexibility and prevent cracking during shaping.
- Work on a cool, smooth surface and spread chocolate thin for easier curling and shaving.
- Use gentle, controlled pressure with tools like a bench scraper or vegetable peeler to avoid breakage.
- Keep chocolate at the correct temperature, reheating slightly if it becomes too firm.
- Handle delicate decorations carefully with tweezers or small spatulas for precise placement and minimal breakage.
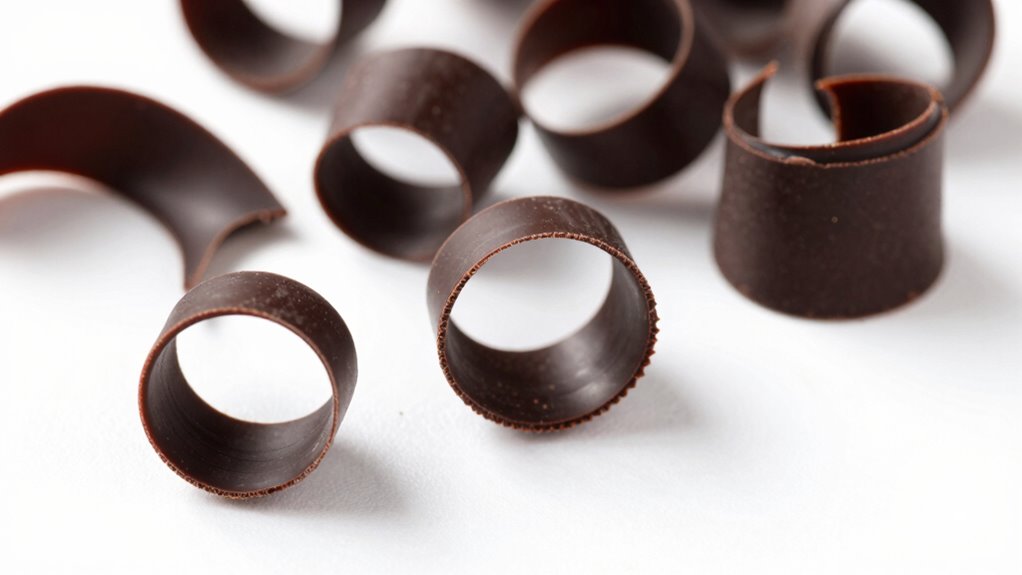
Chocolate curls and shavings add an elegant touch to desserts, elevating their appearance and flavor. To achieve perfect curls and shavings without breaking, you need to master the art of chocolate tempering and garnishing techniques. Proper tempering ensures your chocolate has the right sheen and firmness, making it easier to mold into beautiful curls without cracks or breakage. When you temper chocolate correctly, it becomes glossy, smooth, and stable at room temperature, which is essential for creating delicate garnishes that hold their shape.
Start by melting your chocolate gently using a double boiler or microwave, taking care not to overheat. Then, cool it down to the ideal tempering temperature—around 88-90°F (31-32°C) for dark chocolate. During this process, you’ll want to stir constantly to promote even heat distribution. Once tempered, your chocolate will be ready for shaping. If you’re making curls, pour the tempered chocolate onto a cool, smooth surface like a marble slab, spreading it thin with an offset spatula. Allow it to set slightly before using a bench scraper or a sharp knife to create curls by gently scraping underneath. For shavings, hold the chocolate block at an angle and carefully shave with a vegetable peeler or paring knife, applying gentle pressure. This method produces thin, uniform shavings that won’t snap or crumble.
Garnishing techniques play an essential role in how your chocolate decorations turn out. For example, if you want large, elegant curls, work quickly before the chocolate cools and hardens completely. Keep your tools and chocolate at the right temperature to prevent cracking. When you’re ready to garnish, gently lift the curls or shavings and place them carefully on your dessert. Use tweezers or a small spatula for precise placement, avoiding unnecessary pressure that could cause breakage. If your chocolate becomes too firm to work with, gently rewarm it to the proper temperature, ensuring it remains glossy and pliable. Additionally, understanding the importance of temperature control in chocolate tempering is key to achieving stable, beautiful decorations.
Practicing these techniques will boost your confidence and help you create stunning, break-free chocolate garnishes. Remember, patience and the right temperature are key. With a steady hand and a good understanding of chocolate tempering and garnishing techniques, you’ll be able to craft beautiful, stable chocolate curls and shavings that add a sophisticated finish to any dessert.
Frequently Asked Questions
Can I Use White Chocolate for Curls and Shavings?
Yes, you can use white chocolate for curls and shavings. It’s a great alternative if you prefer a lighter color or flavor. Just keep in mind that white chocolate melts faster and can be more delicate, so storing chocolate curls properly is essential to prevent melting or breaking. For best results, work with slightly cooled white chocolate and store your curls in a cool, dry place to maintain their shape.
What’s the Best Temperature for Tempering Chocolate?
The best temperature for tempering chocolate is like a dance between 88°F and 91°F for dark chocolate, 86°F to 88°F for milk, and 84°F to 86°F for white chocolate. You need precise temperature control to achieve the perfect chocolate consistency, ensuring it melts smoothly without seizing. Use a thermometer to monitor closely, and work quickly to keep the chocolate shiny and workable for beautiful curls and shavings.
How Long Do Chocolate Curls Stay Fresh?
Chocolate curls stay fresh for about 1 to 2 days if stored properly. To extend their shelf life, keep them in an airtight container at a cool, dry place away from humidity and direct sunlight. Storage tips are essential—you want to prevent melting or blooming. If stored correctly, they’ll maintain their appearance and texture longer, ensuring your desserts look beautiful and taste delicious for as long as possible.
Can I Make Curls With Melted Chocolate?
Did you know that about 70% of chocolate connoisseurs prefer using tempered chocolate for curls? You can’t make perfect curls with melted chocolate because it’s too soft and won’t hold its shape. Instead, try using cooled, slightly hardened chocolate, following proper storage tips to prevent melting. Incorporate creative chocolate flavor combinations, like dark and orange, for stunning garnishes. Proper handling guarantees your curls stay beautiful and intact.
Are There Alternative Tools for Shaping Chocolate?
Yes, there are alternative tools for shaping chocolate. You can use silicone molds, which offer flexibility and precision for creating detailed edible decorations. Metal or plastic molds also work well, especially for larger shapes. For delicate curls and shavings, try using a vegetable peeler or a sharp knife against a chilled block of chocolate. These methods expand your chocolate mold options and enhance your edible decoration techniques, ensuring beautiful results without breaking or cracking.
Conclusion
Mastering the art of delicate chocolate curls and shavings elevates your desserts with effortless elegance. With gentle hands and a touch of patience, you’ll find that creating these refined garnishes becomes a subtle dance rather than a challenge. Embrace the process, and soon you’ll discover how the simplest techniques can transform your treats into truly sophisticated masterpieces. Remember, a little finesse goes a long way—your culinary creations will thank you for the understated grace.