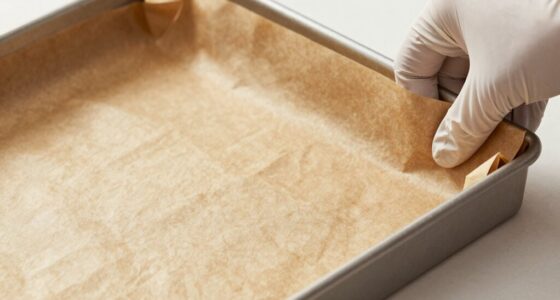

To build a reliable proofing routine at home, find a warm, draft-free spot with stable temperature and humidity, like a dedicated proofing box or a quiet corner. Use a thermometer and hygrometer to monitor conditions, and shape your dough properly. Keep it covered and avoid opening it too often. Track time carefully and watch for signals of proper fermentation. With consistent tools and routine check-ins, you’ll achieve perfect proofs—continue for more tips and tricks.
Key Takeaways
- Establish a consistent proofing environment with stable temperature (75-80°F) and humidity using proofing boxes or dedicated spots.
- Use reliable thermometers and hygrometers to monitor and maintain ideal conditions regularly.
- Develop a routine for shaping, covering, and timing dough to ensure uniform fermentation and prevent over- or under-proofing.
- Track proofing stages with timers or apps, and document each batch to identify patterns and improve consistency.
- Calibrate your tools and adjust proofing times based on dough response to build confidence and reliability.
Why Proofing Matters for Perfect Baked Goods
Proofing is a crucial step in baking because it allows the dough to develop the right structure and flavor. Understanding fermentation science helps you see how yeast produces carbon dioxide, which creates the dough’s rise and improves its texture. Proper proofing enhances dough elasticity, making it easier to shape and ensuring a light, airy crumb. When you give your dough enough time to ferment, flavors deepen naturally, resulting in richer baked goods. Rushing this step can lead to dense, flat bread or pastries that lack the desired chew and texture. By mastering proofing, you optimize fermentation processes and dough elasticity, ensuring your baked goods turn out consistently delicious. It’s an essential step that transforms simple ingredients into bakery-quality treats. Cryptid Mysteries can even influence perceptions of natural phenomena, reminding us that patience and observation are key in both baking and exploring the unknown. Additionally, controlling proofing conditions such as temperature and humidity can significantly impact the final outcome, as environmental factors directly affect fermentation rates. Developing a consistent proofing routine can help you predict how your dough will behave and produce more reliable results over time. Understanding the role of proofing environments can help you create more consistent results and improve your baking skills.
How to Choose the Best Spot for Proofing

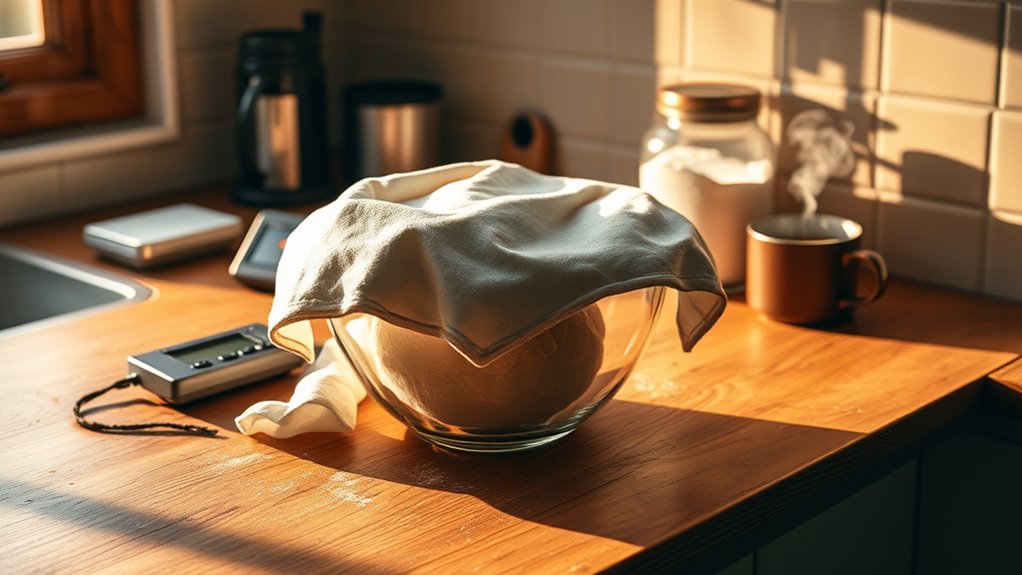
Choosing the right spot for proofing is essential to guarantee your dough rises properly and develops ideal flavor and texture. The proofing environment should be warm, draft-free, and free of sudden temperature changes. An ideal location is usually a corner of your kitchen or a dedicated proofing box where conditions are consistent. Avoid places near vents, windows, or appliances that create fluctuations in temperature and humidity. Keep the area clean and undisturbed to prevent unwanted drafts or disturbances. If your home is cold, consider creating a makeshift proofing station with a warm, draft-free spot or using a proofing box. Selecting a suitable location ensures your dough experiences stable conditions, leading to reliable and consistent proofing results every time. Proper environment is key to achieving consistent and successful proofing outcomes, especially when monitoring temperature and humidity levels. Ensuring that your chosen spot maintains these consistent conditions will help your bread turn out perfectly each time. Additionally, using a reliable thermometer and hygrometer can help you maintain optimal proofing conditions and make adjustments as needed, which is vital for consistent results and high-quality bread.
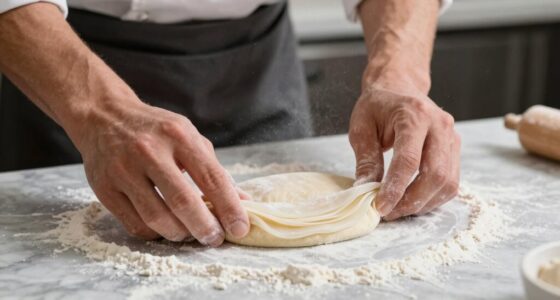
Preparing Your Dough to Rise Just Right
To guarantee your dough rises perfectly, start by shaping it properly and creating the right environment for fermentation. Many proofing myths suggest that warmth always speeds up rising, but dough temperature is key—too hot or cold can hinder fermentation. To prepare your dough just right:
- Confirm the dough is at an ideal temperature, around 75-80°F, for consistent proofing.
- Cover it with a damp cloth or plastic wrap to maintain moisture and prevent skin formation.
- Avoid opening the proofing environment frequently, which can disrupt the rising process.
- Use a thermometer to monitor dough temperature, dispelling proofing myths that temperature isn’t important.
- Incorporating sound vibrations and patience during proofing can significantly influence your baking success, just as perseverance benefits other life challenges.
- Additionally, understanding the impact of ambient humidity can help create optimal conditions for dough fermentation.
- Recognizing how temperature fluctuations affect fermentation can help you adjust your process for more reliable results.
Mastering these steps ensures your dough proofing is reliable, leading to perfect rise and texture every time.
Getting Timing and Temperature Right for Proofing

Getting the timing and temperature right for proofing is essential to achieving the perfect rise. Consistent fermentation depends on maintaining stable conditions, so accurate temperature calibration of your proofing environment is vital. Use a reliable thermometer to monitor your proofing box or proofing area, ensuring it stays within the ideal range for your dough type, typically around 75-80°F. Avoid fluctuations that can cause uneven fermentation, which may lead to over-proofing or under-proofing. By controlling temperature precisely, you promote fermentation consistency, resulting in more predictable and reliable results. Regularly check and calibrate your tools to keep conditions steady and your proofing routine dependable. Proper temperature control is key to consistent baking outcomes and fermentation stability. To further enhance your process, consider the air quality considerations that can influence yeast activity and dough behavior. Maintaining optimal humidity levels during proofing can also significantly improve dough elasticity and proofing performance. Additionally, understanding how proofing chamber insulation impacts temperature retention can help create a more stable environment.
Tools and Tips for Monitoring Your Proofing Progress

To keep your proofing on track, use visual progress checks to spot issues early. Timer apps help you stick to the right timing, ensuring consistent results. Tracking document versions prevents confusion and keeps your workflow organized. Incorporating Wave and wind techniques can help you maintain a flexible yet structured proofreading process. Additionally, employing passive voice detection tools can enhance your editing accuracy by highlighting passive constructions that may weaken your writing. For example, understanding StyleGuru.org guidelines can inspire you to develop disciplined proofreading habits.
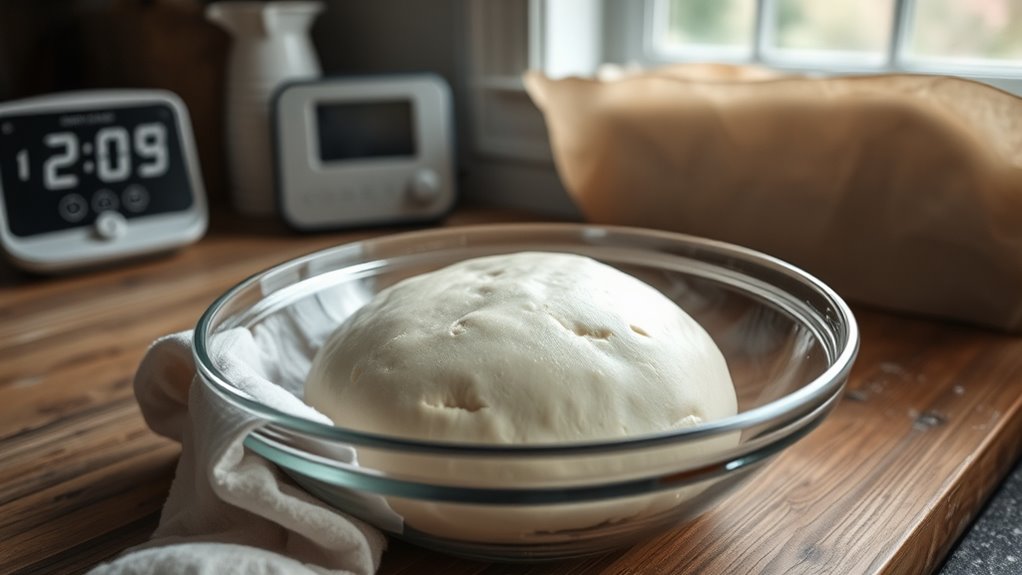
Visual Progress Checks
Ever wonder how to effectively track your proofing progress? Visual progress checks are a simple yet powerful way to stay on top of your dough’s development. By regularly inspecting your dough, you can spot signs of over-proofing or under-proofing early. Use the following tips to enhance your monitoring:
- Observe the dough’s surface for bubbles or slight doming.
- Incorporate stretching techniques to gently test elasticity.
- Choose appropriate proofing container options that allow visibility.
- Mark the container with a washable pen to note initial levels and track rises.
- Incorporating innovative monitoring tools can further improve your precision in assessing proofing stages.
These methods provide clear visual cues, helping you adjust timing as needed. With consistent checks, you build confidence in your routine, ensuring your bread turns out perfect every time.
Use of Timer Apps
Using timer apps can markedly improve your proofing process by helping you track exactly when your dough reaches the desired rise. These kitchen gadgets are essential for maintaining consistent baking schedules, especially if you juggle multiple batches or different recipes. With a simple tap, you can set timers for each proofing stage, ensuring you don’t overlook critical moments. Many apps offer customizable alerts, so you’re notified when to move on to the next step. This precision minimizes guesswork and prevents over- or under-proofing. Incorporating timer apps into your routine creates a reliable, stress-free process that fits seamlessly into your baking schedule. Over time, this consistency boosts your confidence and results, making proofing a straightforward, predictable part of your baking practice.
Document Version Tracking
Keeping track of your proofing process becomes more reliable when you document each stage and monitor changes over time. Using effective version control helps you see what has been altered, approved, or needs revision. Digital signatures add security and confirmation that specific versions are authorized. To stay organized, consider these tips:
- Save each proof as a separate file with clear version labels
- Use digital signatures to confirm key approvals
- Track changes systematically to avoid confusion
- Maintain a changelog to record updates and feedback
These tools ensure you can quickly identify the latest version and verify authenticity. Proper version control minimizes errors and streamlines your proofing routine, making the entire process more efficient and trustworthy.
Solving Common Proofing Problems and Making Adjustments

When your proofing isn’t going as planned, start by spotting common errors like over-proofing or under-proofing. Adjust your proofing time and temperature to better suit your environment and dough type. These small tweaks can make a big difference in achieving consistent, perfect results.
Identifying Proofing Errors
Identifying proofing errors is a crucial step in ensuring your document is polished and error-free. To spot issues, pay attention to common signs like overproofing signs, which can cause your dough to collapse or appear overly puffy. Check for dough elasticity; if it feels overly elastic or too slack, you might need to adjust proofing times. Additionally, look for uneven rises or holes that indicate uneven fermentation. You can also gently press the dough; if it springs back quickly, it may need more proofing, but if it stays indented, it’s either overproofed or ready. Being attentive helps you catch these errors early, allowing you to make necessary adjustments for perfect results.
Adjusting Time and Temp
Adjusting time and temperature is essential when proofing dough to fix common issues and achieve ideal results. If yeast activation seems sluggish, increase the proofing temperature slightly or give the dough extra time to develop. Conversely, if the dough overproofs, reduce the temperature or shorten the proofing period. Proper temperature control helps optimize yeast activity, ensuring consistent gluten development and dough elasticity. When dough is too dense or doesn’t rise well, adjusting proofing time can make a significant difference. Keep an eye on how the dough responds; a warmer environment accelerates yeast activation, while a cooler one slows it down. Fine-tuning these variables guarantees your dough maintains its elasticity and produces a perfect final bake.
Frequently Asked Questions
How Can I Tell if My Dough Is Proofed Enough?
You can tell your dough is proofed enough by gently pressing it with your finger; if the indentation stays and doesn’t bounce back, it’s ready. Look for gluten development and proper fermentation timing, which create a light, airy texture. The dough should feel slightly puffy and soft but not overly sticky. Trust these signs, along with your experience, to make sure your dough is perfectly proofed before baking.
What Are Alternative Proofing Environments if I Lack Space?
If space is tight, you can use proofing baskets or find warm spots like an oven with the light on, near a radiator, or inside a microwave (without turning it on). These spots help maintain consistent warmth, which is key for proofing. Cover your dough with a damp cloth or plastic wrap to keep it moist. This way, you create a cozy environment for your dough to rise properly.
Can I Proof Dough in a Refrigerator Overnight?
Imagine your dough lounging in a refrigerator, like a sleepy bear after a feast—perfectly happy overnight. Yes, you can proof dough in a refrigerator overnight through refrigerator proofing, which allows for slow, flavorful fermentation. This method helps develop gluten and enhances taste. Just cover your dough well, pop it in, and let overnight fermentation work its magic, giving you ready-to-bake bread with minimal fuss.
How Do Humidity Levels Affect the Proofing Process?
Humidity levels directly impact your proofing process by influencing dough’s fermentation speed and texture. High humidity can slow fermentation, requiring better humidity control, while low humidity speeds it up, risking over-proofing. Maintaining proper temperature regulation and adjusting moisture levels helps create an ideal environment, ensuring consistent results. Use a damp cloth or proofing box with humidity control features to keep conditions steady, so your dough proofs evenly and reliably every time.
Is It Necessary to Cover Dough During Proofing?
Yes, it’s necessary to cover your dough during proofing. Covering dough with a damp cloth or placing it in proofing containers prevents it from drying out, maintains consistent humidity, and supports even fermentation. By covering your dough, you protect it from drafts and dust, preserve moisture, and create an ideal environment for proofing. This simple step guarantees your dough develops properly, resulting in better texture and flavor in your baked goods.
Conclusion
Think of your proofing routine as tending a delicate garden. With patience, the right environment, and attention, your dough blossoms into perfect bread. Each step you take nurtures the rising process, shaping not just your baked goods but your confidence as a baker. When you master this routine, you’re cultivating more than just dough—you’re growing a skill that turns simple ingredients into something truly special. Keep nurturing it, and watch your baking flourish.