
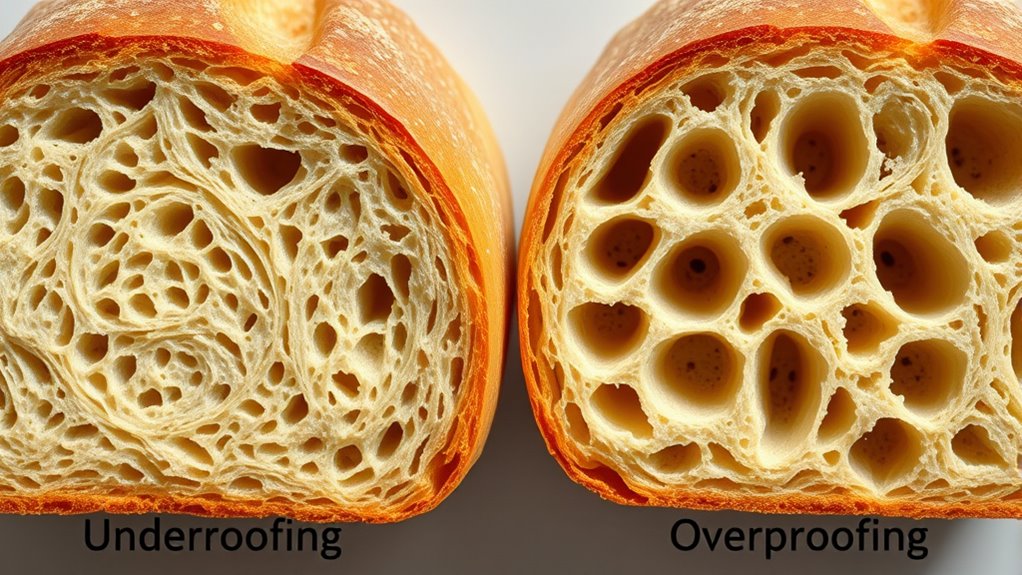
If your bread’s crumb is dense, tight, and feels flat, it’s likely underproofed, meaning it didn’t fully rise and has little gas. On the other hand, if your crumb looks irregular, large-holed, or the loaf is flattened, it’s probably overproofed, with excess fermentation causing a weak structure. Paying attention to these crumb clues helps you perfect your proofing timing. Keep going to uncover more tips on how to recognize and fix these common baking pitfalls.
Key Takeaways
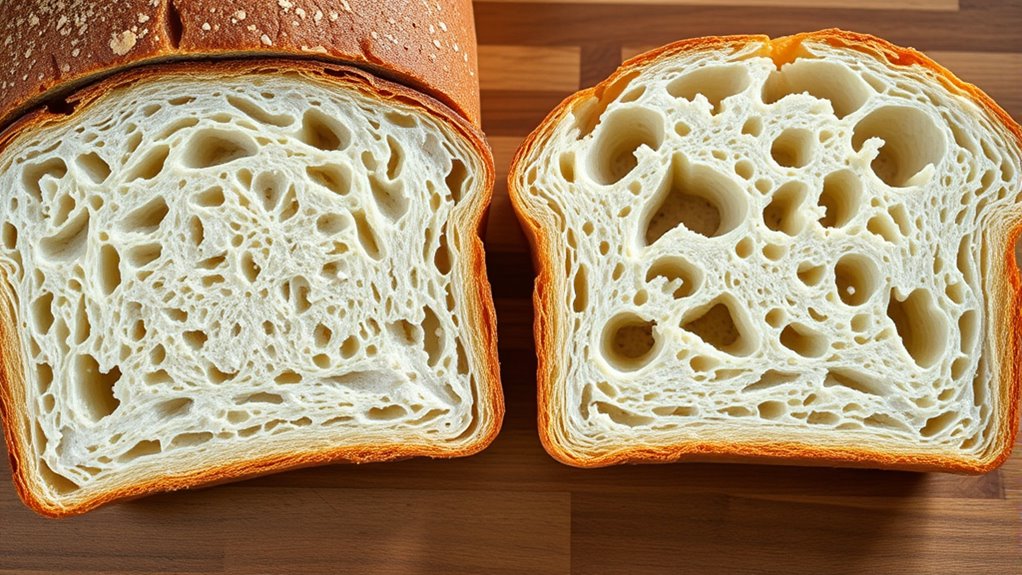
- Underproofed bread has a dense, tight crumb with small, uniform bubbles and feels heavy post-baking.
- Overproofed bread displays a loose, airy crumb with large, irregular holes and may collapse easily.
- Crumb elasticity is low in underproofed bread but more fragile and fragile in overproofed bread.
- The shape of overproofed bread often appears flattened or deflated, unlike the well-rounded underproofed loaf.
- Visual clues like crumb uniformity and hole size help distinguish between underproofed and overproofed bread.
What’s the Difference Between Underproofed and Overproofed Bread?

Understanding the difference between underproofed and overproofed bread is key to baking the perfect loaf. Fermentation speed plays a big role here—if the dough ferments too quickly, it can become overproofed, losing structure and developing weak gluten. Conversely, slow fermentation indicates underproofing, leaving the dough underdeveloped. Ingredient effects also matter; high sugar or fat content can slow fermentation, while warm temperatures speed it up. Overproofed bread often has a looser crumb and may collapse easily, while underproofed bread tends to be dense and tight. Recognizing these signs helps you control fermentation, ensuring your bread rises just right. Paying attention to how your ingredients and environment affect fermentation speed is essential for achieving that perfect, airy crumb. Additionally, understanding sound vibrations can influence fermentation patterns, helping bakers fine-tune the proofing process.
How Can You Tell If Your Bread Is Underproofed by Its Crumb?
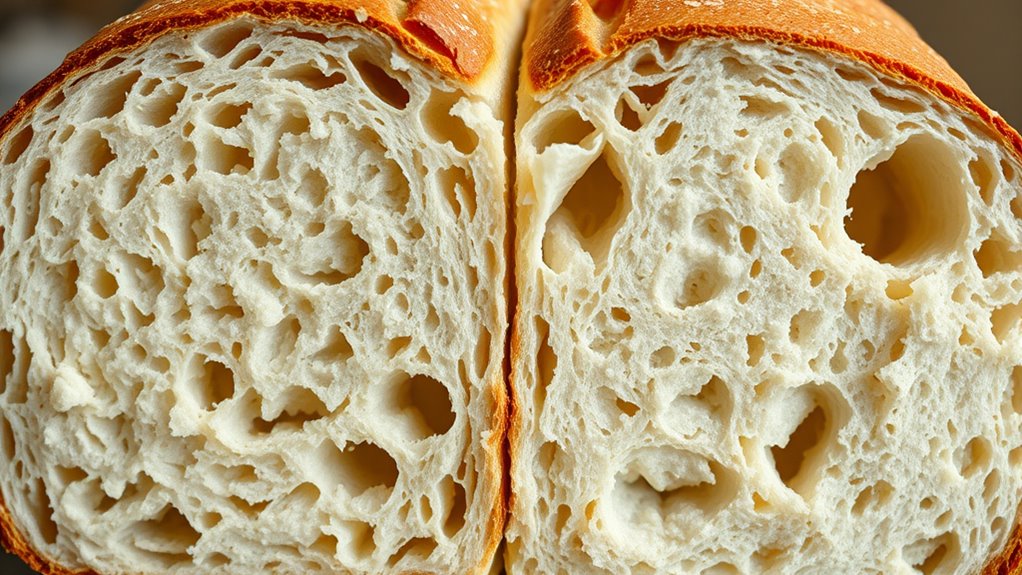
If your bread hasn’t fully risen or feels dense after baking, it’s likely underproofed. Underproofed bread often has a tight crumb because fermentation byproduct hasn’t developed enough, leading to less gas production. This results in lower crumb elasticity, making it feel firm and less chewy. When you slice it, the crumb may appear tight and uniform, lacking the open, airy structure of properly proofed bread. The dough didn’t ferment long enough, so the gluten network didn’t fully relax and expand. You might notice a dull or flat appearance too. To avoid this, guarantee your dough has doubled in size and gently press the surface; if it springs back quickly, it needs more proofing. Proper fermentation is key to achieving a light, airy crumb with good elasticity. Additionally, understanding the role of fermentation in bread making can help you better judge when your dough has reached the ideal proofing stage. Paying attention to proofing times and environmental factors like temperature can also influence the fermentation process and improve your results.
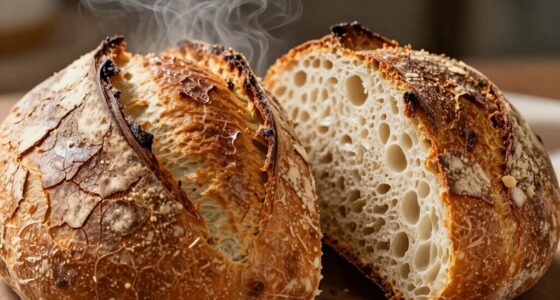
What Are the Visual Signs of Overproofed Bread?
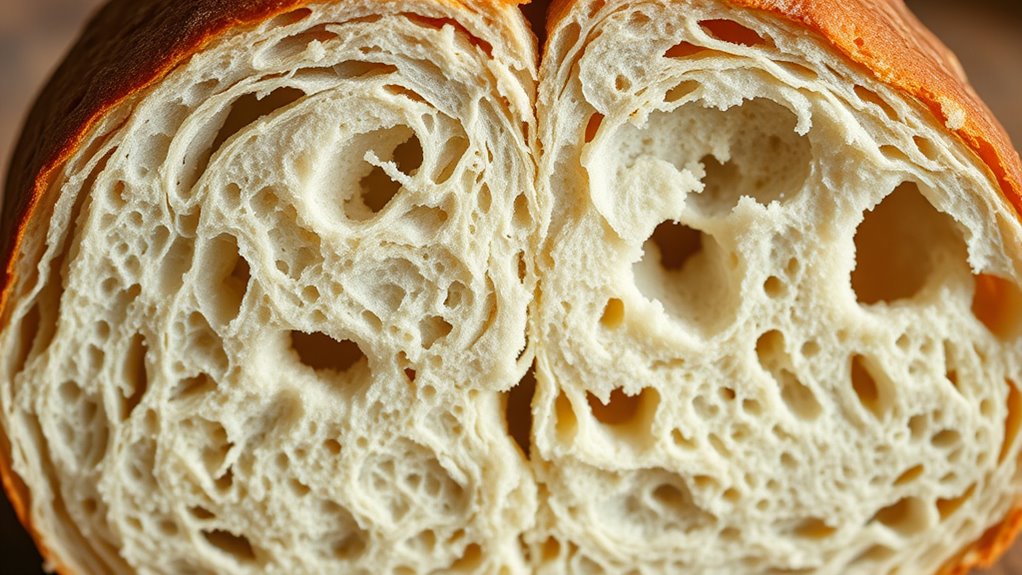
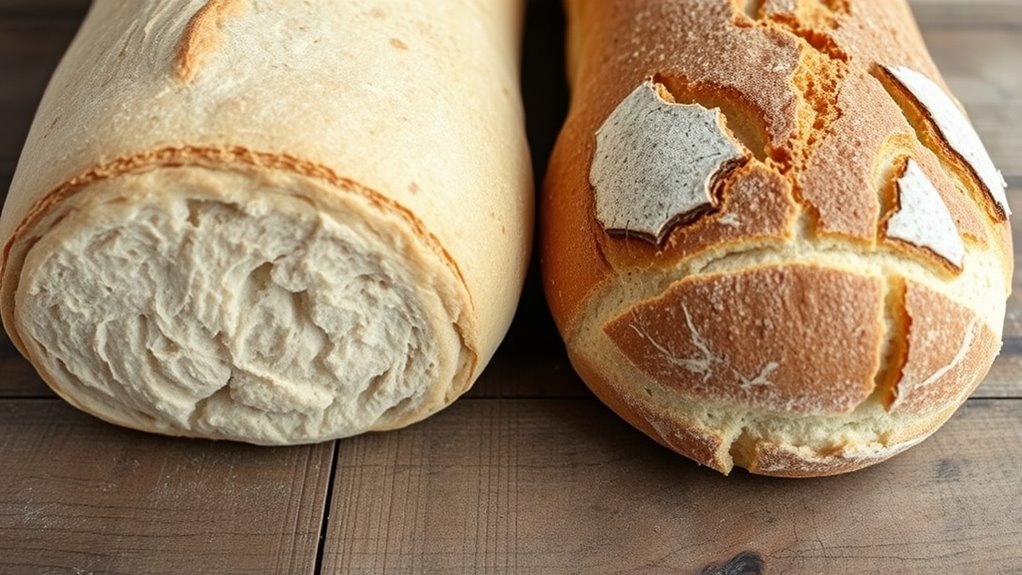
Have you noticed your bread looking overly deflated or flat after baking? This is a clear sign of overproofing. The crumb appearance often becomes overly open, with large, irregular holes that lack uniformity. Instead of a tight, springy texture, the crumb may feel loose and airy, almost like it’s collapsed. The crust contrast can also reveal overproofing: the crust might be duller or less crisp, sometimes showing excessive browning or even a soggy feel. Overproofed bread often exhibits a flattened shape, with less rise and a less appealing crust. These visual signs tell you that fermentation went too far, and the bread’s structure has weakened, resulting in a less desirable appearance and texture.
How Do Texture and Density Indicate Proofing Issues?
Texture and density are key indicators of proper proofing, revealing whether your dough has risen enough or too much. If the dough feels overly dense, it may be underproofed, lacking sufficient fermentation bubbles and gluten development. These bubbles are essential for airy bread, signaling active fermentation. Conversely, if the dough feels overly light and open, it might be overproofed, with the gluten structure weakened and gas pockets too large. Proper proofing creates a balanced crumb—firm but tender. You should notice a slight spring-back when pressing gently, indicating good gluten development. Too dense? It needs more time to ferment. Too airy? It’s likely overproofed. Paying attention to texture and density helps you fine-tune your proofing process for ideal results. Understanding gluten development can further improve your proofing accuracy, ensuring consistent, high-quality bread.
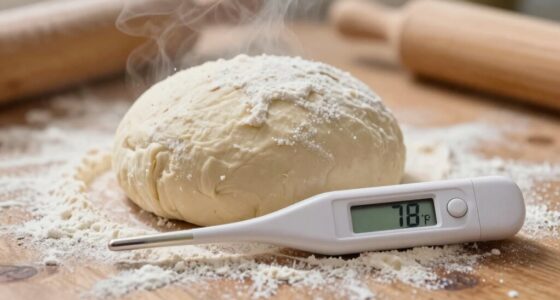
Use the Finger Test to Check Your Bread’s Proofing Stage
The finger test is a simple and effective way to gauge whether your dough has proofed enough. To do it, gently press your finger into the dough’s surface. If the indent springs back quickly, it needs more proofing. If it remains or only slightly springs back, it’s ready. Pay close attention to the crumb clues, which reveal proofing status through texture and elasticity. Underproofed dough often feels soft and resists shaping, while overproofed dough feels overly soft or slack. The finger test helps you interpret these crumb clues directly, giving you a tactile sense of whether your bread is under or overproofed. Mastering this test ensures you stop proofing at the right moment, resulting in a perfect crumb and ideal oven spring. Understanding dough elasticity can further improve your ability to judge proofing stages accurately.
How Can You Adjust Your Proofing Process Using Crumb Clues?
By examining your bread’s crumb texture, you can tell if it’s properly proofed or needs more time. Adjust your proofing process based on what you observe, and aim for consistent results. Practicing regular observation helps you recognize clues and refine your technique.
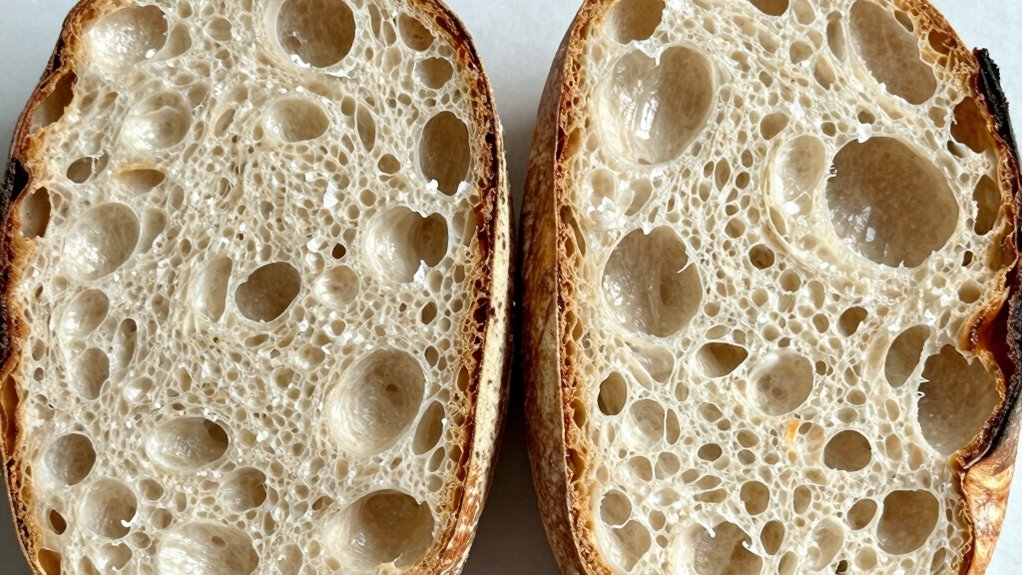
Recognize Crumb Texture
When you examine the crumb after baking, paying close attention to its texture can reveal whether your dough was underproofed or overproofed. The crumb appearance and texture tell the story: a tight, dense crumb indicates underproofing, while large, irregular holes suggest overproofing. To recognize crumb texture effectively, look for these clues:
- Compact, uniform crumb with small holes
- Open, airy crumb with large, irregular holes
- Sticky or gummy crumb texture
- Dry, crumbly appearance
Proper fermentation plays a crucial role in developing the ideal crumb structure, so understanding these signs helps you adjust your proofing process. If the crumb is too dense, give it more time to rise. If it’s overly airy or irregular, reduce proofing time. Recognizing crumb texture is key to perfecting your bread.
Adjust Proofing Time
If your bread’s crumb reveals signs of underproofing, like a dense, tight texture, you should extend the proofing time to allow more rise. Adjusting your proofing environment can help you control fermentation timing more effectively. Warmer temperatures speed up fermentation, so if your crumb looks underproofed, try proofing in a slightly cooler spot. Conversely, cooler environments slow fermentation, giving your dough more time to develop. Keep an eye on the crumb clues to gauge whether you need to extend or shorten proofing. Don’t rush the process; patience guarantees proper gluten development and a light, airy crumb. By fine-tuning your proofing time based on crumb cues, you optimize fermentation timing for the best bread texture. Understanding fermentation control can help you achieve consistent results and perfect bread every time. Monitoring proofing conditions closely allows for better adjustments and more reliable outcomes, including managing proofing environment factors like temperature and humidity. Using smart home automation devices, such as climate sensors, can help you maintain ideal proofing conditions effortlessly.
Practice Consistent Observation
Practicing consistent observation of your bread’s crumb is essential for adjusting your proofing process effectively. By paying close attention, you can fine-tune fermentation timing and ingredient ratios to achieve the perfect crumb. Here are some ways to sharpen your observation skills:
- Look for subtle changes in crumb structure that hint at over- or underproofing.
- Note how the crumb responds after different fermentation times.
- Observe if the crumb’s texture is too dense or airy, indicating possible ingredient ratio issues.
- Compare crumbs from multiple batches to identify consistent patterns.
- Understanding how the proofing process affects crumb quality helps you make more precise adjustments.
These clues help you make informed adjustments, preventing guesswork. Over time, you’ll develop an intuition for when your dough is just right, ensuring consistent, delicious results every time.
Frequently Asked Questions
Can Environmental Factors Affect Proofing Consistency?
Yes, environmental factors like your proofing environment can influence proofing consistency. Humidity effects are especially significant; high humidity slows fermentation, making dough rise unevenly, while low humidity speeds it up, risking overproofing. Maintaining a stable proofing environment with controlled humidity and temperature helps guarantee your dough proofs evenly and predictably, giving you better control over the final bake.
How Does Temperature Influence Proofing Signs?
Imagine you’re back in the 1800s, watching bakers test dough. Temperature greatly influences proofing signs—if proofing temperature is just right, your dough stays warm enough to rise evenly, revealing good proofing signs. Too cold, and it stalls; too warm, and it overproofs quickly. Maintaining ideal dough warmth ensures consistent proofing, making your bread perfect. Keep a close eye on temperature to avoid under or overproofing, and your bread will turn out beautifully.
Are There Differences Between Bread Types in Proofing Clues?
Yes, different bread types show distinct proofing clues. For example, crusts on rustic loaves may crack when overproofed, while soft sandwich breads often feel overly elastic, indicating underproofing. You can also observe dough elasticity—more elastic dough suggests underproofing, whereas less elasticity hints at overproofing. Paying attention to these subtle cues helps you perfect each bread type, ensuring the crust and texture meet your expectations.
What Role Does Yeast Freshness Play in Proofing?
Think your yeast is a superhero? Well, its freshness directly impacts proofing. Yeast potency weakens over time, especially if stored poorly—exposed to heat, light, or humidity. If your yeast’s past its prime, it’ll struggle to activate, leading to underproofed bread. Keep it fresh in airtight containers and cool, dark storage conditions, and your dough will rise like a champion. Forget freshness, and your loaf’s fate is sealed!
How Long Should Each Proofing Stage Ideally Last?
For each proofing stage, aim for an ideal timing of about 1 to 2 hours, depending on your dough and environment. During the first proof, let it double in size, which usually takes around 1 hour. The final proof should be slightly longer, until the dough is puffy and passes the finger poke test. Adjust proofing duration based on dough behavior, not just clock time, for perfect results.
Conclusion
By paying close attention to your bread’s crumb, you can tell if it’s underproofed or overproofed—like reading a secret message in its texture. The clues are subtle but revealing, guiding you like a lighthouse through the baking storm. With practice, you’ll tune into these signs, turning each loaf into a perfectly proofed masterpiece. Trust your senses; they’re your most reliable tools on this delicious journey.