To prevent burning brown butter, keep the heat at medium or medium-low and stir constantly. Watch for a nutty aroma and the color just turning golden brown—don’t wait until it darkens too much. Use a light-colored pan to easily monitor the change, and remove it from heat promptly once you see the signs. Paying close attention guarantees you get perfect, flavorful brown butter every time—keep exploring for more expert tips.
Key Takeaways
- Use a light-colored, heavy-bottomed skillet to monitor browning progress easily.
- Keep the heat at medium or medium-low to prevent overheating and burning.
- Stir continuously to distribute heat evenly and avoid hot spots.
- Remove the butter from heat as soon as it develops a nutty aroma and small brown specks.
- Pay attention to smoke and color changes, and avoid cooking past the golden stage.
light-colored heavy-bottomed skillet
As an affiliate, we earn on qualifying purchases.
As an affiliate, we earn on qualifying purchases.
What Is Brown Butter and Why Should You Use It?
Ever wonder what makes brown butter so special? It’s all about flavor enhancement. When you cook butter until it turns a rich, golden-brown, you reveal nutty, caramel-like notes that elevate any dish. This transformation adds depth and complexity to baked goods, sauces, and even vegetables. Color temperature adjustments can help you achieve the perfect tone and flavor when browning butter. Brown butter’s culinary versatility means you can use it in sweet and savory dishes alike, making your creations more memorable. Its rich aroma and enhanced flavor profile turn simple recipes into gourmet experiences. Plus, it’s easy to prepare and stores well, giving you a quick way to upgrade your cooking. Whether drizzled over pasta, stirred into batter, or used as a finishing touch, brown butter’s unique qualities make it a must-have in your kitchen. Understanding the Maillard reaction can help you master the perfect browning process. Additionally, controlling the heat level during cooking is essential to prevent burning and ensure a desirable flavor. Paying attention to temperature control can help you avoid burning the butter and achieve that ideal golden-brown hue.

0.5 Sec Instant Read Meat Thermometer Digital with ±0.5℉ Precision, Food Thermometer for Cooking Kitchen Gadgets, Oven Grill Candy BBQ Essentials Accessories, Gifts for Him Dad Men Birthday, Red
【8X Faster + 4X More Precise】: Upgraded with an industrial-leading professional thermocouple sensor, Themomonster meat thermometer digital with…
As an affiliate, we earn on qualifying purchases.
As an affiliate, we earn on qualifying purchases.
Tools and Ingredients You Need for Perfect Brown Butter
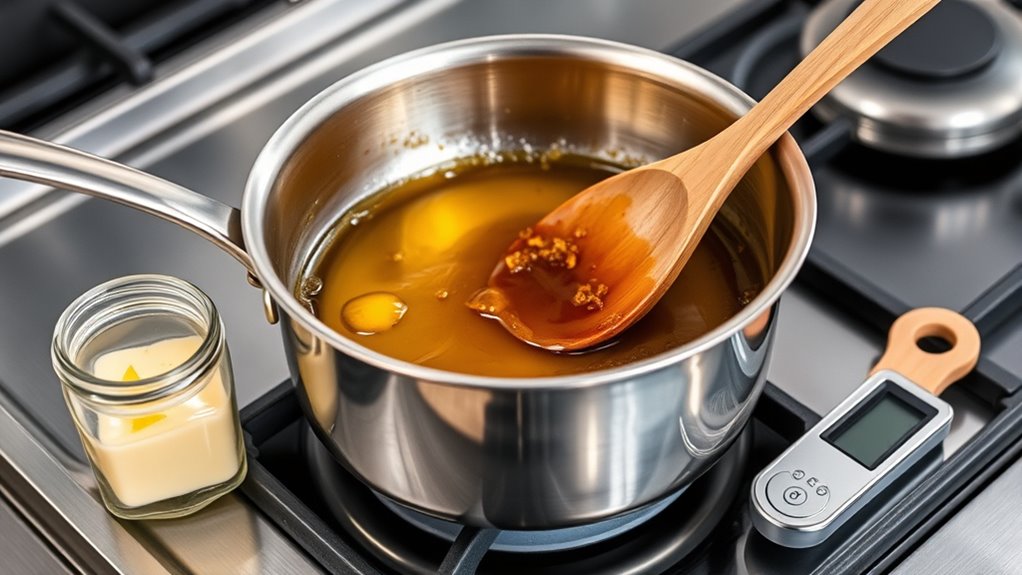
To make perfect brown butter, you’ll need a few essential tools and high-quality ingredients. First, choose the right pan—preferably a light-colored, heavy-bottomed skillet—to monitor the butter’s color easily and prevent burning. Second, select good butter types; unsalted butter is ideal for control over salt levels, while European-style butters with higher fat content yield richer flavor. Third, have a heat-resistant spatula or spoon ready to stir constantly and prevent sticking or burning. Fourth, keep a kitchen thermometer nearby if you want precise temperature control. These tools and ingredients help you achieve the perfect brown butter, ensuring even browning without burning, giving you that nutty aroma and flavor every time.

ChefAide 5 Pieces Silicone Spatula Set, Food Grade Rubber Spatula, Upgrade Strong Handle with Ergonomic Grip, Heat Resistant Up to 600°F for Nonstick Cookware, Cooking
Premium 100% Food Grade Silicone: The silicone spatula set is made of healthy and friendly material, resistant to…
As an affiliate, we earn on qualifying purchases.
As an affiliate, we earn on qualifying purchases.
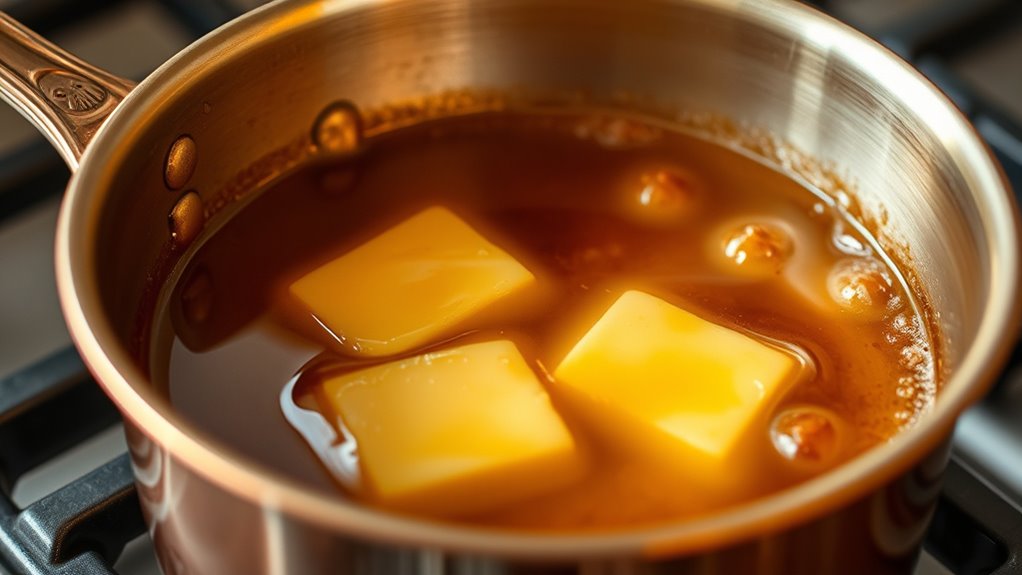
How to Make Brown Butter Step by Step
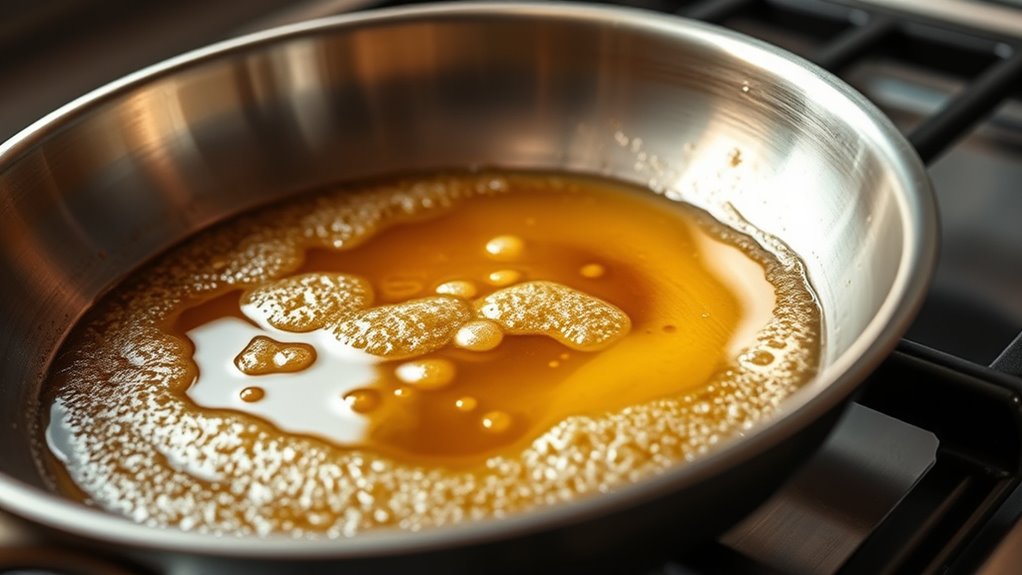
Start by placing your pan on the stove over medium heat and adding the butter. As it melts, use gentle techniques like swirling the pan to distribute heat evenly. Watch closely for the butter to foam and develop a nutty aroma, indicating it’s approaching browning. Keep stirring or swirling to prevent hot spots that could burn the butter. Once you see small brown specks forming at the bottom and it smells rich, remove it from heat immediately. You can customize flavor variations by adding herbs, garlic, or lemon zest during the process. For added complexity, consider incorporating Free Floating elements to create layers of flavor. Proper filtration during the process helps maintain uniformity and prevents unwanted particles from affecting the flavor. Being attentive to temperature control is essential to avoid burning the butter and achieving perfect browning. Adjusting the heat level carefully allows for better control over the browning process. Using a quick‑test like a small piece of bread can help gauge the butter’s readiness before removing it from heat. Here’s a quick guide:
| Technique | Flavor Variations |
|---|---|
| Gentle swirling | Add garlic for depth |
| Constant stirring | Infuse with herbs |
| Keep heat moderate | Incorporate citrus zest |
| Watch closely | Use spices for warmth |
| Remove promptly | Adjust flavors after browning |

Land O Lakes Salted Extra Creamy Butter, European Style, 4 sticks, 1 lb pack
EXTRA CREAMY SALTED BUTTER: Whether you’re making a creamy sauce, flaky breakfast pastries or just topping warm, fresh-baked…
As an affiliate, we earn on qualifying purchases.
As an affiliate, we earn on qualifying purchases.
Avoid These Common Mistakes That Cause Burning

When making brown butter, it’s easy to accidentally burn it if you’re not attentive. Overcooking hazards happen quickly once the butter reaches its smoke point, causing a bitter taste and potential burnt smell. To avoid this, watch your butter carefully. Here are common mistakes to prevent:
- Ignoring the butter’s color change—stop once it turns golden brown.
- Increasing the heat too high, which can quickly surpass the smoke point.
- Leaving it unattended, risking it burning before you notice.
- Using a small pan that causes uneven heat distribution and hotspots.
Staying alert helps you control the process and prevents the butter from burning. Remember, once it smokes or turns dark, you’ve gone past the ideal brown butter stage. Keep it gentle and attentive.
Tips for Achieving Perfectly Browned Butter Every Time

Achieving perfectly browned butter requires your full attention and a few simple techniques. First, use a light-colored pan to monitor the color change easily. Stir constantly to ensure even browning and prevent hot spots that can cause burning. Keep the heat at medium or medium-low; high heat increases the risk of scorching. As the butter melts, you’ll notice a nutty aroma—this scent enhancement signals it’s nearing ideal browning. Once golden-brown, remove it promptly to stop the process. Temperature control tools can help you monitor temperature precisely to avoid burning. For flavor variation, consider adding herbs or spices after browning to infuse additional depth. Consistent stirring and attentive timing are key for perfect results every time. With these tips, you’ll achieve beautiful, aromatic browned butter that elevates any dish. Additionally, understanding the smoke point of butter can help prevent accidental burning during the process, especially when managing heat levels carefully.
Frequently Asked Questions
Can I Use Salted Butter to Make Brown Butter?
Yes, you can use salted butter to make brown butter. Just be aware that salted butter contains added salt, so it may influence your recipe’s flavor and salt balance. When using salted butter, consider making baking adjustments by reducing any additional salt in your recipe. Keep an eye on the butter as it browns to avoid over-salting or burning, and taste as you go to ensure the flavor is just right.
How Long Does Brown Butter Last in the Refrigerator?
Brown butter can last in your fridge for about 1 to 2 weeks. Like a delicate flower, it needs proper care; store it in an airtight container to prevent spoilage. Keep an eye out for signs like an off smell, mold, or discoloration, which indicate it’s time to toss it. Proper storage extends its life, so you can enjoy its rich flavor without worry.
What Are Some Alternative Fats I Can Use for Brown Butter?
You can use clarified butter or vegetable oils as alternatives for brown butter. Clarified butter has a high smoke point, making it great for browning without burning. Vegetable oils like grapeseed, canola, or avocado oil also work well because they withstand high heat and won’t burn as easily. Just keep an eye on the heat, and you’ll achieve that rich, nutty flavor without the risk of burning your fats.
Is It Safe to Eat the Browned Milk Solids?
Yes, it’s safe to eat the browned milk solids as long as you’ve cooked them properly. They develop flavor and are safe because the caramelization process reduces bacteria. However, avoid eating burnt or charred solids, as these could contain potentially harmful compounds. Always make sure the butter is browned at a controlled temperature, and if the milk solids smell or look off, discard for food safety.
How Can I Tell When the Brown Butter Is Ready Without Burning It?
You can tell your brown butter is ready by watching for a rich color change to a golden or amber hue, signaling the development of flavor. Also, listen for a nutty aroma that fills the kitchen, indicating the butter’s milk solids are toasted perfectly. Keep a close eye and smell frequently, removing it from heat as soon as these signs appear to prevent burning and achieve that perfect brown butter.
Conclusion
Mastering brown butter takes patience and practice, but with the right tips, you’ll tame the technique and turn it into a tempting treat. Remember to watch its wobbling whirl, whisk with wisdom, and ward off worry by watching the heat. With consistent care and clever control, you’ll create perfectly browned butter—beautifully browned, irresistibly aromatic, and endlessly versatile. So, savor the skill, stay steady, and succeed in your buttery baking adventures!