To seal a pie without leaks, firmly crimp the edges using your fingers or a fork, ensuring the crusts are pressed together evenly. Dampen the crust edges with a little water to help them stick, then apply consistent pressure to create a tight seal. For added security, make decorative crimping patterns like scallops or zigzags. Proper technique and attention to detail are key—if you want to master leak-proof sealing, keep exploring more tips and tricks.
Key Takeaways
- Use your fingers or a fork to press firmly along the crust edge for an even, tight seal.
- Slightly dampen the crust edges with water to act as an adhesive before crimping.
- Apply consistent pressure while crimping to ensure a resilient, leak-proof seal.
- Incorporate decorative patterns like zigzags or scallops to reinforce the crust’s barrier.
- Chill the pie before baking to help set the crust and improve sealing effectiveness.
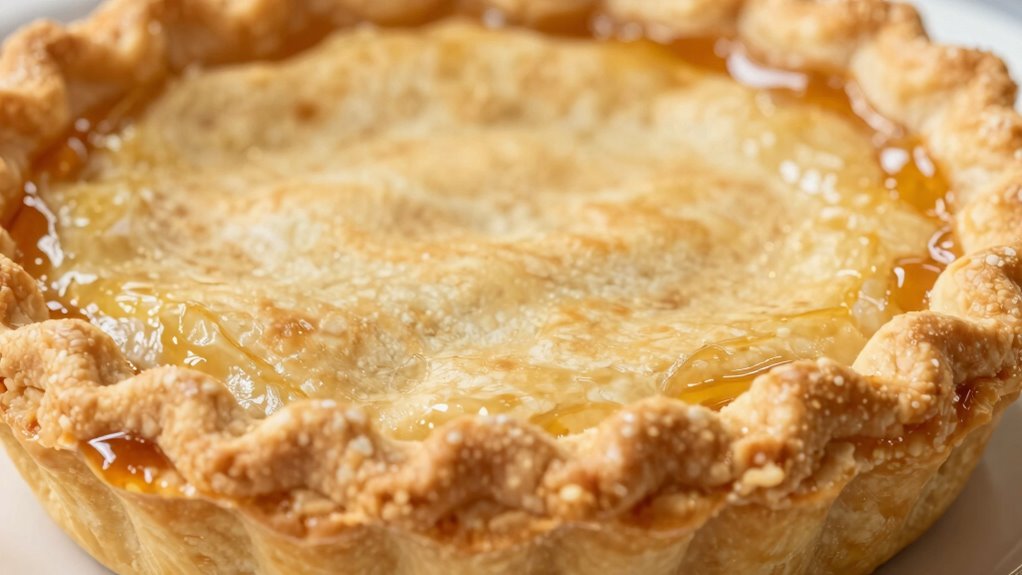
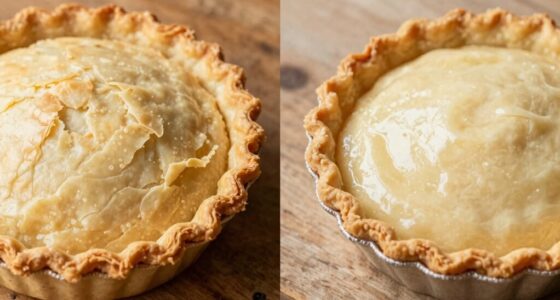
Have you ever wondered how to create secure, reliable connections with electrical wires? Well, the same principles apply when you’re sealing a pie to prevent leaks. Whether you’re working with homemade or store-bought pie crusts, the goal is to ensure a tight seal that keeps the filling from oozing out during baking. One of the best ways to achieve this is by mastering crimping techniques, which in baking translates to properly sealing the edges of your pie. Using decorative edges not only makes your pie look beautiful but also adds an extra layer of security against leaks. When you crimp the pie crusts with a simple pinch or fork press, you create a barrier that keeps the filling contained. To do this effectively, start by dampening the edges slightly with water; this acts as an adhesive, helping the crusts stick together better.
Next, place your top crust over the filling, making sure it covers the entire surface. Using your fingers or a fork, press down along the edge of the crust, applying consistent pressure to create a decorative edge. This crimped pattern not only enhances visual appeal but also acts as a seal, preventing the filling from escaping during baking. If you’re aiming for a more polished look, you can use the tines of a fork to create a uniform pattern around the edge. For a more intricate design, you might pinch the crust with your fingers, alternating sides to produce a zigzag or scalloped effect. These decorative edges serve as a practical barrier, ensuring the filling stays inside while giving your pie a professional finish. Incorporating proper sealing techniques can significantly improve your baking results and reduce messes in the oven.
As you work, remember that the key to a leak-free pie is a tight seal. Press firmly but gently, making sure the crusts are firmly joined without tearing. When you crimp the edges properly, the crust becomes more resilient against the expansion of the filling during baking. Also, chilling your pie before baking helps the crust set, making it easier to crimp and less prone to shrinking or cracking. Once baked, a well-sealed pie with decorative edges will hold its filling intact, giving you a clean, attractive presentation. So, just like creating secure electrical connections, sealing a pie relies on the right technique—firm, even crimping combined with thoughtful detailing ensures your dessert stays intact and looks stunning.

Fusiontec Pastry Wheel Cutter – Pasta Cutter Wheel – Ravioli Crimper Cutter Wheel for Home and Kitchen Use, 1.3inch
UNIQUE DESIGN – Our classic cutting wheel make it easy for you to create delicious fresh ravioli and…
As an affiliate, we earn on qualifying purchases.
As an affiliate, we earn on qualifying purchases.
Frequently Asked Questions
Can Crimping Prevent All Types of Pie Leaks?
Crimping considerably reduces pie leaks, but it doesn’t prevent all types. Proper pie crust storage before baking keeps the dough firm, making sealing easier. When comparing crimping techniques, choose the one that creates a tight, even seal. However, some ingredients or filling excess can still cause leaks, so double-check your crust’s edges. Overall, good crimping combined with proper storage minimizes leaks but may not eliminate them entirely.
What Tools Are Best for Crimping Pie Crusts?
Imagine a gentle wave rolling over your pie’s edge—that’s what the right tools can do. Use a fluted crimper or a fork to create textured crimping patterns, shaping your pie crust with precision. A silicone crimper or a pastry wheel also work wonders, helping you achieve even, decorative edges. These tools give you control and consistency, ensuring your crust’s texture stays intact and your sealing is flawless.
How Do I Fix a Poorly Crimped Pie Seal?
If your pie seal isn’t perfect, gently press the edges again using your fingers or a fork, reinforcing the crimping techniques. You can also brush a little water or beaten egg along the edge to help close any gaps. For pie crust textures that are uneven, consider trimming excess dough first. Recrimping ensures a tight seal, preventing leaks and giving your pie a professional finish.
Is Crimping Necessary for Every Type of Pie?
Crimping isn’t necessary for every type of pie, especially if you prefer decorating techniques like lattice or braided crusts. You can also use pie crust alternatives, such as store-bought shortcuts or alternative doughs that don’t require crimping. While crimping helps seal traditional pie edges, experimenting with different styles allows you to customize your pie and showcase your creativity without always relying on this technique.
How Long Should I Chill the Crust Before Crimping?
You should chill your pie crust for at least 30 minutes before crimping. This helps improve the dough’s elasticity, making it easier to work with and less likely to crack. Chilling also enhances the pie crust texture by firming it up, which helps you create neat, tight crimps without tearing. If you have extra time, refrigerate for up to an hour to achieve even better results and a flaky, tender crust.

Talisman Designs Pastry Wheel Pie Crust Decorator | Pie Crust Wheel | Pie Crust Decorating Tools | Easy to Use Pastry Wheel | Pie Decorating Tools & Gadgets | Pie Crust Embosser
PASTRY WHEEL DECORATOR: Talisman Designs high quality pie tool will help create a professional looking braid around the…
As an affiliate, we earn on qualifying purchases.
As an affiliate, we earn on qualifying purchases.
Conclusion
Mastering crimping techniques is like tightening a secure lid on a treasure chest—you keep everything inside safe and sound. When you seal your pie crust properly, it’s as if you’re locking in all those delicious juices and flavors, preventing leaks and messes. With a little practice, your crimping skills will become second nature, turning each pie into a beautifully sealed masterpiece. Remember, a well-criped crust is the armor that keeps your sweet secrets safe until the first perfect bite.
Talisman Designs Pastry Wheel Pie Crust Decorator | Pie Crust Wheel | Pie Crust Decorating Tools | Easy to Use Pastry Wheel | Pie Decorating Tools & Gadgets | Pie Crust Embosser
PASTRY WHEEL DECORATOR: Talisman Designs high quality pie tool will help create a professional looking braid around the…
As an affiliate, we earn on qualifying purchases.
As an affiliate, we earn on qualifying purchases.

Precisions Stainless Steel Dough Roller With Comfort Grip – Ravioli Cutter, Pastry Crimper & Sealer for Homemade Pasta, Pie Crusts & Baking Tool– Dishwasher Safe, Professional & Home Use
【Premium Stainless Steel Construction】Made from thickened, high-grade stainless steel—durable, rust-resistant, and built to last. Measures 7.09" long ×…
As an affiliate, we earn on qualifying purchases.
As an affiliate, we earn on qualifying purchases.