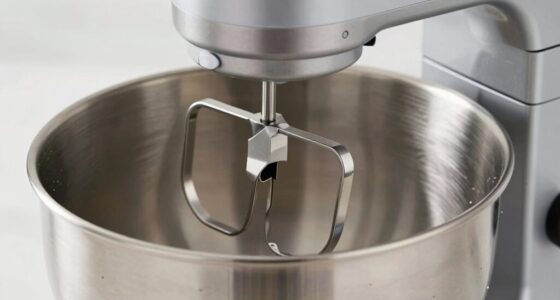
Maintaining your KitchenAid Artisan Series 5 Quart Tilt Head Stand Mixer is essential for keeping it running smoothly and extending its lifespan. Regular upkeep not only ensures consistent mixing results but also prevents common issues that can arise from neglect. Whether you’re a new owner or have been using your mixer for years, this comprehensive guide provides practical, safe, and easy-to-follow maintenance steps and troubleshooting tips.

Get baking supplies delivered free with Prime
- Fast, free delivery on millions of items
- Prime Video, Amazon Music and more included
- Member-only deals all year
From cleaning and inspecting parts to resolving motor or attachment issues, this guide will help you understand what needs to be done to keep your mixer in top condition. Remember, safety is paramount—always unplug your mixer before performing any maintenance or troubleshooting tasks.
Key Takeaways
| Routine Cleaning | Regular cleaning prevents buildup and maintains performance. |
| Inspection & Replacement | Check and replace worn parts to avoid malfunctions. |
| Gear & Motor Care | Keep gears and motor components clean and lubricated. |
| Troubleshooting Tips | Identify common issues like motor overheating or attachment problems. |
| Safe Maintenance Practices | Always unplug before maintenance to prevent accidents. |
Cleaning Your Mixer for Optimal Performance
- Unplug your mixer from the power outlet to ensure safety.
- Remove the mixing bowl and attachments, such as the flat beater, wire whip, or dough hook.
- Wash the bowl and attachments in warm, soapy water. The stainless steel bowl is dishwasher safe, but check the manufacturer’s instructions for other attachments.
- Use a damp cloth to wipe down the mixer body, paying special attention to the area around the head and the base.
- For stubborn residue or flour buildup, use a soft brush or a toothbrush to gently scrub hard-to-reach spots.
- Dry all parts thoroughly before reassembling to prevent rust or corrosion.
Regular cleaning after each use keeps your mixer running smoothly and prevents the buildup of ingredients that can interfere with performance.
Inspecting and Replacing Wear Parts
- Check the drive shaft and gears periodically for signs of wear or damage.
- Inspect the beater and attachment sockets for cracks or excessive wear.
- Replace worn or damaged parts promptly. KitchenAid offers replacement attachments and parts designed for durability.
- Ensure the tilt-head mechanism moves smoothly and locks securely in place.
- Lubricate moving parts, if recommended by the manufacturer, with food-grade lubricant.
Worn parts can cause vibrations, noise, or even mechanical failure. Regular inspection and replacement help maintain efficiency and safety.
Maintaining the Drive and Motor Components
The motor and drive components are critical for your mixer’s performance. Keep these parts clean and free of debris. Use a soft brush or compressed air to remove dust and flour from vents and motor housing. Never immerse the motor or electrical parts in water.
If your mixer experiences overheating or sluggish performance, it may be due to dust buildup or worn brushes. In such cases, consult the user manual or contact a professional repair service. Avoid attempting internal repairs unless you are qualified, as this can void your warranty or cause damage.
Regularly check the power cord for frays or damage. Replace damaged cords immediately to prevent electrical hazards.
Troubleshooting Common Issues
- Mixer not turning on: Ensure the unit is plugged in and the power outlet functions properly. Check the safety lock and tilt-head position.
- Unusual noises or vibrations: Inspect attachments and bowl for proper fit. Tighten or replace worn parts if needed.
- Motor overheating: Allow the mixer to cool down and avoid overloading. Check for obstructions or buildup inside the housing.
- Attachments not rotating: Confirm proper attachment installation and that the head is securely locked in place.
- Uneven mixing or ingredients sticking: Check the bowl and beater alignment. Clean and realign if necessary.
Most issues can be resolved with basic troubleshooting, but persistent problems should be addressed by a professional technician to avoid further damage.
Safety Tips and Best Practices
- Always unplug your mixer before cleaning, inspecting, or replacing parts.
- Use only manufacturer-approved attachments and replacement parts.
- Do not immerse electrical components or motor housing in water.
- Keep the mixer in a dry, stable environment to prevent electrical hazards.
- Follow the manufacturer’s instructions for lubrication and maintenance procedures.
Safety should always be your top priority during maintenance. Proper handling and regular upkeep will keep your KitchenAid mixer safe and efficient for years to come.
The Products in This Guide

KitchenAid Artisan Series 5 Quart Tilt Head Stand Mixer
- ✔ Bowl Size: 5 Quart
- ✔ Speed Levels: 10
- ✔ Color Options: Over 20

KitchenAid Stand Mixer Attachment
- ✔ Material: Metal
- ✔ Includes: Grinding plates, sausage tubes
- ✔ Compatibility: All Household KitchenAid Mixers
KitchenAid Artisan Series 5 Quart Tilt Head Stand Mixer
The KitchenAid Artisan Series 5 Quart Tilt Head Stand Mixer is built with durable metal construction and features 59 touchpoints for thorough mixing. Its tilt-head design offers easy access to the bowl, making cleaning and attachment changes straightforward. With 10 speeds, it adapts to nearly any recipe, from gentle stirring to high-speed whipping.
Pros:
- Durable metal construction
- Easy tilt-head access
- Multiple speed settings
- Large 5-quart bowl
- Dishwasher safe parts
Cons:
- Can be heavy to move
- Requires regular cleaning of moving parts
- Attachments sold separately
Best for: Home bakers and cooking enthusiasts seeking reliable performance
Not ideal for: Commercial use or very heavy-duty professional tasks
Bottom line: A versatile, durable mixer ideal for home baking and cooking tasks.
KitchenAid Stand Mixer Attachment
The KitchenAid Metal Food Grinder attachment transforms your stand mixer into a powerful food processor, perfect for grinding meat, vegetables, or nuts. Its durable construction and included grinding plates make it a versatile addition to your kitchen, simplifying food prep with professional results.
Pros:
- Sturdy metal build
- Multiple grinding plates
- Easy to attach and clean
- Includes sausage stuffing tubes
Cons:
- Requires separate purchase
- May be heavy when filled
- Cleaning requires disassembly
Best for: Homemade sausages, ground meats, and fresh produce processing
Not ideal for: For those who do not frequently grind ingredients
Bottom line: A robust grinder attachment that expands your KitchenAid mixer capabilities.
Frequently Asked Questions
How often should I clean my KitchenAid stand mixer?
Clean your mixer after each use to prevent buildup and ensure continued optimal performance. Regularly inspect and clean attachments, the bowl, and exterior surfaces.
Can I use my KitchenAid mixer for heavy doughs?
Yes, the Artisan Series mixer is designed to handle small to medium batches of heavy doughs, such as bread or pizza dough, thanks to its powerful motor and sturdy construction.
What should I do if my mixer stops working?
Unplug the mixer and check for simple issues like a tripped circuit or overload. If the motor overheats, allow it to cool down before resuming use. For persistent problems, consult the user manual or contact customer service.
Are attachments dishwasher safe?
Many attachments, such as the stainless steel bowl, are dishwasher safe. However, always check the manufacturer’s instructions for specific cleaning guidelines for each attachment.
How do I troubleshoot vibration or noise issues?
Ensure attachments are properly installed and securely locked. Check that the bowl is correctly seated and that the mixer is on a stable surface. Worn or misaligned parts may need replacement.
Keep Your KitchenAid Mixer in Top Shape with Regular Maintenance
Proper maintenance of your KitchenAid Artisan Series 5 Quart Tilt Head Stand Mixer ensures it continues to deliver excellent results for years to come. Regular cleaning, inspection, and prompt troubleshooting of issues are key to preventing unexpected breakdowns and prolonging its lifespan. By following this guide, you can enjoy a reliable, high-performing kitchen companion that makes baking and cooking a pleasure every time.
Affiliate disclosure: As an Amazon Associate we earn from qualifying purchases. Prices and availability are accurate as of the time of publishing.
Halloween Picks
halloween
As an affiliate, we earn on qualifying purchases.