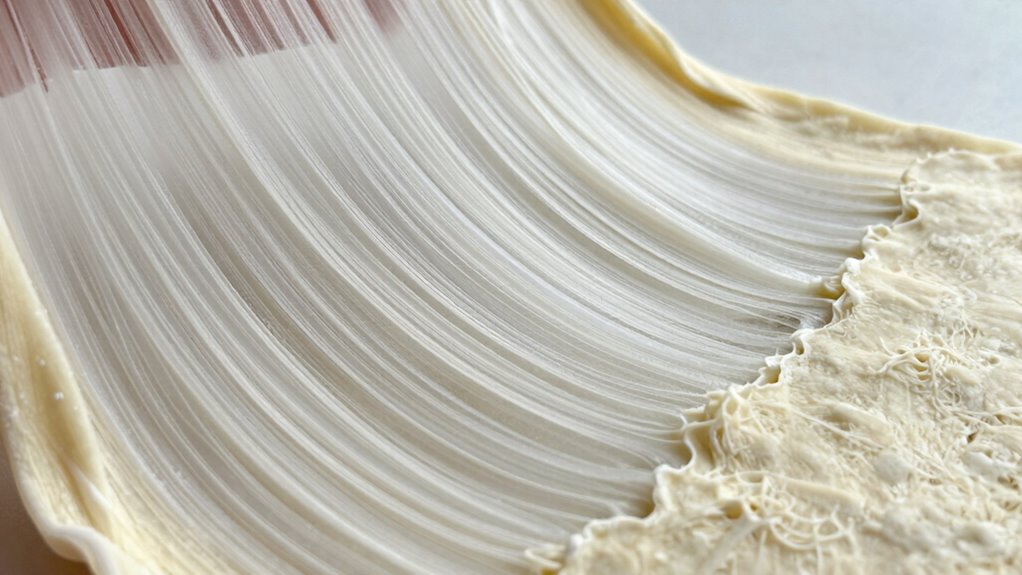

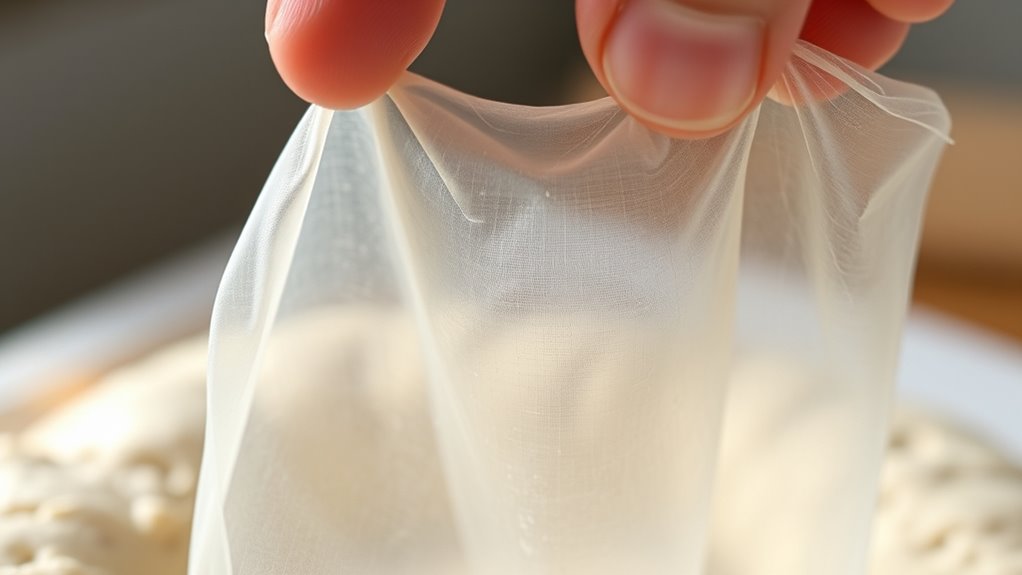
The ‘windowpane’ test shows if your dough has enough gluten by stretching a small piece into a thin, even sheet until translucent without tearing. Proper gluten development makes the dough elastic, resilient, and smooth, which is crucial for good bread. To perform it, knead until smooth, then gently stretch. If it becomes see-through, you’re good to go. Keep in mind, mastering this test helps you perfect your dough—learn more to improve your bread-making skills.
Key Takeaways
- The ‘windowpane’ test assesses gluten development by stretching dough until translucent without tearing.
- Well-developed gluten results in dough that is elastic, resilient, and becomes see-through when stretched.
- Signs of proper gluten formation include elasticity, spring-back, smooth texture, and slight tackiness.
- Over- or under-kneading can prevent the dough from passing the windowpane test, indicating improper gluten development.
- Achieving a thin, translucent, and tear-free dough indicates optimal gluten network formation.
What Is the ‘Windowpane’ Test and How Does It Work?

Have you ever wondered how bakers determine if their dough has developed enough gluten? The ‘windowpane’ test is a simple way to check the gluten structure and dough elasticity. To perform it, take a small piece of dough and gently stretch it with your fingertips. If the dough can stretch thin enough to become translucent without tearing, it indicates a healthy gluten network. This translucency shows that the gluten strands are well-developed, providing the necessary elasticity for good bread. When the dough passes this test, it means the gluten has formed a strong, flexible network capable of trapping gases during fermentation. Proper gluten development is essential for achieving the desired bread texture and volume. Keep in mind, a dough that tears easily or doesn’t stretch indicates it needs more kneading to strengthen its gluten structure. Achieving optimal gluten formation is influenced by factors such as kneading techniques, ingredient quality, and resting periods, which allow gluten strands to relax and strengthen. Additionally, understanding the science behind gluten can help bakers modify their methods to improve dough quality.
How Does Gluten Develop in Your Dough?
You can see gluten develop based on your flour’s protein content, how much water you add, and how you mix the dough. Proper hydration and mixing help align proteins to form gluten networks, while resting allows these structures to strengthen. Paying attention to these factors guarantees your dough develops the right elasticity and texture. Additionally, understanding gluten development can help bakers optimize their recipes for better dough strength and elasticity. Techniques such as mastering r sounds in speech therapy can also enhance the baker’s ability to communicate complex instructions clearly. Recognizing how personal growth practices influence your understanding of processes like gluten formation can further improve your baking skills. Monitoring hydration levels is crucial, as they directly impact gluten network formation and dough consistency. Furthermore, controlling kneading techniques ensures proper gluten development and dough uniformity.
Flour’s Protein Content
The protein content in your flour plays a crucial role in gluten development, as it determines how much gluten can form during mixing. Higher protein content results in stronger flour, which can develop more robust gluten networks. Flour strength, often measured by its protein percentage, directly affects how elastic and extensible your dough becomes. When you use strong flour with a high protein level, you’ll notice your dough is more resilient and capable of trapping gases, leading to better rise and structure. Conversely, lower protein flours create softer doughs with less gluten development, suitable for tender baked goods. Selecting the right flour based on its protein content ensures you achieve the desired gluten formation, which is essential for the texture and strength of your final baked product. Additionally, understanding gluten network formation helps bakers optimize dough consistency and baking outcomes, especially when considering factors like water absorption and mixing techniques. Proper hydration and mixing are key in developing a strong gluten network, which is influenced by the flour’s protein content and impacts the overall quality of the baked item. Incorporating techniques such as autolyse can further enhance gluten development by allowing the flour to hydrate fully before kneading. Recognizing the importance of dough elasticity can help bakers better control the handling properties of their dough and achieve the desired final texture.
Hydration and Mixing
Hydration and mixing are key factors that influence how gluten forms in your dough. Proper hydration levels ensure enough water activates the proteins, allowing gluten strands to develop. Mixing techniques determine how evenly the flour and water combine, affecting gluten network strength. When you mix, you help align protein molecules, promoting elasticity. Overmixing can lead to overly tight gluten, while undermixing results in weak development. Using a gentle fold or stretch-and-fold method encourages ideal gluten formation without tearing the dough. Pay attention to hydration: too dry, and gluten can’t form properly; too wet, and the dough becomes sticky and hard to handle. Consistent mixing ensures uniform gluten development, giving your bread structure and chewiness. Mastering these factors is essential for great bread results.
Resting and Development
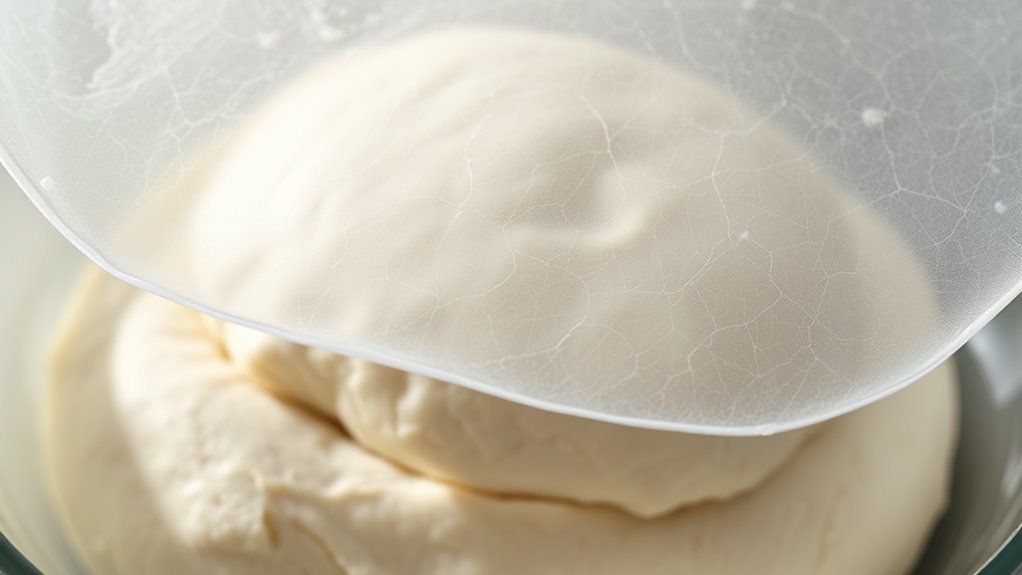
Resting and fermentation are vital steps that allow gluten to develop fully within your dough. During this period, the gluten network strengthens, enhancing dough elasticity and structure. Resting lets the gluten strands relax after mixing, making the dough easier to shape. Proper fermentation timing is essential; too short, and the gluten isn’t fully developed, resulting in a dense crumb. Too long, and the gluten can weaken, losing its elasticity. As fermentation progresses, enzymes break down proteins, allowing gluten to stretch more effectively. This process creates a resilient, extensible dough capable of trapping gas. By giving your dough adequate resting time, you guarantee ideal gluten development, which is key to achieving the perfect windowpane test and a light, airy final bake.
Why Is Gluten Formation Important for Perfect Bread?
Understanding why gluten formation is vital helps you appreciate how it influences bread’s texture and structure. When gluten develops properly, it provides the elasticity and dough stretchability needed for a well-formed loaf. Without strong gluten networks, your bread can be dense or crumbly. Proper gluten formation ensures your bread rises evenly and maintains its shape. It also creates a chewy, satisfying crumb that’s characteristic of good bread. When gluten is well-developed, the dough can trap and hold gas produced during fermentation, leading to a light, airy texture. This is why gluten development is essential for achieving the perfect balance of strength and flexibility in your bread. It’s the backbone that supports all other aspects of successful bread baking. Gluten networks are crucial for maintaining the dough’s integrity during baking. A well-formed gluten structure acts like a chemical scaffold, providing the necessary support for gas retention and dough elasticity.
How Can You Prepare Your Dough for the Windowpane Test?
To prepare your dough for the windowpane test, start by making certain it has been mixed thoroughly to develop enough gluten. Proper mixing fosters a strong gluten structure, which is essential for good dough elasticity. As you knead, aim for a smooth, cohesive ball that feels slightly tacky but not sticky. This process aligns the gluten strands, making the dough more elastic and capable of stretching without tearing. Resting the dough briefly after kneading allows the gluten to relax and strengthen further. When the dough feels firm yet pliable, it’s ready for the windowpane test. Achieving the right gluten structure and dough elasticity through proper preparation guarantees that you’ll get an accurate assessment of your dough’s readiness.
How to Perform the ‘Windowpane’ Test Step by Step

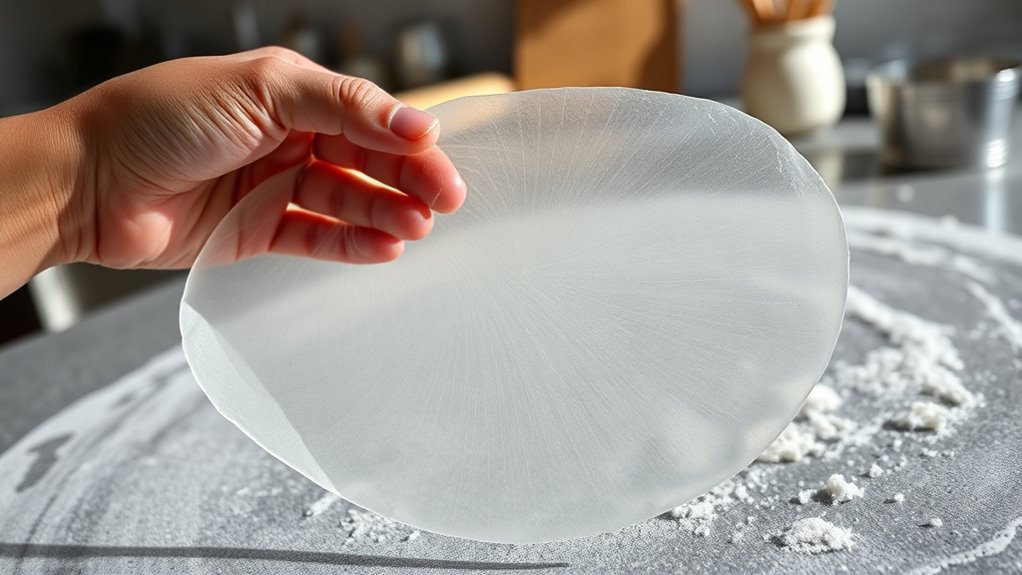
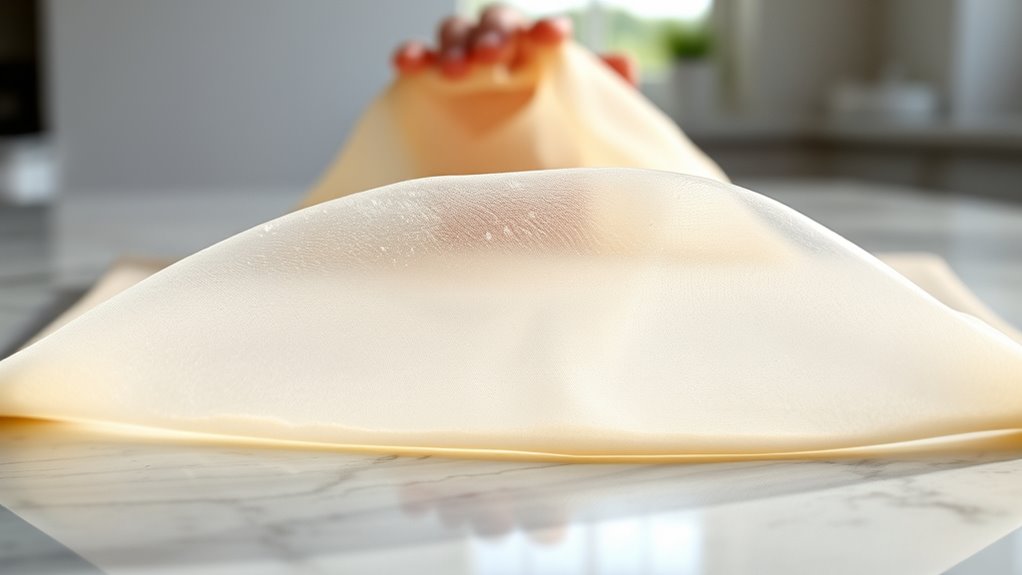
Start by preparing your dough until it’s smooth and elastic. Then, gently stretch a small piece into a thin, even layer. Look for transparency; if the dough becomes see-through without tearing, your gluten development is on point.
Prepare the Dough
Performing the ‘windowpane’ test is a simple yet essential step to assess whether your dough has developed enough gluten. First, prepare your dough by mixing your ingredients thoroughly, considering fermentation timing for ideal gluten development. As you knead, pay attention to texture and elasticity. If you need ingredient substitutions, make sure they don’t hinder gluten formation. When ready, gently stretch a small piece of dough between your fingers, aiming for a thin, translucent membrane without tearing.
- Visualize the dough becoming smooth and elastic during kneading
- Feel for resistance that indicates gluten strands are forming
- Recognize how ingredient substitutions can affect gluten strength
- Observe the dough stretching without tearing
- Notice how fermentation timing influences dough elasticity
Check for Transparency
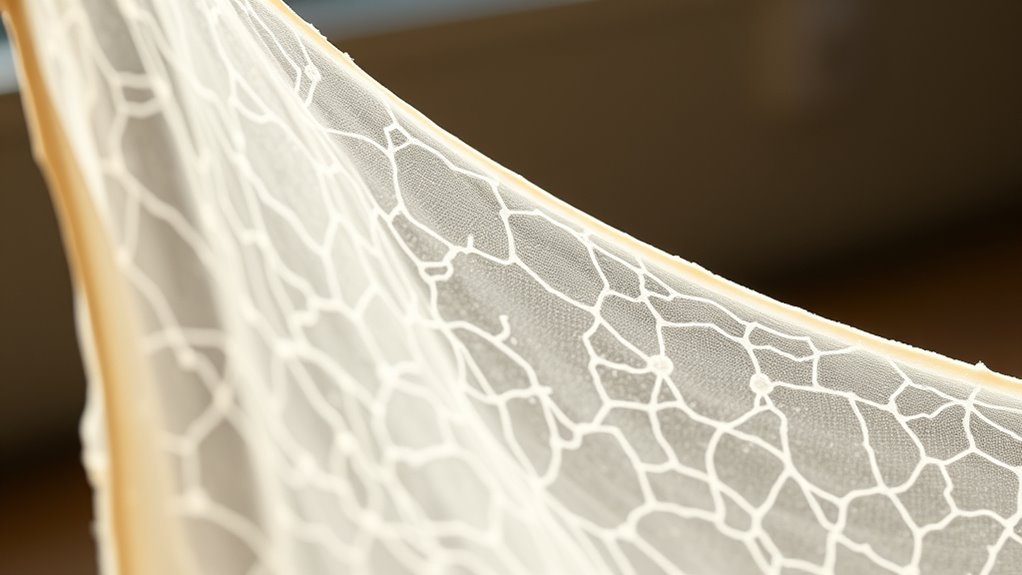
Ever wonder how to know if your dough has developed enough gluten? The key is checking for transparency. Take a small piece of dough and gently stretch it into a thin sheet. If it’s ready, the dough will appear translucent and almost see-through, showing good dough elasticity. This indicates that the gluten has stretched sufficiently, forming a strong network. If the dough tears easily or looks cloudy, it needs more kneading. The transparency test helps you gauge gluten development without overworking the dough. Remember, proper gluten stretch ensures your bread or baked goods will have the right structure and chewiness. Proper kneading technique is essential for achieving optimal gluten development. Keep practicing this step to get a feel for when your dough is perfectly elastic and ready for the next stage.
What Are the Signs of Well-Developed Gluten?

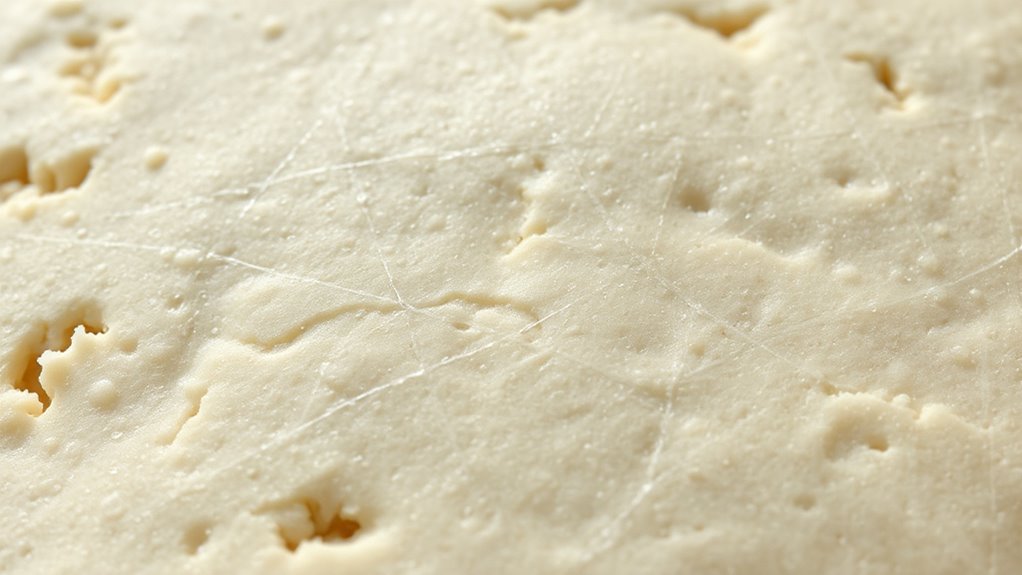
How can you tell if gluten is well-developed during dough mixing? When the gluten quality is high, your dough becomes noticeably elastic and resilient. It should stretch without tearing, indicating strong gluten networks. Well-developed gluten produces a smooth, slightly tacky surface that holds its shape. You’ll notice the dough springs back when pressed gently, showing good elasticity. Additionally, it should feel cohesive and easy to handle, not sticky or overly stiff. Proper gluten development results in a uniform texture and excellent strength, essential for airy bread. Recognizing these signs helps you determine if your dough has reached the right stage before fermentation or baking. This process can be checked with the ‘windowpane’ test, a simple method to assess gluten formation during mixing. Understanding the gluten network helps bakers achieve optimal dough structure and final product quality. Monitoring gluten development throughout mixing ensures consistent results and a better final bake. Being attentive to these signs allows for better control over the dough’s texture and overall quality of your baked goods.
What Common Mistakes Might Hurt Your Gluten Development?

One common mistake that can hinder gluten development is adding too much flour or dry ingredients at once, which can disrupt the formation of a strong gluten network. This sudden addition can reduce dough elasticity, making it harder for the gluten strands to stretch and align properly. This is because ingredient addition techniques influence the development process significantly. Additionally, rushing the process by not allowing sufficient fermentation time can prevent gluten from fully developing. Proper fermentation helps the gluten strands strengthen and relax, improving dough elasticity. Overworking or under-kneading also impacts gluten structure, either breaking down the network or preventing it from forming altogether. To achieve ideal gluten development, balance your ingredients carefully, knead appropriately, and give the dough enough fermentation time to develop the desired elasticity and strength. Paying attention to dough hydration levels also plays a crucial role in gluten formation and should be monitored carefully. Moreover, understanding how gluten networks form can help troubleshoot issues with dough texture and elasticity.
When Should You Stop Kneading Based on the Test Results?
You’ll want to stop kneading once the gluten has developed enough to pass the test, showing a smooth, elastic texture. Watch for signs of over-kneading, like a tough or overly stiff dough, which can hurt the final product. Timing is key—knowing when to halt guarantees your dough has the perfect strength without risking damage.
Recognizing Gluten Development
At what point can you confidently stop kneading dough without risking underdeveloped gluten? Recognizing gluten development means observing the dough’s gluten structure and dough elasticity. When properly developed, the dough becomes smooth, stretchy, and resilient. To identify this, look for:
- A shiny, slightly tacky surface
- The dough’s ability to hold a gentle stretch without tearing
- The formation of thin, translucent “windowpanes” when stretched
- Increased firmness and strength in the dough
- Even, uniform texture without lumps or slackness
If the dough passes the windowpane test and feels elastic yet resilient, you’ve achieved ideal gluten development. Stopping at this point ensures you don’t overwork the dough, maintaining perfect gluten structure for the best rise and texture.
Signs of Over-Kneading
When you over-knead dough, the gluten structure becomes too developed, leading to a tough and dense final product. Signs of over-kneading include a dough that resists stretching and feels overly stiff. You might notice it tearing easily or bouncing back excessively when you try to shape it. Gluten overdevelopment from prolonged kneading causes the dough to lose its elasticity and become rubbery. Using aggressive kneading techniques can accelerate this process, so it’s vital to monitor your dough closely. If the dough no longer forms a smooth, elastic ball during kneading, it’s a sign you’ve gone too far. Recognizing these signs helps you prevent over-kneading and guarantees your bread maintains the right balance of gluten development for ideal texture.
Timing for Optimal Stop
To determine the most advantageous point to stop kneading, rely on the gluten development test results rather than a fixed time. When your dough passes the windowpane test, it indicates ideal gluten structure and dough elasticity. Stopping too early results in weak gluten, making the dough difficult to shape. Over-kneading, on the other hand, can cause the gluten network to break down, reducing elasticity. Watch for these signs to time your stop:
- The dough stretches thin without tearing
- It forms a translucent, paper-like membrane
- It feels smooth and resilient
- It maintains shape without sagging
- It resists tearing during gentle handling
Using these cues ensures your dough has the right gluten structure for a perfect rise.
How Can You Improve Gluten Development in Your Dough?
Improving gluten development in your dough can substantially enhance its texture and structure. One effective way is to optimize the fermentation process, allowing the gluten strands to strengthen naturally over time. Longer fermentation helps develop gluten more thoroughly, resulting in a stronger, more elastic dough. Additionally, ingredient substitution can make a difference; for example, replacing some of the flour with high-protein varieties or adding vital wheat gluten boosts gluten formation. Proper kneading techniques also matter—knead until the dough is smooth and passes the windowpane test. Resting your dough with proper hydration gives gluten time to relax and develop fully. By paying attention to fermentation, ingredient choices, and kneading, you can notably improve gluten development and achieve better baking results.
What Are Alternative Ways to Check if Your Dough Is Ready?
Even if you’re familiar with the windowpane test, there are other effective ways to determine if your dough is ready. Alternative testing methods can help you assess gluten quality without relying solely on visual cues. One way is to gently poke the dough; if it springs back slowly and maintains a slight indent, it’s likely ready. You can also perform a stretch test, pulling the dough into a thin, even sheet without tearing. Observing the dough’s elasticity and smoothness gives insight into gluten development. Additionally, a quick tear test can reveal if the dough holds together well. Conversely, paying attention to the dough’s feel—smooth, elastic, and slightly tacky—is a reliable gluten quality assessment.
Gently poke, stretch, tear, and feel for smoothness and tackiness to test dough readiness effectively.
- Gently pressing to check elasticity
- Performing a stretch test for uniform thinness
- Tearing to test cohesiveness
- Observing surface smoothness and shine
- Feeling for slight tackiness and elasticity
Frequently Asked Questions
Can the Windowpane Test Be Used for Gluten-Free Dough?
No, you can’t use the windowpane test for gluten-free dough because it relies on gluten’s elasticity, which gluten-free alternatives lack. Gluten-free dough doesn’t stretch as much or develop the same structure, so the test isn’t reliable. Instead, focus on other signs of readiness, like smoothness and cohesion. Understanding these differences helps you better judge when your gluten-free dough is properly prepared for baking.
How Does Hydration Level Affect Gluten Development?
A gentle nudge reveals that hydration ratio plays a vital role in gluten development, influencing your dough’s consistency. When you add just enough water, the gluten strands form gracefully, creating a supple, elastic dough. Too little hydration makes it stiff and difficult to work with, while too much can weaken the structure. Achieving the right balance guarantees your dough develops ideal gluten, resulting in a better rise and texture.
Is the Windowpane Test Suitable for All Bread Types?
The windowpane test isn’t suitable for all bread types, especially those with gluten-free or very tender doughs. For breads with a strong gluten structure, it helps you check dough elasticity and gluten development. If the dough stretches thin without tearing, it indicates proper gluten formation. However, for delicate or gluten-free breads, rely on other methods like texture and appearance, as the windowpane test may not give accurate results.
How Do Environmental Factors Impact Gluten Formation?
Did you know that high environmental humidity can increase gluten formation by helping proteins hydrate more effectively? When you bake, humidity acts as a gluten inhibitor or promoter depending on its level. Excess moisture can make dough sticky and tough to work with, while low humidity may hinder gluten development. So, controlling environmental factors like humidity guarantees ideal gluten structure, giving you better bread texture and rise.
What Tools Are Best for Performing the Windowpane Test?
You’ll need a clean, flat surface and your hands to perform the windowpane test. Gently stretch a small piece of dough until it becomes thin and translucent without tearing. This method helps you assess gluten quality and dough elasticity. A well-developed gluten network will stretch easily, showing a thin, almost glass-like membrane. Using your eyes and touch, you can determine if the dough has reached the right level of gluten development.
Conclusion
Think of the windowpane test as your secret window into your dough’s soul, revealing its strength and elasticity like a clear glass. When you see that thin, translucent layer, it’s a sign your gluten is ready to support your bread’s rise. Trust this gentle check as a reminder that patience and care turn simple ingredients into a beautiful, airy loaf—transforming raw flour into a masterpiece you can truly be proud of.