TL;DR

Get baking supplies delivered free with Prime
- Fast, free delivery on millions of items
- Prime Video, Amazon Music and more included
- Member-only deals all year
Halloween baking molds shape cakes, chocolates, candies, and chilled desserts into seasonal designs, but each mold is suited to specific uses. Check its food-safety label and temperature range, fill cavities as directed, test small cakes early, and let treats cool or set before releasing them.
A perfect little ghost cake can become a lopsided blob if you rush it out of the mold. Halloween baking molds turn cakes, chocolates, candies, and chilled desserts into pumpkins, bats, skulls, and other seasonal treats, but the material and shape affect how well they work.
This guide helps you choose a mold for your recipe, get crisp details without broken ears or wings, and clean and store it safely. You’ll also find easy ways to make a family baking session smoother, whether you’re filling a party tray or making treats for a school event.
Choose a mold for the treat: silicone can release many detailed shapes, metal browns cakes, and plastic is usually for chilled or set treats.
Use a mold in the oven only when its label says it is oven-safe and gives a suitable temperature range.
Start checking small cavities early; they may finish before a full-size pan recipe.
Leave room for cakes to rise and let each treat cool or set before releasing it.
Wash and inspect molds, keep craft-use molds out of food preparation, and store flexible molds flat or supported.
Pick a mold that matches the treat you want to make
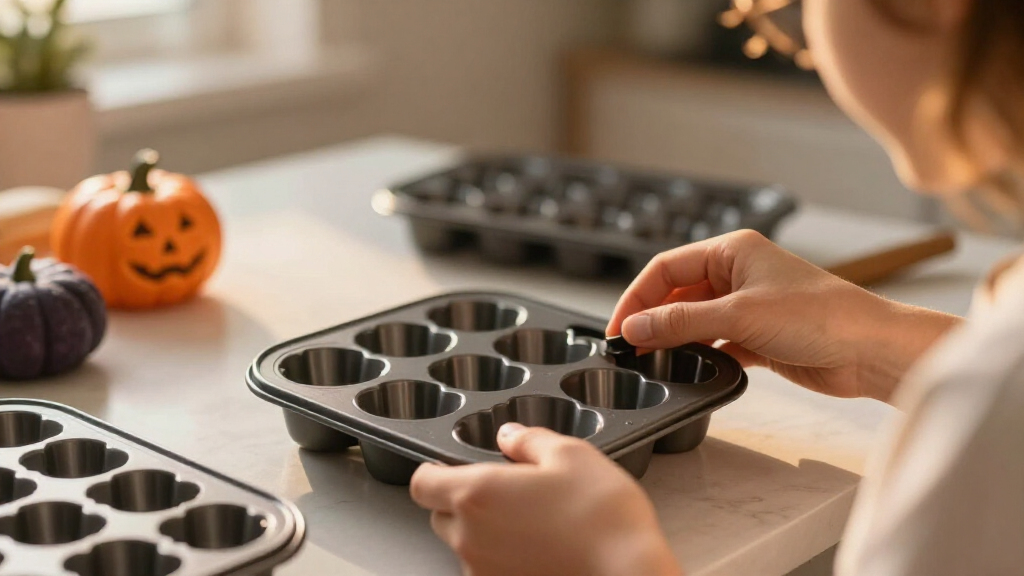
Halloween baking molds are food-safe containers shaped to form seasonal treats, and each material suits different recipes. Silicone bends to release many detailed shapes, metal transfers heat well for cakes with browned edges, and plastic usually suits chilled or set treats rather than oven baking. Check the mold’s label before you fill it.
Common shapes include pumpkins, ghosts, bats, skulls, cats, and haunted houses. These designs are popular for party favors, school events, and family baking because one batch can look like a whole tiny Halloween parade.
Material affects the result as much as the recipe does. A soft silicone bat can capture delicate wings, while a metal pumpkin pan may give you darker edges and a sturdier cake. A plastic skull mold might be made for chocolate or ice, so putting it in the oven could warp it.
Think of choosing a mold like choosing a shoe for a walk: the right fit depends on where you’re going. If your plan is brownies for a party, a sturdy metal pan may be easier; for frozen yogurt ghosts, a food-safe silicone mold may be more practical.
Compare silicone, metal, and plastic before you buy
The best mold material depends on whether you need oven heat, fine detail, or easy release. Silicone offers flexibility, metal supports browning, and plastic is generally for treats that set without baking. A mold’s product label and instructions take priority over its appearance.
| Material | Works well for | What to watch for |
|---|---|---|
| Silicone | Detailed cakes, gelatin, mousse, frozen treats, and some candy | Use in the oven only when that exact mold is labeled oven-safe; support it while carrying batter. |
| Metal | Cakes and other oven-baked treats that benefit from browning | Greasing and release depend on the pan and recipe; hot metal needs careful handling. |
| Plastic | Chocolate, ice, or other treats that set without oven heat | Do not bake it unless the maker clearly labels it for oven use. |
For example, if you’re making a dozen chocolate skulls, a food-safe chocolate mold can be a good fit, even if it cannot go near the oven. For mini pumpkin cakes, look for an explicitly oven-safe mold and follow its temperature limit.
Check the intended use first: a mold sold for soap, crafts, ice, or candy is not automatically safe for baking or food preparation.
Follow these steps for clean shapes and fewer broken treats
To get neat Halloween shapes, prepare the mold as directed, use a mixture that suits its detail, avoid overfilling, and release the treat only after it has cooled or set. Small cavities can finish sooner than a full-size pan, so begin checking early. These steps help keep a ghost’s arms attached and a pumpkin’s ridges visible.
- Read the label. Confirm food use, oven safety, temperature limits, and cleaning directions for the exact mold you own.
- Wash and inspect it. Before first use, wash it as directed and check for cuts, damage, or lingering odors. A damaged mold can be harder to clean and may release poorly.
- Set up the mold. Place flexible silicone on a firm baking sheet before pouring batter. Grease only if the maker or recipe recommends it; a light coating may help some detailed cavities.
- Choose a smooth mixture. Fine batter or chocolate can flow into narrow ears, wings, and corners. Large nuts or chocolate chunks may block details in a tiny cavity.
- Fill with room to rise. Check the mold’s capacity and leave the recommended headroom. Batter filled to the brim can spill over and blur the design.
- Check early, then cool. Test a small cake before the recipe’s full-size baking time is up. Let baked treats cool, or let chilled treats set, before gently releasing them.
Suppose your recipe makes one large cake and your mold has eight tiny ghosts. Don’t assume the original baking time still applies: check one ghost early and look for the recipe’s doneness cues. A few extra minutes of cooling can matter too; warm cake often bends where cold cake holds its shape.
Use one seasonal mold for more than cake
A food-safe Halloween mold can suit several kinds of treats when its material and care instructions allow them. Depending on the design, you may be able to use it for cake, chocolate, gelatin, mousse, frozen desserts, fondant, or candy. Look for the maker’s guidance before changing from an oven recipe to a chilled one.
One pumpkin mold, for instance, could make mini cakes for a weekend party and chilled gelatin pumpkins for a school event. For a tray of chocolate bats, melted chocolate can catch the wing details; once the pieces set, a small brush of colored chocolate or a dusting of edible powder can make those ridges stand out.
The mold shapes the treat, but it doesn’t decorate it for you. Icing, melted chocolate, and food coloring add contrast, especially to dark designs where a plain cake might hide the carved details.
For shared treats, label common allergens in the recipe or on the serving tray. Cakes may contain wheat, eggs, milk, soy, or nuts, while chocolate and decorations can add more; check package labels and keep allergen-free portions separate with clean utensils.
Keep baking safe for kids and protect the mold between seasons
Safe mold use starts with a clean, food-grade product and careful handling around heat. Wash it before the first use, inspect it for damage, and follow its temperature and cleaning directions; adults should handle hot pans, ovens, and melted sugar or chocolate. Kids can still help with filling cool molds or adding decorations under supervision.
After a party, wash the mold with warm soapy water if its care label allows, rinse it, and dry it thoroughly. Avoid sharp knives or metal picks that can cut silicone, and don’t use a mold for crafts and then return it to food preparation.
Store flexible molds flat or supported so they don’t bend into a spill-prone shape. Keep them away from sharp tools and strong odors; a silicone pumpkin mold stored beside an open spice jar can pick up a scent you don’t want in next year’s cake.
Halloween designs often appear in seasonal collections, so the widest selection may show up before October. If you want a particular haunted house or bat design outside the season, check baking-supply shops and online listings, since availability changes from year to year.
Frequently Asked Questions
Can silicone Halloween molds go in the oven?
Only use a silicone mold in the oven if the maker labels that specific mold oven-safe and gives a suitable temperature range. Set a flexible mold on a firm baking sheet before filling it so you can carry it without sloshing batter.
Do I need to grease a silicone Halloween mold?
It depends on the mold, recipe, and shape. Follow the maker’s directions; a light coating may help with a detailed cavity or delicate batter, while some molds are designed to work without grease.
How do I stop cakes from sticking or breaking?
Prepare the mold as directed, avoid overfilling, and choose a smooth batter for intricate designs. Let the cake cool before gently releasing it; pulling it out while warm can break narrow parts like bat wings or ghost arms.
Can I use Halloween molds for chocolate or candy?
Yes, if the mold is food-safe and suitable for that treat. Some plastic molds work well for chocolate but are not made for oven heat, so check the label before using one for baking.
Can one mold be used for food and crafts?
Use a mold for food only when it is designated for food use. If you use it with soap, resin, or other craft materials, keep it out of food preparation afterward.
Conclusion
Choose your mold by its labeled use, match it to the treat, and give each tiny cake or chocolate time to release cleanly. A little patience turns a tray of fragile ghosts into a party plate that looks ready for its close-up.
Fall Picks
fall essentials
As an affiliate, we earn on qualifying purchases.