To get square slices from your Pullman pan, start by shaping your dough into a rectangle that fits the pan exactly. Use gentle folds and even rolling to create clean, straight edges. Proper proofing is key—let the dough rise until it’s just right. When baking is complete, cool the loaf slightly before slicing with a sharp serrated knife, applying steady pressure to maintain the square shape. Keep exploring for detailed steps to perfect your technique.
Key Takeaways
- Shape dough into a snug rectangle before placing it in the Pullman pan for even, square slices.
- Use gentle spreading and smoothing techniques to fill the pan uniformly, avoiding air bubbles.
- Maintain consistent dough temperature and handle with care to ensure even spreading and straight edges.
- Properly proof the dough until it reaches the correct volume for a uniform rise and square shape.
- Slice the cooled loaf with a sharp serrated knife, supporting the bread to achieve clean, straight cuts.
Pullman loaf pan
As an affiliate, we earn on qualifying purchases.
As an affiliate, we earn on qualifying purchases.
Understand Your Pullman Pan’s Shape and Size

To guarantee your baked goods come out perfectly, it’s vital to understand the shape and size of your Pullman pan. Knowing the pan dimensions helps you determine the right amount of batter to fill it without overflows. Pullman pans generally have a rectangular shape with straight sides, making a uniform, square slice possible. Comparing shapes, they differ from standard loaf pans, which are narrower and taller, or bread pans with sloped sides. A shape comparison reveals that Pullman pans produce a flat top and consistent height, ideal for slicing into perfect squares. Measure your pan accurately, including length, width, and depth, so you can adjust your recipe accordingly. Pan measurements are also essential for achieving consistent results and proper filling levels. Proper baking techniques and understanding the pan’s shape ensure even baking and clean, precise slices every time. Additionally, understanding the pan’s construction can help in selecting the right materials for heat distribution, which contributes to uniform baking. Mastering pan material considerations can further improve baking performance and slice quality. This understanding guarantees even baking and clean, precise slices every time.
serrated bread knife
As an affiliate, we earn on qualifying purchases.
As an affiliate, we earn on qualifying purchases.
Use the Right Dough Consistency for Easy Shaping
Achieving the right dough consistency is essential for easy shaping in Pullman pans. You want your dough to have good dough elasticity, which allows it to stretch without tearing and maintains its shape. To reach this, focus on your kneading technique—knead until the dough is smooth, slightly tacky, and springs back when pressed. Over-kneading can make the dough tough, while under-kneading results in poor elasticity. Proper kneading develops the gluten structure necessary for easy shaping and consistent slices. If your dough feels too sticky, add a small amount of flour; if it’s too dry, incorporate a bit of water or milk. Consistently evaluating your dough’s texture helps you achieve the ideal consistency for seamless shaping in your Pullman pan.

Superbaking Banneton Bread Proofing Basket, Sourdough Bread Baking Supplies, Round 9 Inch Sourdough Starter Kit, Proofing Basket for Baking, Bread Making Supplies Tools, Banneton Basket Gift Set
PROOF, BAKE, SHARE your Sourdough Bread: Create delicious sourdough loaves with The Superbaking Banneton Kit. Enjoy the smiles,…
As an affiliate, we earn on qualifying purchases.
As an affiliate, we earn on qualifying purchases.
Prepare Your Work Surface and Tools Before You Start

Before you begin shaping your dough, make sure your workspace is clean and organized. Gather all the necessary tools so you won’t have to search for them later. A prepared surface and tools help you work efficiently and keep your focus on shaping your Pullman pans perfectly. Taking a few moments to organize your workspace ensures a smoother and more enjoyable baking process. Additionally, having a connected kitchen setup can streamline your workflow by integrating smart appliances that assist in precise measurements and timing. Understanding cybersecurity measures and maintaining your equipment’s security can prevent disruptions during your baking session. Remember to also consider storage solutions to keep your tools and ingredients easily accessible during your baking session.
Gather Necessary Tools
Gathering your necessary tools is the first step to guaranteeing a smooth process when shaping Pullman pans. Start by assembling sharp knives, rulers or measuring tapes, and food-safe markers to mark your dough accurately. Make sure your work surface is clean and stable to promote kitchen safety and prevent accidents. Having the right tools ready helps you focus on ingredient preparation without interruptions. Use a dough scraper or bench knife for handling sticky dough and a clean cloth or damp sponge to keep your workspace tidy. Check that all equipment is in good condition to avoid delays. Preparing your tools in advance minimizes distractions, keeps your workflow efficient, and assures your shaping process goes smoothly from start to finish. Additionally, understanding the importance of precise measurements and proper projector calibration can help ensure consistent results in your baking projects.
Clear and Prepare Workspace
Have you prepared your work surface and tools before starting? Ensuring your workspace is clear and organized is essential for kitchen safety and accurate ingredient measurements. Clear the area of clutter to prevent accidents and make your tools easily accessible. Use a clean, flat surface to work on, and gather all necessary tools like knives, spatulas, and measuring cups beforehand. Double-check that your measuring tools are precise, especially when measuring ingredients, to maintain consistency. Keeping your workspace tidy helps prevent cross-contamination and spills, making your baking process smoother. Remember, a prepared work surface minimizes distractions and keeps you focused on shaping your pullman pans efficiently, leading to better, more consistent results. Additionally, using appropriate vacuums can help keep your workspace dust-free and clean, especially if you have pets or allergies. Proper workspace organization also contributes to overall kitchen safety and efficiency. Being aware of potential AI cybersecurity risks can further ensure your digital safety while managing your kitchen devices.
bread dough scraper
As an affiliate, we earn on qualifying purchases.
As an affiliate, we earn on qualifying purchases.
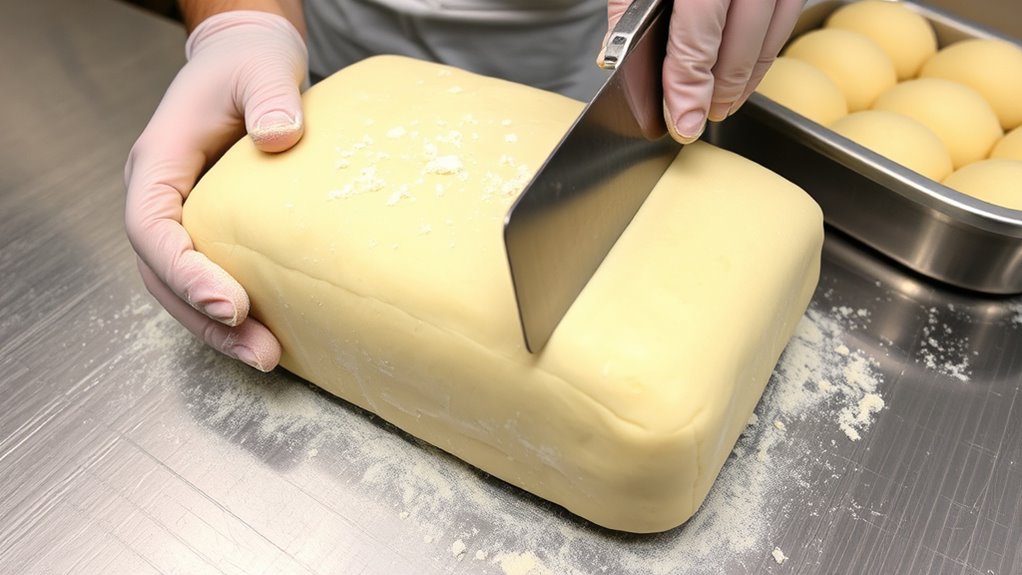
Pre-shape Your Dough for Consistent Results

Pre-shaping your dough is a crucial step in achieving consistent results when using Pullman pans. Proper pre-shaping helps distribute dough evenly, which supports uniform dough fermentation and prevents irregular gaps or bulges. Focus on maintaining correct ingredient ratios to guarantee the dough has the right elasticity and strength for shaping. When pre-shaping, gently form the dough into a rough rectangle, avoiding excessive tension, so it can relax and ferment evenly. This step also makes final shaping easier and more consistent, resulting in uniform slices later. Take your time to handle the dough carefully, ensuring it’s not overworked. Incorporating proper dough handling techniques can further enhance your baking results. Additionally, allowing the dough to rest during pre-shaping enables gluten development and relaxation, which contributes to better shaping and a more uniform crumb. Pre-shaping sets a solid foundation, leading to better rise, structure, and ultimately, perfectly square slices in your Pullman pan.
Shape Your Final Dough for a Perfect Fit in the Pan
Shape Your Final Dough for a Perfect Fit in the Pan
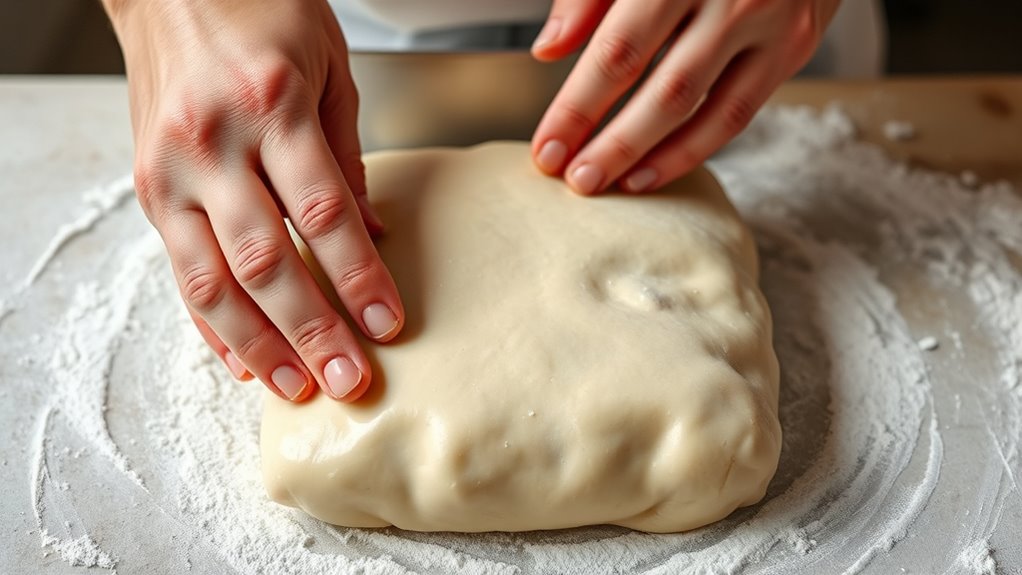
To guarantee your final dough fits perfectly in the Pullman pan, focus on shaping it precisely after pre-shaping. Adjust dough hydration carefully; too wet or dry can affect shaping and final size. Proper hydration helps develop gluten strength, making the dough easier to shape evenly. Be mindful of fermentation timing—wait until the dough has risen adequately but not over-proofed. Over-fermented dough may become slack and difficult to shape, resulting in uneven sides. When shaping, gently flatten and elongate the dough, aiming for a uniform thickness that matches the pan’s dimensions. Use light, consistent pressure to avoid tearing or stretching the dough unevenly. Proper shaping ensures a snug fit, giving you perfectly square slices with consistent crumb and crust. Additionally, understanding how dough elasticity influences shaping can help you achieve a more precise final result, especially in square pans. Developing a good sense of gluten development can improve your shaping technique and final product quality. Embracing creative storytelling in your baking process can inspire innovative recipes and presentation styles that elevate your bread-making craft.
Spread and Smooth Dough Evenly in the Pullman Pan
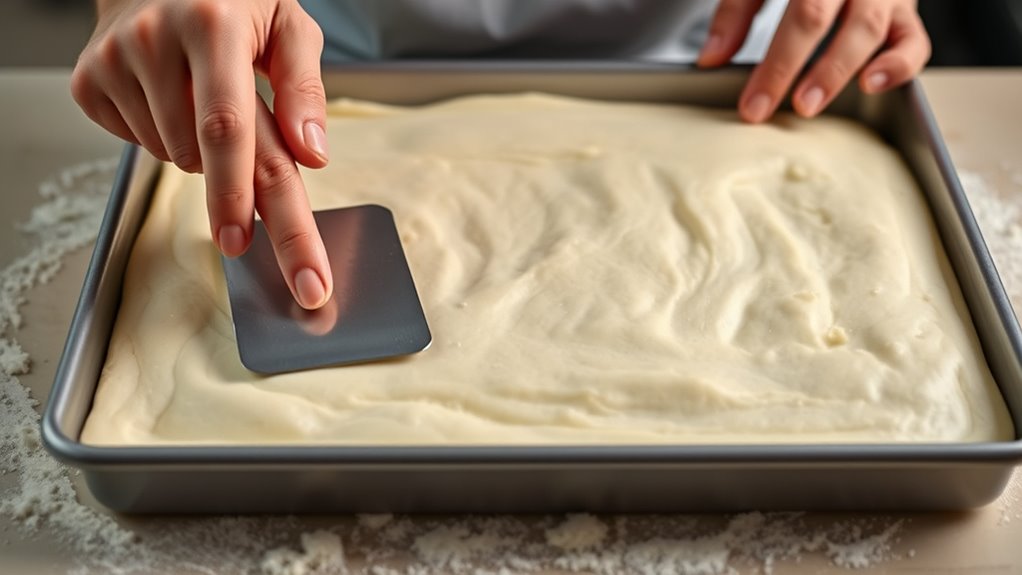
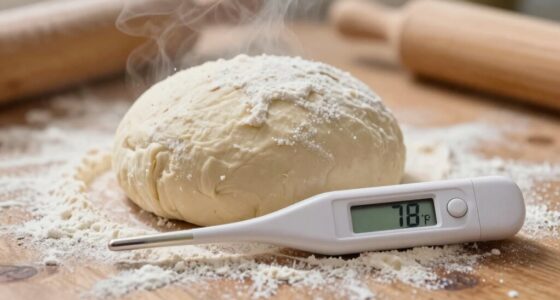
Once your dough is properly shaped to fit the pan, the next step is to spread it evenly. Make sure the dough has the right temperature—slightly warm but not sticky—to make smooth spreading easier. Use ingredient measurements that are accurate; too much flour or liquid can affect the dough’s consistency. Gently press the dough into the corners and smooth the surface with a spatula or your fingertips. Work from the center outward, applying even pressure to avoid thick or thin spots. Keep the surface level and free of air bubbles by tapping the pan lightly on the counter. An even layer of dough guarantees consistent baking and helps you achieve those perfect square slices later. Proper tool maintenance can ensure your spatula and other tools work smoothly, making the spreading process more efficient. Additionally, maintaining a consistent technique can reduce the chances of uneven spreading and improve overall results. Paying attention to dough temperature can also help ensure a smooth, even application. Practicing proper technique is similar to calibrating a deep-sky imaging setup for optimal results, ensuring precision and uniformity throughout. Regularly checking your tools and technique can help you develop a uniform baking process, leading to better and more predictable outcomes.
Fold and Roll to Get Straight Edges and Clean Lines
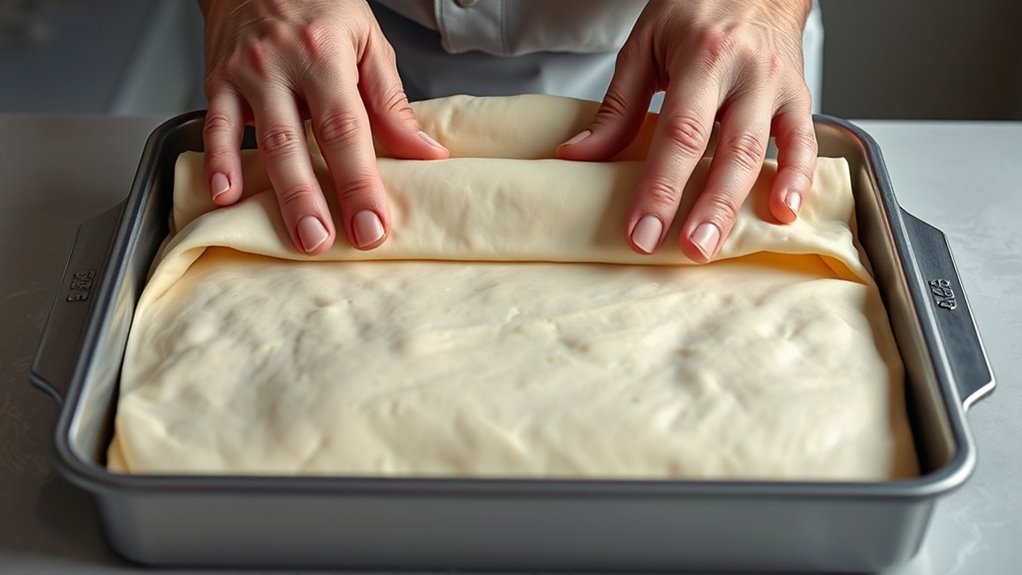
When working with your dough, folding and rolling are essential steps to achieve straight edges and clean lines. Proper dough elasticity allows you to shape smoothly without tearing, while choosing the right flour type guarantees ideal flexibility. To improve your technique, consider this table:
| Step | Tip |
|---|---|
| Fold | Gently fold dough to strengthen gluten and improve elasticity. This process helps in achieving a consistent texture. |
| Roll | Use even pressure to roll dough into straight, uniform edges. Proper technique prevents warping of the dough. |
| Check edges | Ensure edges stay aligned during rolling. Regularly inspecting helps maintain shape. |
| Adjust if needed | Re-fold if dough tears or edges are uneven. This step is crucial for maintaining a clean shape. |
| Final shaping | Roll until edges are crisp and clean for perfect squares. Mastering this ensures a professional appearance. |
Mastering these steps helps you create neat, sharp edges essential for square slices in Pullman pans. Proper shaping also ensures consistent baking results and easier removal from the pan. Additionally, understanding the importance of gluten development can significantly enhance your dough handling skills.
Proof Properly to Maintain Shape and Structure

Proper proofing is essential for maintaining the shape and structure of your baked goods. Ensuring the right dough hydration helps the dough hold its form during proofing, preventing it from spreading or collapsing. Adjust hydration levels based on your recipe and environment. Your proofing environment also plays a vital role; a warm, humid space encourages even fermentation and helps the dough rise uniformly without overproofing. Use a proofing box or a covered container to control temperature and humidity. Avoid rushing the process, as under- or over-proofing can distort your shape. Regularly check the dough’s progress, and aim for the right volume increase. Proper proofing guarantees a structured, well-formed loaf that slices cleanly into square pieces.
Remove Baked Bread Carefully to Keep It Square

Careful removal of your baked bread helps preserve its shape and keeps it square and neat. To do this, use a sharp knife to gently loosen the edges before lifting. Avoid tearing or squeezing the bread, which can distort its shape. Instead, slide the knife carefully around the sides to release any sticking parts. Use a steady hand and confident cuts to ensure clean separation from the pan.
| Step | Method | Tip |
|---|---|---|
| Prepare | Cool slightly before removing | Prevents sticking |
| Loosen edges | Use a sharp knife around the perimeter | Keeps shape intact |
| Lift carefully | Support with hands or a spatula | Avoid damage |
| Final check | Ensure all sides are free before lifting | Keeps bread square |
Slice Your Pullman Loaf Straight for Perfect, Square Slices
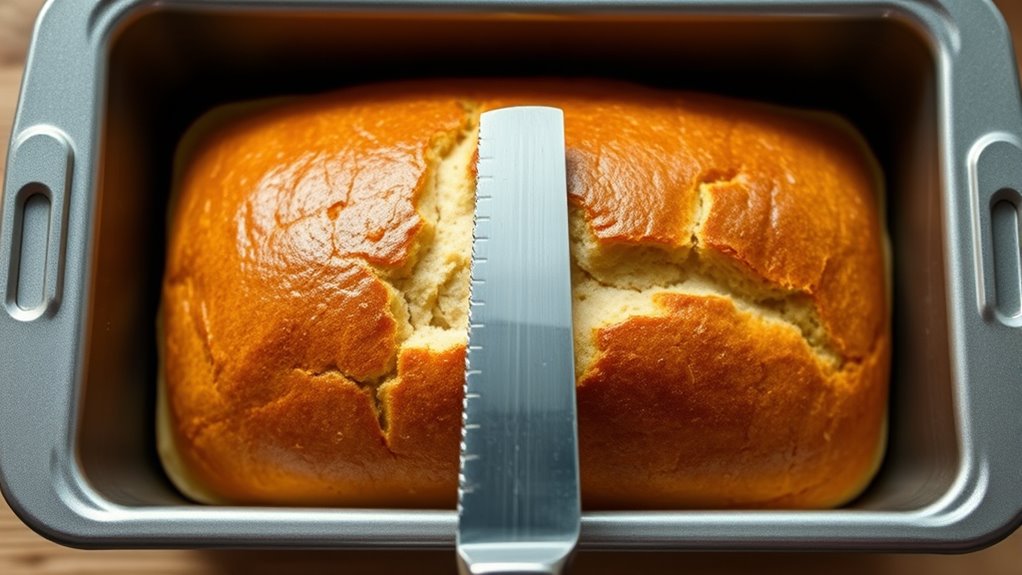
To achieve perfectly straight, square slices of your Pullman loaf, it’s vital to use a sharp serrated or bread knife and apply steady, even pressure. Before slicing, ensure your bread has cooled enough to prevent squishing. For clean cuts, consider bread scoring the loaf beforehand to guide your knife and help control the slice. Maintaining the correct oven temperature during baking is essential; a properly baked loaf will have a firm crust that’s easier to cut through cleanly. Use a gentle sawing motion, slicing straight down without pressing too hard. If you find resistance, wait a few minutes for the bread to cool further. With these tips, you’ll get neat, uniform slices that showcase your perfectly shaped Pullman loaf.
Frequently Asked Questions
Can I Use Different Types of Dough in a Pullman Pan?
Yes, you can use different types of dough in a Pullman pan, but keep in mind that dough consistency and ingredient variations matter. Thicker or wetter doughs may need adjustments to baking time or shape, while lighter or denser doughs can influence the final look. Experiment with small batches first to ensure your preferred dough works well and achieves the desired square slices without sticking or uneven baking.
How Do I Prevent Sticking When Removing the Bread?
Sticking to your bread is frustrating, but you can prevent it by using proper greasing techniques and parchment paper tips. First, generously grease your pullman pan with butter or oil, ensuring all corners are coated. Then, line it with parchment paper, cutting it to fit snugly and leaving an overhang for easy removal. These steps work together, making sure your bread releases smoothly without tearing or sticking.
What Tools Are Best for Trimming Uneven Edges?
For trimming uneven edges during bread shaping, use a sharp serrated bread knife or a razor blade for precise edge trimming. These tools allow you to easily remove excess dough and create clean, straight edges, especially when working with Pullman pans. Keep your tools sharp and steady, and gently trim the edges to maintain an even, professional look. Proper bread shaping combined with careful edge trimming guarantees your slices come out perfectly square.
How Long Should I Proof the Dough for a Square Loaf?
Think of your dough as a seed waiting to sprout. You should proof it for about 1 to 2 hours, or until it doubles in size, allowing proper dough fermentation. This gentle rise awakens flavors and develops structure, ensuring a square loaf with even crumb. Keep an eye on the dough, and don’t rush the process—patience turns raw dough into a beautifully shaped, perfectly proofed masterpiece.
Can I Bake Without a Pullman Lid for a Similar Shape?
Yes, you can bake without a Pullman lid by using alternative shaping techniques and a suitable pan substitution. To achieve a similar square shape, try shaping your dough into a tight rectangle and place it in a standard loaf pan, then cover with foil or a baking sheet to mimic the lid’s effect. This method helps control the rise and produces a neat, even loaf similar to a Pullman pan.
Conclusion
With a gentle touch and a steady hand, you’ll craft beautifully square slices that resemble neatly aligned windows. By understanding your pan’s shape, preparing your dough with care, and handling your loaf with patience, your bread will naturally take on a crisp, orderly appearance. Each slice will feel like a perfectly aligned row of tiles—smooth, even, and inviting. Your skill and attention turn everyday baking into a pleasing, artful display of craftsmanship.